


What to Do With an Old Computer: 5 Projects That Work
Three problems kill most old-PC reuse attempts: leftover data on a machine that wasn't properly sanitized, a project that outstrips what the hardware can actually run, and a failure mode nobody mentioned until the build collapsed three weeks in. This guide addresses all three in that order. By the end, you'll know how to wipe the machine responsibly, match it to a realistic project based on specs and duty cycle, and avoid the gotchas that end these builds early.
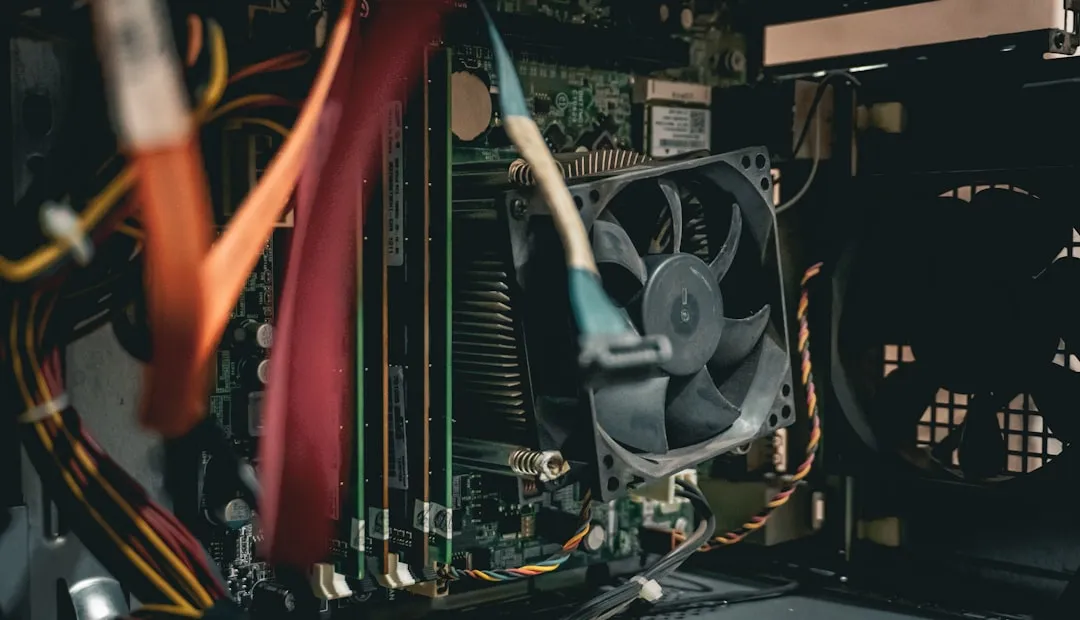
The premise is simple: "old" and "useless" are not synonyms. Last August, Tom's Hardware covered a Redditor who pulled an entire PC out of a dumpster an Intel Core i5-6600 with 8GB of RAM and an AMD Radeon R9 380. They cleaned it up, repasted the CPU, updated the BIOS and drivers, then eventually upgraded it with an RX 6600 XT GPU, 16GB of RAM, and a new SSD before handing it off to a family member. That machine was someone's trash. But "salvageable" and "right fit for every project" are different claims. Matching the machine to a project it can realistically handle is the whole game.
The framework here is four steps: wipe it, assess it, choose the right project category, and sidestep the failure modes. Everything else follows from that.
What you need before starting:
- RAM amount (check BIOS or system settings before you wipe)
- Storage type (HDD or SSD)
- Number of Ethernet ports
- Whether the machine will run continuously or only on demand
More specific requirements are listed under each project category. Some projects require additional hardware before they're viable that's called out up front.
Step 1: Wipe it before you do anything else
Repurposing a machine without sanitizing it first is the most common skipped step, and the most consequential one. A machine that's changed purpose still holds everything the previous use left behind: cached credentials, saved passwords, browser sessions, work email attachments, VPN certificates.
The UK's National Cyber Security Centre identifies storage media sanitization as a standard requirement any time a device changes hands or purpose reuse, donation, sale, or repair. Assets that are no longer required in their original role can expose sensitive data and create exploitable attack surfaces (NCSC, May 2025). That guidance applies whether the machine is going to a family member or becoming your home router.
Before any irreversible action, the NCSC also notes that backups should be confirmed complete and rollback plans tested where possible. Backups should include not just files but configuration data needed to reconstruct a working setup (NCSC, May 2025). Don't sanitize before you've extracted what you need.
How to do it:
-
Back up everything you want to keep. Documents, photos, browser bookmarks, software license keys, configuration files from any services the machine was running. Confirm the backup is readable before proceeding.
-
Assess what was on the machine. If it handled work email, connected to a corporate VPN, or stored client data, treat the wipe as a security operation, not a housekeeping task. Consumer machines used only for personal browsing have lower stakes but the process is identical.
-
Choose your sanitization method. Some sanitization methods allow the drive to be reused afterward; others are destructive and render the media permanently unusable (NCSC, May 2025). Choose based on whether you plan to keep the drive in the repurposed machine. The NCSC has published separate guidance on secure data removal from laptops and desktop PCs aimed at personal device owners that's the right reference for specific method selection.
-
Verify completion. Use software that reports completion status. Don't assume the process finished cleanly.
⚠️ Common mistake: Running a standard Windows or macOS format and treating it as a wipe. A standard format removes directory entries, not the underlying data. Use a dedicated sanitization tool.
After a successful wipe, the drive should show as empty or unformatted. The old user data should not appear when the machine boots to an OS installer.
Step 2: Assess the hardware and filter your options for reusing an old PC
This is where most guides skip ahead. They show you a catalog of projects and leave you to figure out which one your machine can actually run. Three questions eliminate most mismatches before you invest an afternoon in the wrong build.
Question 1: How much RAM does it have? This is a practical fit guide, not a benchmark-backed spec sheet but as a working rule of thumb: under 4GB suits lightweight single-purpose builds like a router, DNS filter, or photo frame. 8GB opens up more demanding tasks. 16GB or more handles multiple simultaneous workloads without obvious friction.
Question 2: Does it have two Ethernet ports, or can you add one? A router and firewall require physical separation of WAN and LAN interfaces. One port means buying a USB-to-Ethernet adapter or PCIe NIC before that project is viable. OPNsense's published minimum requirements are an x86-64 CPU, more than 2GB of RAM, and at least 4GB of storage the dual-NIC requirement is the practical constraint that disqualifies most laptops (XDA, January 2025).
Question 3: Will this machine run continuously, and what does that cost? Most project guides skip this entirely. Power draw compounds over time, and a machine that was fine as an occasional workstation can become an expensive liability running 24/7. If the project requires always-on operation, measure idle wattage before committing. For intermittent-use projects a gaming machine you power on by hand, a kiosk at an event power draw matters much less.
The table below uses sourced minimums where available, and editorial judgment elsewhere. Rows marked with an asterisk are based on published requirements; the rest are practical fit recommendations.
Quick-reference hardware matching table (editorial fit guide):
| Hardware type | RAM | Best-fit projects | Avoid | Runs 24/7? | |---|---|---|---|---| | Mini PC / thin client | 2–4GB | OPNsense router*, Pi-hole, DNS filter | NAS, media server, gaming | Yes, low draw | | Old laptop | 4–8GB | Linux workstation, dev box, Pi-hole | Router (usually one NIC), NAS | Occasionally; battery degrades | | Mid-tower desktop | 8–16GB | Media server, Linux daily driver, emulation | Always-on (high draw) | Intermittent preferred | | Mid-tower + GPU | 8–16GB | Linux gaming, emulation | Budget electricity costs | Intermittent | | Broken/partial hardware | Varies | Case mods, stripped rebuilds, parts donor | Reliable infrastructure | Situational |
*OPNsense minimum: x86-64 CPU, 2GB+ RAM, 4GB+ storage, dual NICs (XDA, January 2025).
Step 3: Old computer projects worth your time, sorted by realistic fit
Five project categories cover the vast majority of what old PCs are genuinely well-suited for. Before reading through them, run this decision filter to find your starting point:
- Dual NICs + low idle power = router/firewall candidate
- Any hardware + intermittent use = emulation box or Linux daily driver
- Always-on acceptable + more storage needed = media server
- Advanced Linux experience + always-on acceptable = homelab node
Pick the first category that matches your hardware profile and tolerance for continuous operation. Each section below lists what the project actually needs, what it costs beyond the machine, difficulty level, and when to skip it.
1. Router and firewall (intermediate | runs 24/7 | low power draw required)
Install OPNsense on a mini PC or low-power desktop with two Ethernet ports and it replaces the ISP-supplied router with a configurable firewall and router you control. Once running, it supports VLANs, VPN configurations, DDNS, reverse proxies, and SSL certificate management (XDA, January 2025). A mini PC running OPNsense on an active fiber connection uses roughly 10% of its CPU at full throughput (XDA, January 2025). Installation takes about 20 minutes, and OPNsense can often automatically detect and configure WAN and LAN connections. The configuration learning curve is real and ongoing.
Extra spending required: A USB NIC or PCIe NIC if the machine has only one port ($15–$30). Otherwise, none.
Skip if: You're a networking beginner with no tolerance for an outage while you learn. This is not a first-ever Linux project.
What success looks like: The system detects both NICs during install, assigns WAN and LAN automatically, and the web interface loads from a device on the LAN.
2. Self-hosted media server (beginner–intermediate | runs 24/7 | watch power draw)
Running a local media server Jellyfin and Plex are the two most common options is one of the more popular ways to reuse an old PC, and the project logic is straightforward: the machine sits on the network, serves video files to other devices, and stays on. The catch is that last part. This project requires always-on operation, so it's worth measuring idle wattage before committing a high-draw tower to the role. That's the primary constraint, not CPU or RAM.
Extra spending required: Additional hard drives for storage. A discrete GPU if hardware-accelerated transcoding matters to you.
Skip if: The machine draws significant power at idle and you'd need to leave it on continuously. Run the numbers first.
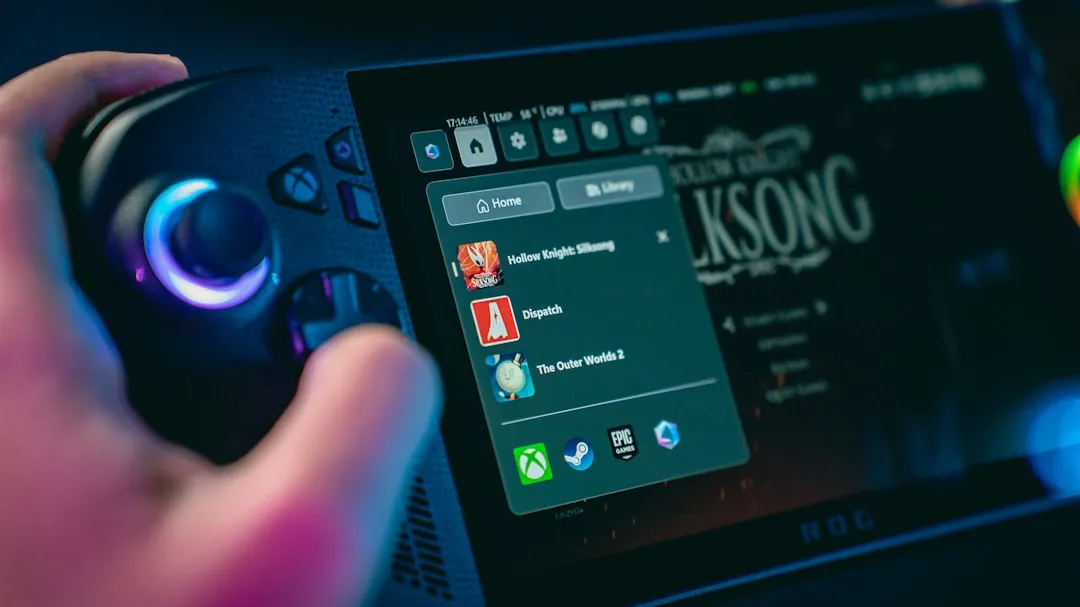
3. Retro gaming console and emulation box (beginner | intermittent use | any power draw)
This is the most accessible project on the list and the one that works across the widest range of old computer hardware. Batocera and Recalbox the two most polished emulation operating systems both support x86 PCs, not just Raspberry Pi boards (Ars Technica, 2022). Flash the image to a USB drive, boot to the EmulationStation frontend, pair a controller, and you're done. That's the basic path, and it's genuinely beginner-friendly.
For context on scope: a 2022 Pi 4-based build handled systems through the PlayStation 1 era cleanly at a starting bill of materials around $81, with the Pi 4's extra headroom enabling more consistent emulation for Nintendo 64, Sega Dreamcast, and Sony PSP (Ars Technica, 2022). Those are 2022 prices offered as historical context, not current buying guidance.
For a 24/7 kiosk variant that auto-boots, cycles games on a timer, and recovers from crashes, the configuration requires a cron job for game rotation and a watchdog process for crash handling (Miles Burton blog, January 2025). That's the advanced path.
Extra spending required: A USB controller ($15–$60 depending on preference). Likely nothing else.
Skip if: You want to emulate more demanding systems on hardware with limited RAM. The experience degrades before the software tells you it will.
What success looks like: The EmulationStation interface loads on boot, a controller pairs without issue, and a game launches cleanly.
⚠️ ROM legality note: Emulator software is legal. Emulating commercial game ROMs you don't own is a legal gray area. Stick to open-source titles, rip your own cartridges with a Retrode, or purchase games through legitimate retro storefronts (Ars Technica, 2022).
4. Linux workstation or gaming machine (beginner | intermittent | any power draw)
This is the most direct way to repurpose an old computer: same role, new OS. The dumpster-rescued build covered by Tom's Hardware last August illustrates the path cleanly cleaned up, repasted, fitted with a used GPU, and running Bazzite, a gaming-focused Linux distribution. Tom's Hardware notes that installing Bazzite, adding extra RAM, and pairing with a used GPU gives a machine like that another decade as a Linux gaming PC in a living room. The same piece is explicit that the hardware handles older titles and casual gaming, not the latest AAA releases.
Workstation use requires no GPU upgrade. Gaming use benefits from one, and the used GPU market makes that affordable.
Extra spending required: A used GPU if the machine has only integrated graphics. A new SSD if the original drive is aging.
Skip if: Windows application compatibility is non-negotiable for the primary user.
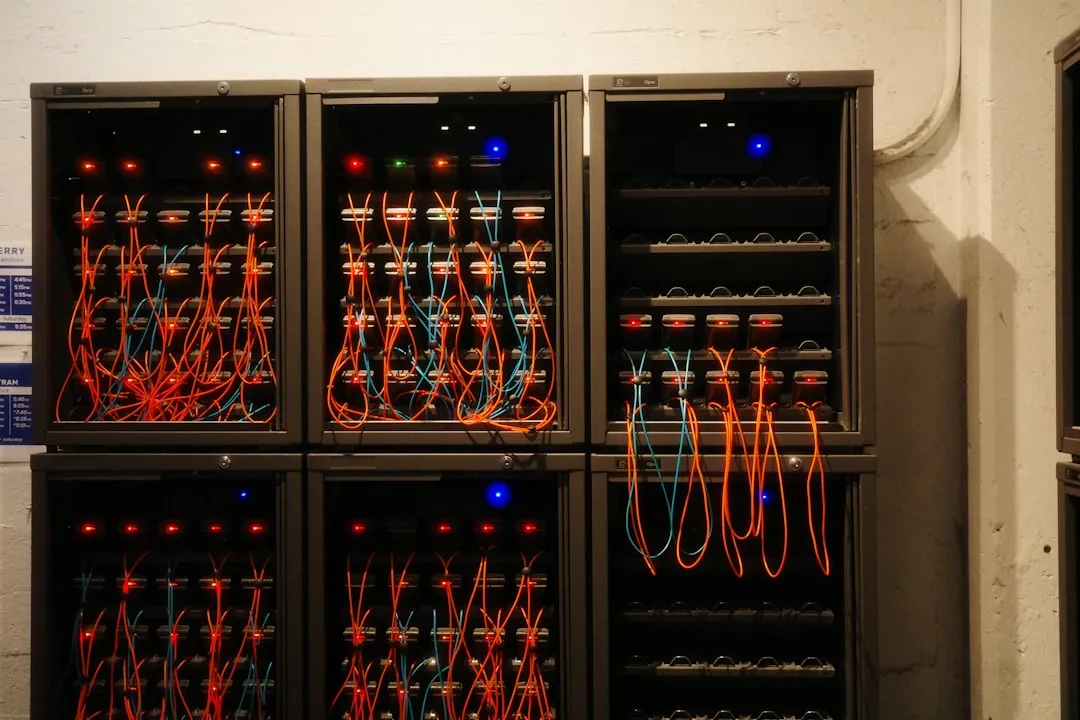
5. Homelab node: Proxmox, Docker host, or Home Assistant hub (intermediate–advanced | runs 24/7 | watch power draw)
This is the advanced path and the right one for people who already know why they want it. Running multiple services on one physical machine, whether through a hypervisor or a Docker Compose stack, requires some Linux administration experience. Start with a single service before running a full hypervisor.
For people scaling these setups into something organized, Jeff Geerling's Project Mini Rack guide compiles compatible compact hardware, 3D-printable rack components, gear recommendations, and build-out strategies (Ars Technica, January 2025). It's a practical starting point for anyone who wants to go beyond a single repurposed tower sitting on a shelf.
Homelab scope creep is real. A network switch, additional drives, and a UPS tend to follow.
Extra spending required: Possibly a network switch, additional drives, or a UPS.
Skip if: You've never administered a Linux server. A single Docker deployment first then a hypervisor.
On novelty builds: Last November, Tom's Hardware covered a build that turned a microwave into an all-in-one PC, with the door serving as a display and the motherboard mounted on the rotating turntable. These exist, they're impressive, and they belong in a separate article about fabrication skills. They're not beginner projects, and they don't reuse old hardware so much as consume it in service of a different art form.
Step 4: The three failure modes that kill these projects early
Most failed repurposing projects don't die at the idea stage. They die three weeks in, when the SD card corrupts, the machine overheats, or a RAM-constrained configuration quietly stops working.
Storage quality. Cheap no-name SD cards running always-on builds will fail, and when they do, you rebuild from scratch. For Pi-based or SD card builds, stick to Samsung EVO, SanDisk Ultra, or Kingston Canvas brands with documented endurance ratings. A failing SD card is not a recoverable situation (Miles Burton blog, January 2025). For x86 builds running always-on workloads, an aging spinning hard drive carries similar risk; an SSD reduces moving-part failure as a variable.
Thermal limits in compact hardware. A fanless build pushed into high-power mode will eventually thermal-throttle or shut down under sustained load. A compact mini PC mod stress-tested at 45W hit this ceiling during CPU benchmarks (Tom's Hardware, June 2024). For any always-on build, run a 30-minute stress test and monitor temperatures before considering the project complete. For gaming kiosks specifically, running the CPU in powersave mode reduces heat and extends hardware life (Miles Burton blog, January 2025).
RAM constraints that quietly change software behavior. This failure mode doesn't announce itself with a crash. It produces errors that look like bugs. On a Raspberry Pi Zero 2 W which has under 1GB of RAM launching Chromium in kiosk mode without the --no-memcheck flag produces a low-memory alert that blocks startup entirely. Display resolution also requires manual edits to /boot/dietpi.txt before the screen renders correctly (Fanyang Meng blog, October 2024). Both are one-line fixes once you know they exist. The principle applies to any build: match software choices to the machine's memory ceiling before installation, not during troubleshooting.
What you have now, and where to go next
The machine is wiped, assessed against real hardware requirements, matched to a specific project, and you know the failure modes to check during setup. That's the work most guides skip entirely.
A few things worth keeping before you start:
- Don't run OPNsense inside a VM. If the host machine goes offline, the entire network drops with it (XDA, January 2025). Router and firewall duties belong on dedicated hardware.
- Power draw compounds. Build electricity cost into the decision before committing to any always-on role.
Your next step: measure idle wattage, write down your specs, pick one path from the table above, and download the OS image.
The machine in your closet isn't worthless. It just needs a better job description and now you have enough to write one.


Comments
Be the first, drop a comment!