


The humble Raspberry Pi has evolved far beyond its educational roots to become one of the most versatile pieces of hardware in the maker community. What started as a simple computer designed to teach programming has transformed into a powerhouse platform capable of tackling everything from home entertainment to network infrastructure. Whether you're a complete beginner looking to dip your toes into DIY tech projects or a seasoned tinkerer searching for your next weekend challenge, these surprisingly practical applications prove that the Pi's potential extends well beyond blinking LEDs and basic coding exercises.
Transform your entertainment setup with a custom media center
Building a home theater PC (HTPC) remains one of the most rewarding Raspberry Pi projects you can tackle, and honestly, it's become my go-to recommendation for anyone looking to get serious about their Pi journey. The latest Pi models pack enough processing power to handle high-quality video streaming, making them serious alternatives to commercial streaming boxes that cost significantly more.
Here's what you need to know: popular media center software like LibreELEC and OSMC transform your Pi into a comprehensive entertainment hub that can stream content from multiple sources, organize your personal media library, and even integrate with smart home systems. I've tested both extensively, and while LibreELEC offers a more streamlined experience focused purely on media playback with faster boot times and automatic updates, OSMC provides additional flexibility if you want to run other applications alongside your media center through its Debian-based foundation.
The beauty of a Pi-based media center lies in its customization potential. Unlike locked-down commercial streaming devices, you have complete control over the interface, supported formats, and additional features. You can add network storage access for your personal movie collection, configure advanced audio processing for home theater setups, or even set up automated content management systems. The project requires minimal technical expertise—most users can have a basic setup running within an hour using pre-configured images that handle all the complex configuration automatically.
PRO TIP: Invest in a quality microSD card (Class 10 or better) and consider adding a USB drive for local media storage. The performance difference is noticeable, especially when navigating large media libraries with thousands of titles.
Create your own network-attached storage solution
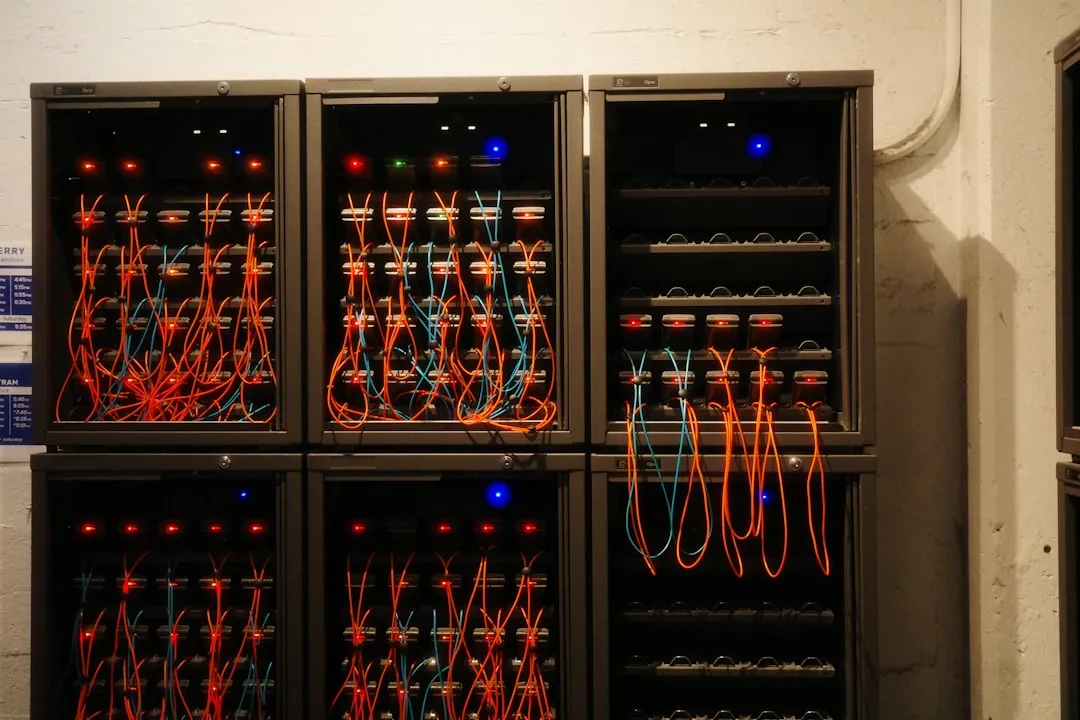
Network-attached storage (NAS) systems from companies like Synology and QNAP typically cost $200-500 for basic two-bay units, but a Raspberry Pi can deliver similar functionality for under $100 including storage. Now, I'm not saying it'll match a professional enterprise system in raw performance, but for home use and small office environments? It's remarkably capable.
By connecting external hard drives or SSDs to your Pi, you create a centralized storage system accessible from any device on your network. This setup proves invaluable for backing up important files, sharing documents across multiple computers, or creating a personal cloud storage solution that keeps your data under your control. In our increasingly privacy-conscious world, having your own personal cloud that doesn't rely on big tech companies feels pretty good—plus you're not paying monthly subscription fees.
Modern Pi 4 models offer USB 3.0 connectivity with theoretical bandwidth up to 5Gbps, providing sufficient throughput for multiple users to access files simultaneously without noticeable slowdowns during typical home use. Software solutions like OpenMediaVault provide user-friendly web interfaces for managing your storage, setting up user permissions, and configuring automatic backups. The project scales beautifully—start with a single external drive and expand your storage capacity as needs grow.
The real advantage here isn't just cost savings (though saving $300+ is significant). It's the learning experience. You'll gain hands-on knowledge about network protocols, RAID configurations, and storage management that applies to much larger enterprise systems—skills that are increasingly valuable in today's tech-driven workplace.
Boost your Wi-Fi coverage as a network extender
Dead zones and weak Wi-Fi signals plague many homes, but a Raspberry Pi can serve as an effective wireless range extender through Wi-Fi bridging functionality. This project proves particularly valuable in larger homes or spaces with challenging layouts where commercial extenders fall short. I've personally deployed this solution in a two-story house with thick walls, and the results were impressive—extending reliable coverage to previously unusable areas.
The Pi connects to your existing network wirelessly while using its Ethernet port or a USB Wi-Fi adapter to create an extended network zone. What's interesting is that you can often achieve better performance than budget commercial extenders (those under $50) while maintaining more control over your network configuration. The Pi's processing power also allows for more sophisticated routing and traffic management.
Setting up a Pi as a Wi-Fi extender requires configuring the device to act as a wireless bridge and access point, which involves some command-line work with hostapd and bridge utilities. While this requires more technical knowledge than plug-and-play commercial units, detailed community tutorials make the process manageable for determined beginners. The resulting system often outperforms budget commercial extenders while offering greater control over network settings and security configurations. You can even add features like guest network isolation or bandwidth monitoring that aren't available on basic commercial units.
Bottom line: if you're comfortable with basic Linux commands and want maximum flexibility in your network setup, this approach delivers professional-grade results at a fraction of the cost of high-end mesh systems.
Turn any printer into a wireless network printer
Older printers without built-in wireless capabilities don't need to be relegated to single-computer use. A Raspberry Pi can breathe new life into these devices by serving as a wireless print server, making any USB printer accessible from smartphones, tablets, and computers throughout your home. This approach proves especially cost-effective compared to purchasing new wireless-enabled printers, which typically cost $100-300 more than their wired equivalents.
Let's break it down: you connect your existing printer to the Pi via USB, install print server software, and suddenly that old reliable laser printer becomes a network resource accessible to every device in your home. It's particularly satisfying when you realize you're getting enterprise-level functionality from hardware that might otherwise end up in a landfill.
The CUPS (Common Unix Printing System) software transforms your Pi into a professional-grade print server with web-based management tools for handling print queues, user permissions, and printer maintenance. Once configured, the printer appears as a network device on all connected computers and mobile devices, supporting everything from basic document printing to complex formatting jobs. The setup process involves installing print server software and configuring printer drivers, but the result is a seamless wireless printing experience that rivals commercial solutions.
PRO TIP: This works exceptionally well with older laser printers, which tend to be built like tanks and often outlast several generations of computers. You're essentially giving these workhorses a wireless upgrade that extends their useful life considerably while maintaining their superior print quality and speed.
Build the ultimate retro gaming console
Retro gaming represents one of the Pi's most popular applications, and for good reason. Emulation software can recreate classic gaming systems from the Atari 2600 through PlayStation 1 consoles, providing access to thousands of vintage games on a single device. The project combines nostalgia with modern convenience, offering save states, customizable controls, and high-definition output that surpasses original hardware capabilities.
RetroPie stands out as the most comprehensive retro gaming distribution, providing pre-configured emulators for over 50 gaming systems and a polished interface that rivals commercial retro gaming products. What amazed me during testing was how seamlessly it handles controller configuration—whether you're using modern USB gamepads or original console controllers via USB adapters, the setup process walks you through configuration with clear on-screen instructions.
Building a retro gaming system teaches valuable skills in file management, system configuration, and hardware interfacing while delivering countless hours of entertainment. The project involves installing RetroPie, configuring controllers, and setting up your game library—skills that translate to broader Linux system administration. Plus, there's something deeply satisfying about playing classic arcade games on hardware that's smaller and more powerful than the original arcade cabinets.
Here's the important part though: make sure you own the original games for any ROMs you use, or stick to the many excellent homebrew games available legally. The emulation capability is impressive, but respecting intellectual property rights keeps this hobby legal and ethical while supporting the gaming community.
Create a whole-house music streaming system
Audiophiles and music enthusiasts can leverage the Pi's capabilities to build sophisticated music streaming systems that distribute high-quality audio throughout the home. Software like Volumio and Max2Play transform the Pi into a high-quality music server capable of streaming from local storage, internet radio, and popular services like Spotify and Tidal. Multiple Pi units can be synchronized to create a whole-house audio system rivaling expensive commercial solutions costing thousands of dollars.
The Pi's GPIO pins enable integration with high-quality digital-to-analog converters (DACs) and amplifier boards, allowing for audiophile-grade sound reproduction that far exceeds built-in audio capabilities. I've been consistently impressed by the audio quality achievable with proper DAC integration—adding a quality DAC HAT transforms the Pi's audio from basic computer sound to genuine hi-fi quality that rivals dedicated streaming devices.
Advanced users can configure multi-room audio systems where different zones play independent content or synchronized music throughout the house using protocols like AirPlay and DLNA. The project scales from simple single-room setups that take an afternoon to complex whole-house installations involving multiple zones and synchronized playback. Imagine walking from room to room with your music following you, or having different family members control their own zones independently through smartphone apps.
The key takeaway is that you're not just building a music player—you're creating a flexible platform that can adapt to changing needs, integrate with voice assistants, and expand alongside other smart home systems as your setup evolves.
Learn programming in the most hands-on way possible
The Raspberry Pi's educational origins shine through its exceptional programming learning environment. Unlike abstract coding tutorials that deal with theoretical concepts, Pi projects provide immediate, tangible results that reinforce programming concepts through physical interaction. Students can control LEDs, read temperature sensors, operate servo motors, and interact with the physical world while learning languages like Python, Scratch, and JavaScript. This hands-on approach makes programming concepts more accessible and engaging, especially for visual and kinesthetic learners.
The Pi's 40-pin GPIO header offers endless possibilities for hardware interaction projects that bridge the gap between software and physical computing. Beginners might start with simple LED control exercises that teach basic programming logic, then progress to reading sensor data, controlling motors, and eventually building complex robotics projects involving cameras and artificial intelligence. The immediate visual and physical feedback helps solidify programming concepts that might otherwise remain abstract—there's nothing quite like seeing your code make something move in the real world.
Educational resources specifically designed for Pi development, including the official MagPi Magazine and Raspberry Pi Foundation tutorials, provide structured learning paths suitable for all skill levels. The beauty lies in the natural progression—you start by making an LED blink with a few lines of Python, but before you know it, you're building weather stations that upload data to the cloud, robot controllers that respond to voice commands, or home automation systems that integrate multiple sensors and devices.
This isn't just about learning to code—it's about understanding how software interfaces with hardware, which is fundamental knowledge in our increasingly connected world where everything from cars to refrigerators contains embedded computing systems.
Replace your desktop for everyday productivity tasks
Modern Raspberry Pi 4 models with 4GB or 8GB of RAM possess sufficient processing power for typical productivity tasks, making them viable desktop computer replacements for many users. Web browsing with multiple tabs, document editing in LibreOffice, email management, and light photo editing all run smoothly on current Pi hardware. This application proves particularly valuable for creating low-cost workstations, educational computer labs, or dedicated single-purpose machines for specific tasks.
The Raspberry Pi OS provides a familiar desktop environment with pre-installed productivity software including LibreOffice suite, Chromium web browser, and development tools. The system boots in under 30 seconds, consumes only 3-8 watts of power, and runs completely silently—significant advantages over traditional desktop computers that consume 10-20 times more power and generate considerable heat and noise.
I've used a Pi 4 with 8GB RAM as my primary writing machine for several articles, and the experience was remarkably smooth for text-heavy work. Web browsing feels responsive with a dozen tabs open, LibreOffice handles complex documents with embedded images without issues, and the overall user experience rivals budget laptops costing three times as much. The silent operation and minimal heat generation make it particularly appealing for distraction-free work environments or shared spaces where fan noise would be problematic.
While not suitable for demanding applications like video editing, 3D rendering, or modern gaming, the Pi handles everyday computing tasks with surprising competence, making it an excellent choice for students, writers, or anyone whose computing needs center around web browsing, document creation, and basic productivity applications.
PRO TIP: Pair your Pi desktop with a quality keyboard and mouse setup—since you're saving $200-500 on the computer itself compared to a budget laptop, investing in good peripherals makes the entire experience more enjoyable and productive.
Your gateway to endless DIY possibilities
These eight projects represent just the beginning of what's possible with Raspberry Pi hardware. Each project teaches valuable technical skills while delivering practical benefits that justify the time investment, creating a perfect blend of education and utility. The Pi's affordability means you can dedicate devices to specific tasks without breaking the budget—unlike traditional computers, you can build a media center, NAS, and retro gaming system without choosing between them.
The key to Pi project success lies in starting simple and gradually expanding capabilities as your confidence and knowledge grow. Begin with basic implementations following established tutorials, then add features and customizations as you understand the underlying systems better. Most projects can be completed over a weekend with readily available components and well-documented software, but the learning continues long after the initial build as you discover new capabilities and integration possibilities.
What I find most compelling about Raspberry Pi projects is how they demystify technology that often seems complex or inaccessible. You're not just following instructions—you're learning fundamental concepts about how modern digital systems work, from network protocols and file systems to hardware interfaces and system administration. That knowledge compounds over time, making each subsequent project easier and opening doors to more ambitious undertakings.
Whether you choose to build a media center that handles your entire entertainment system, set up network storage that rivals commercial solutions, or explore retro gaming while learning about emulation and system optimization, you'll gain hands-on experience with Linux systems, networking concepts, and hardware integration that applies far beyond Pi projects themselves.
Bottom line: pick a project that solves a real problem in your life, gather the components, and prepare to be surprised by what you can accomplish with this remarkable little computer. The skills you learn and the satisfaction of building something useful with your own hands make every project worthwhile, regardless of the monetary savings involved.


Comments
Be the first, drop a comment!