

If you've ever received an email from a sketchy address purporting to be Uber, asking you to sign in with your credentials, you might be a phishing target. Hackers use a fake login page from real-looking domains to trick you into giving up your account information, and while it's been an issue in the past, Uber is making it more difficult on cyber thieves with the addition of two-step verification.
Two-step verification (2SV), also referred to as two-step authentication, is slightly different than two-factor authentication (2FA), but both protect against unauthorized access to an account. The terms tend to be used interchangeably, and Uber calls its implementation 2SV (even though it's more like 2FA), which is slightly less secure but still necessary to defeat anyone trying to get into your account to wreak havoc.
Two different types of factors are needed for 2FA: a combination of either something you know (password), something you are (biometrics), and something you have (a trusted device). However, 2SV only requires that there are two total, and they don't have to be different factors. In Uber's app, that would be your password and a one-time verification code received from either an SMS text or third-party security app. The password is the something you know factor, while the SMS or authentication app can be considered something you have since you need your phone, technically making this 2FA, not 2SV.
Although 2FA and 2SV help protect your account from hackers, it's not very popular among consumers because it's seen as a headache or another obstacle in the way of easily logging in. Sure, convenience is nice, but it should always be put on the back burner when it comes to security. If you don't have two-step verification enabled on your Uber account, here's how to set it up.
Step 1: Enable 2-Step Verification
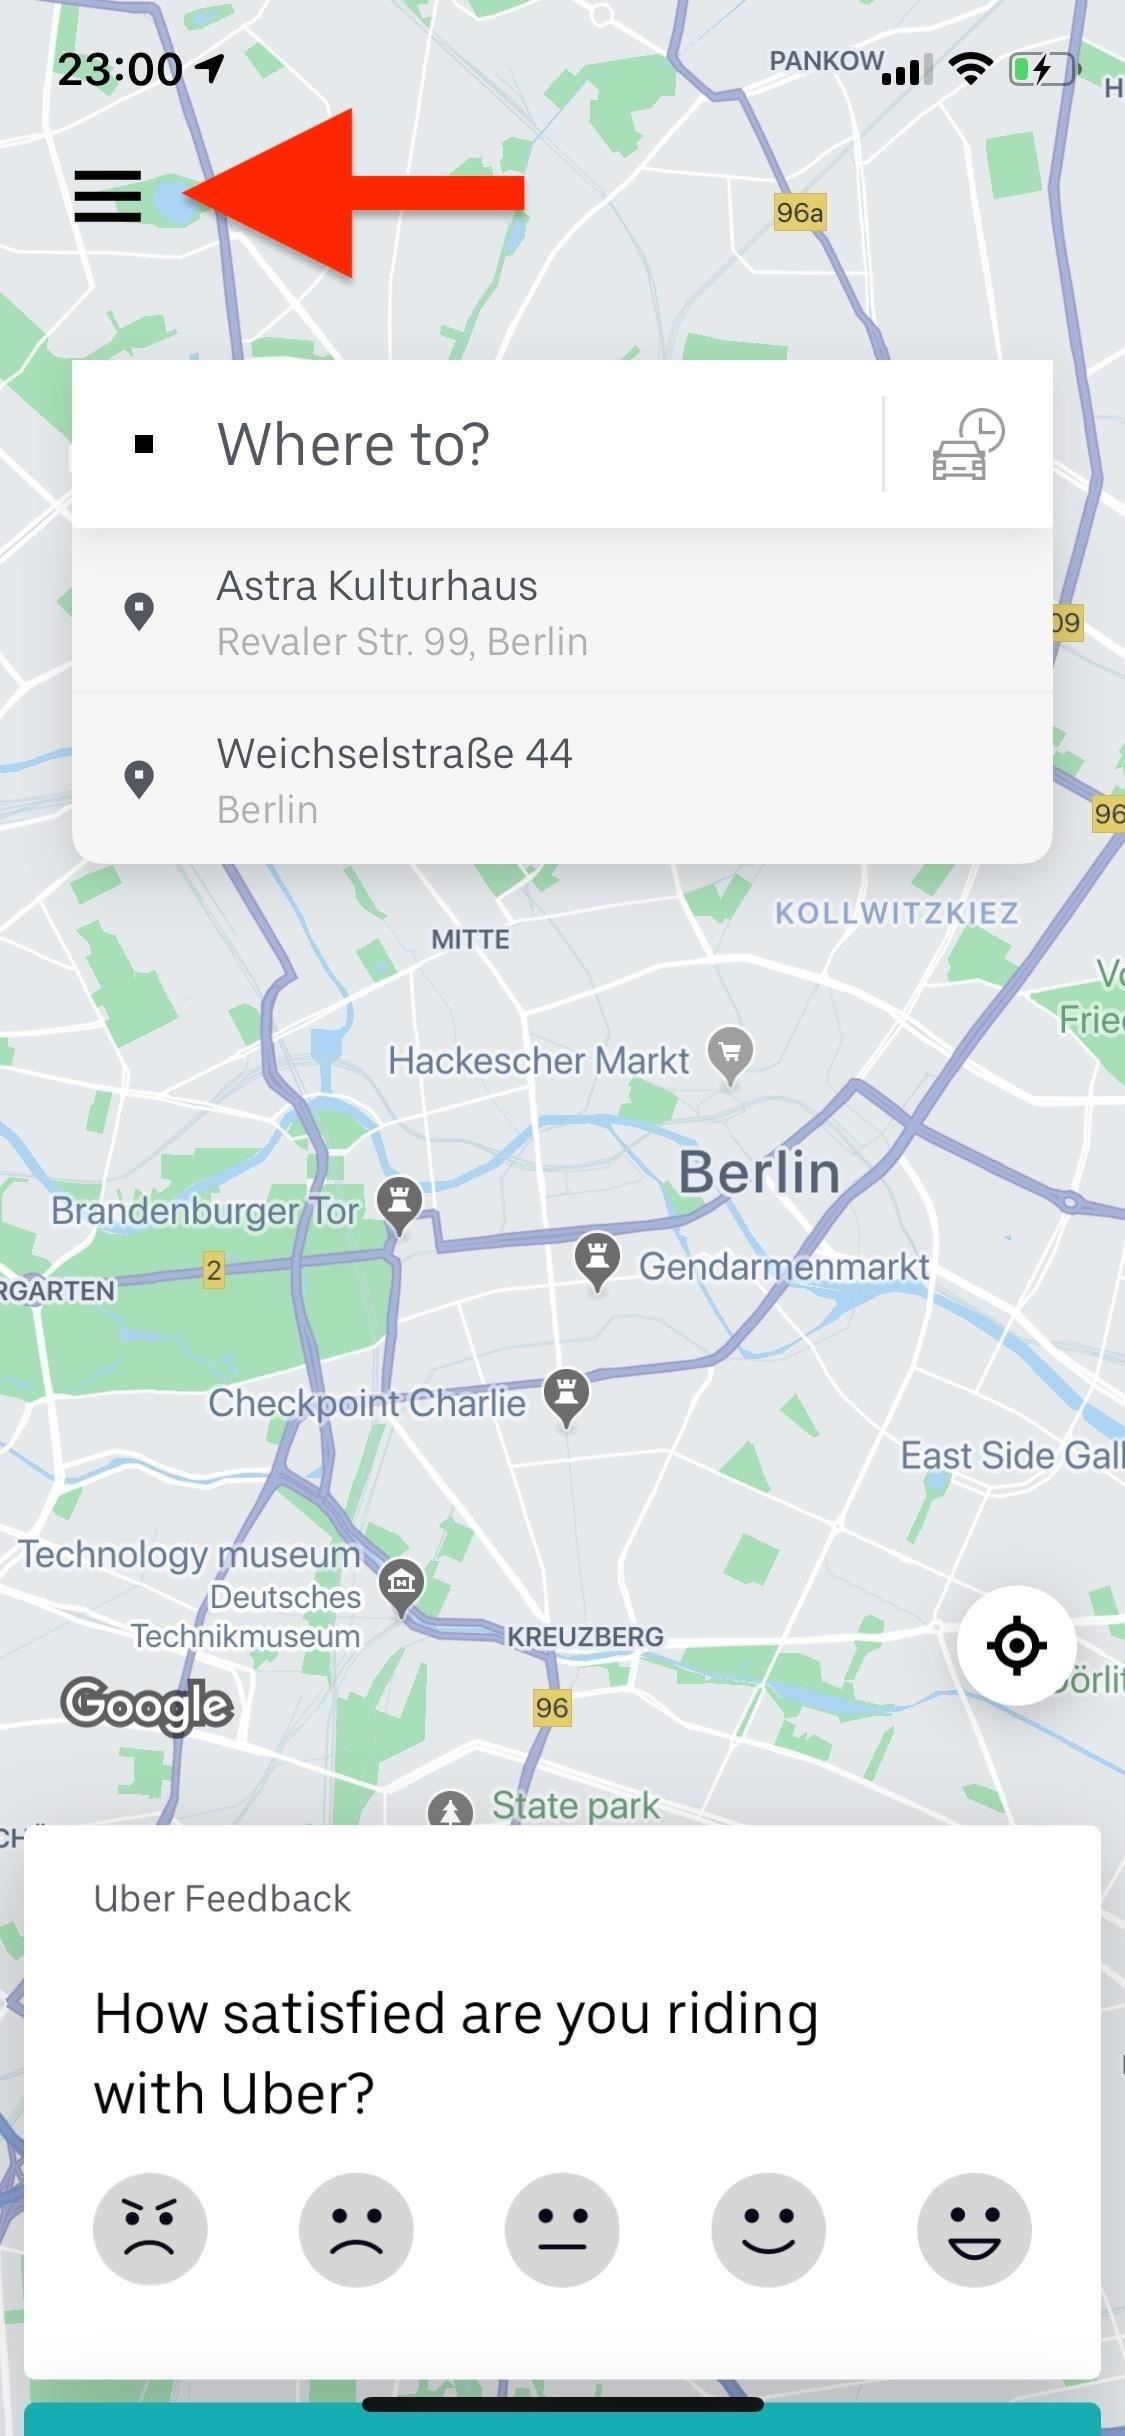
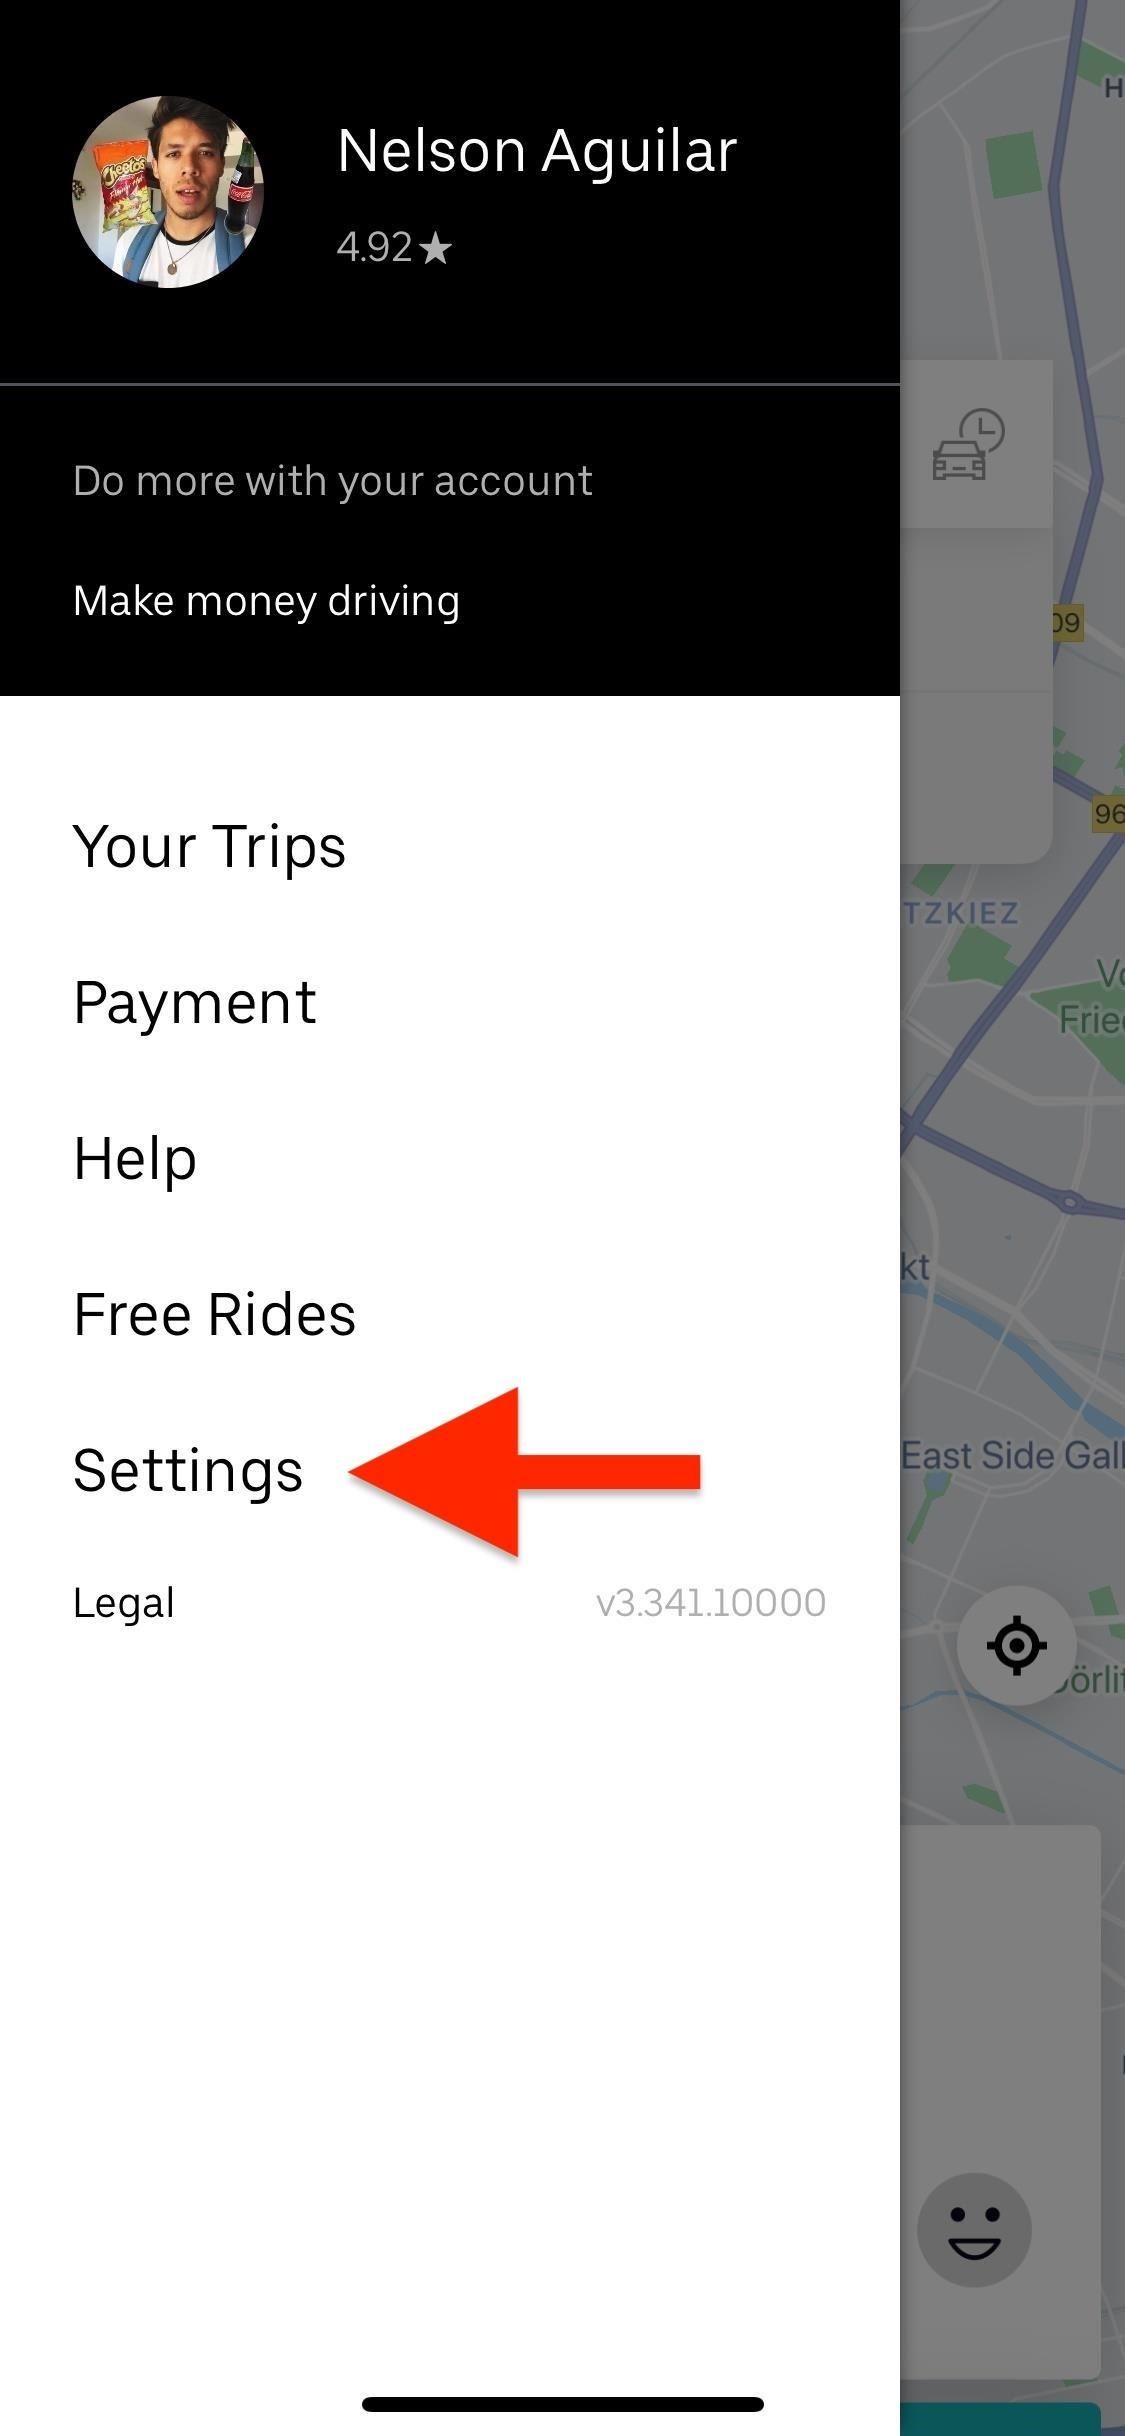
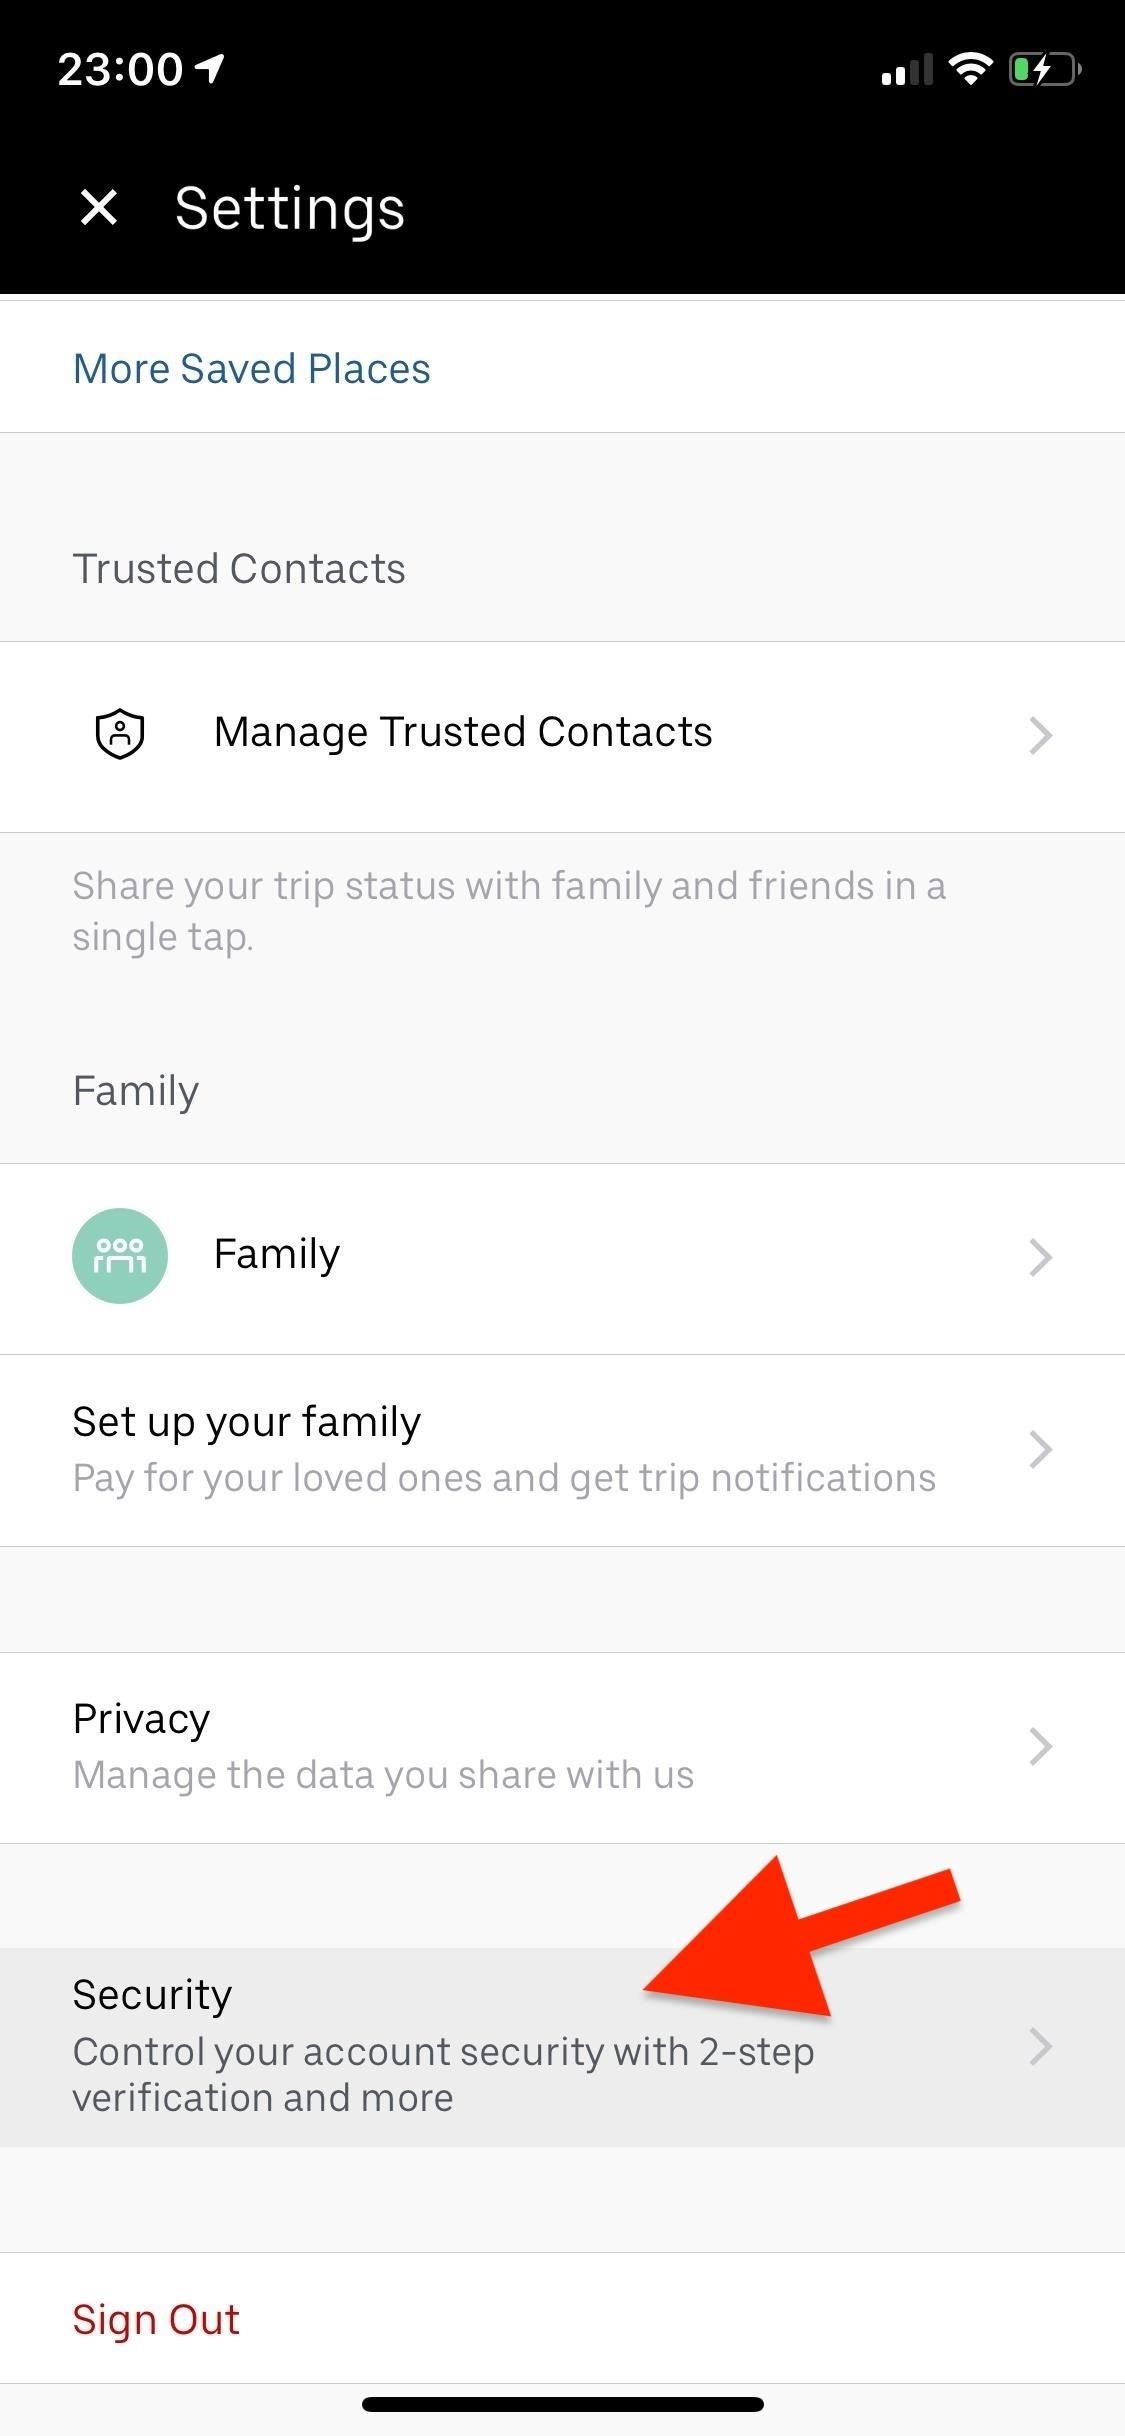
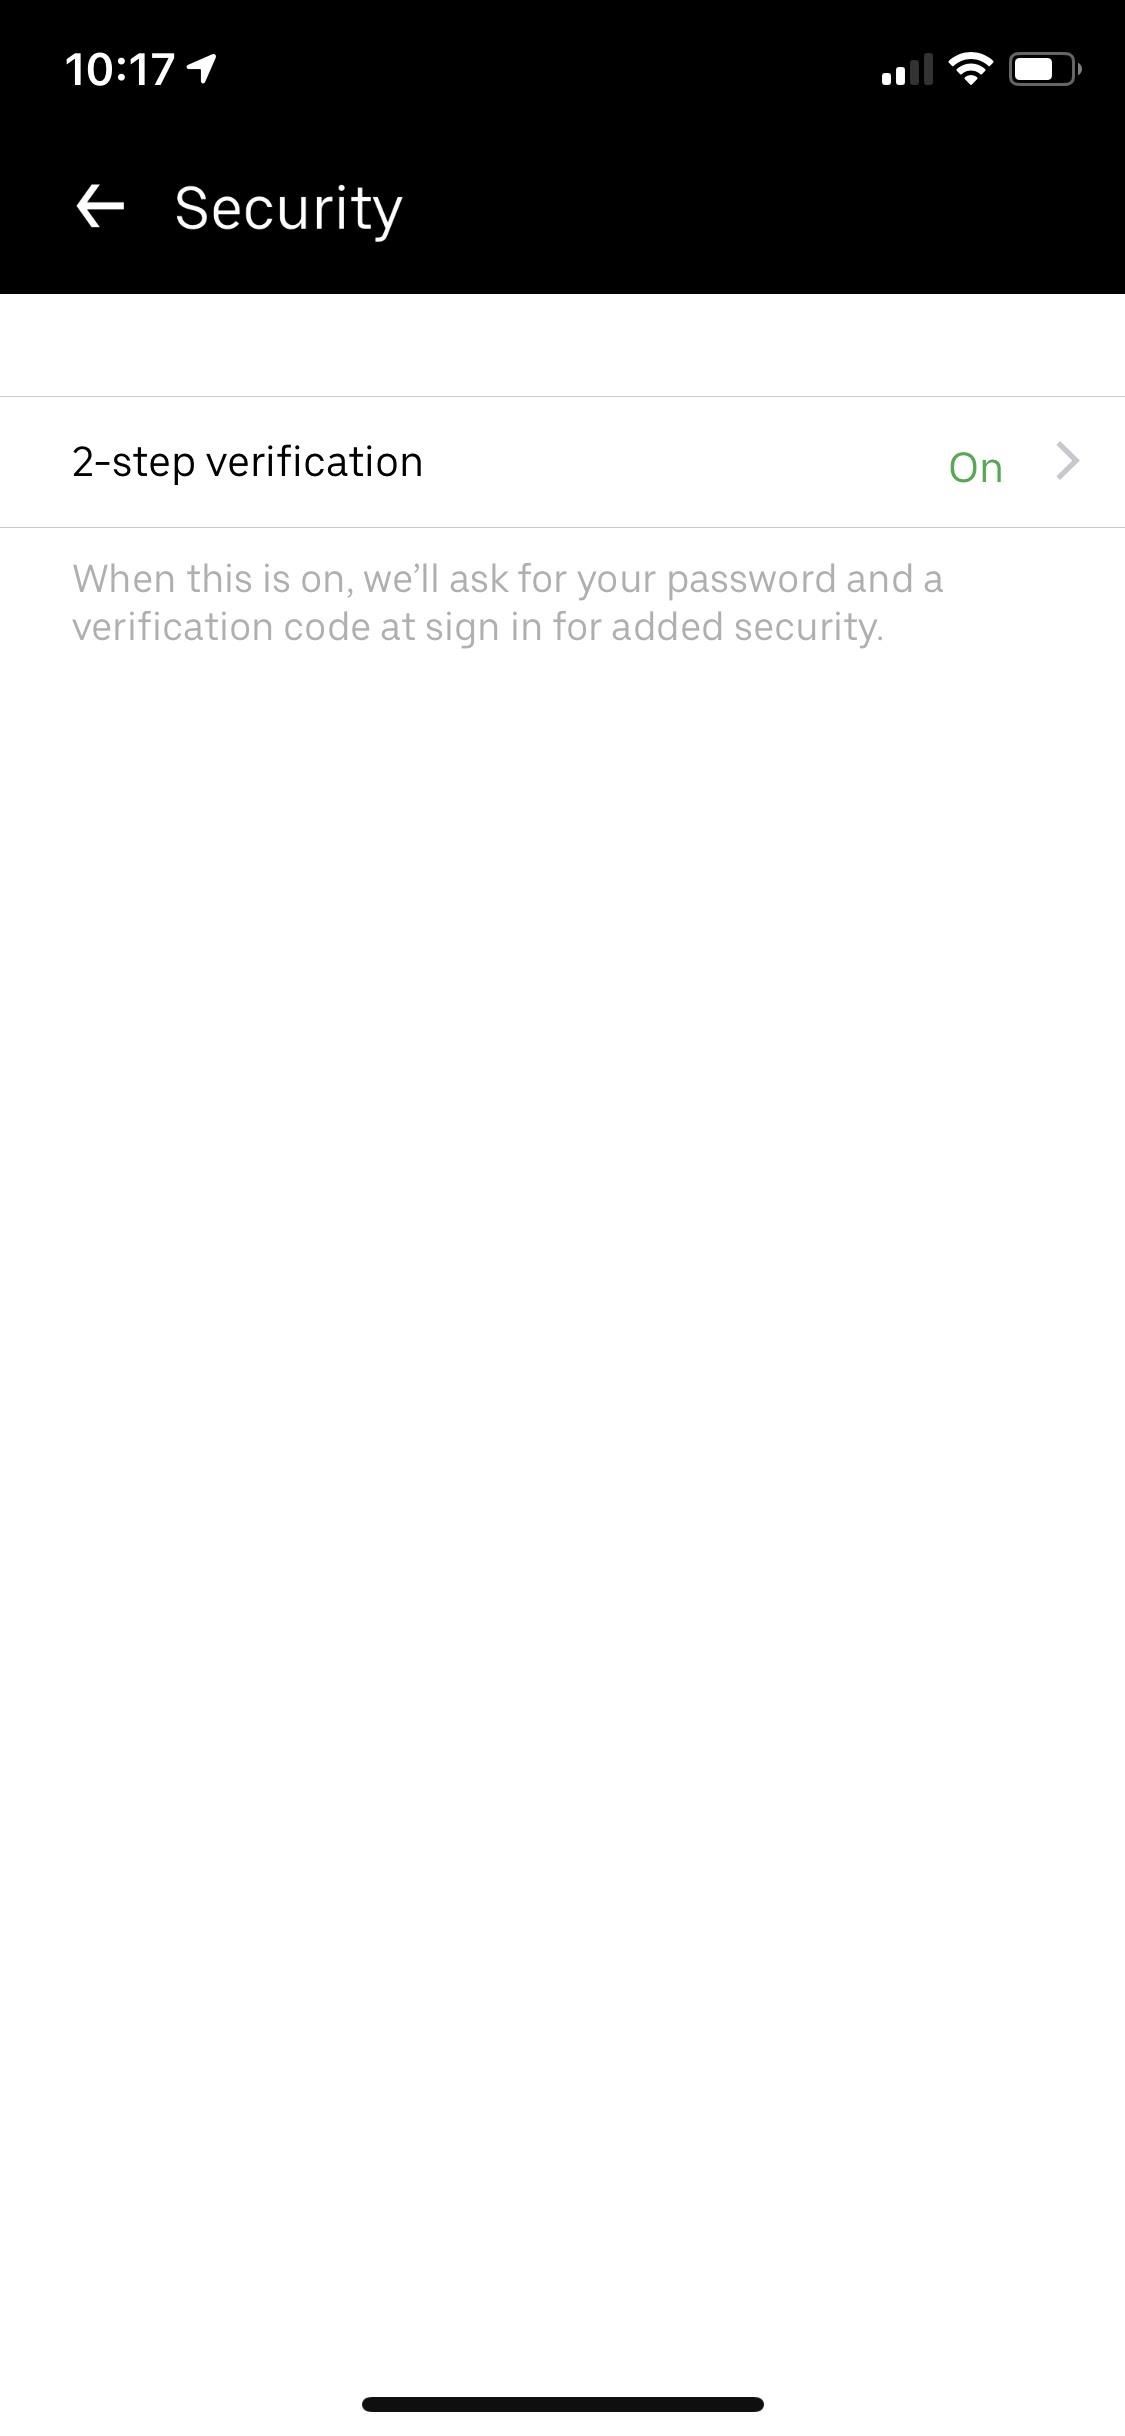
In order to enable two-step verification, open the Uber app on your iPhone or Android phone, and tap on the three-dash icon in the top left. Go into your "Settings," scroll down, and tap on "Security" at the bottom.
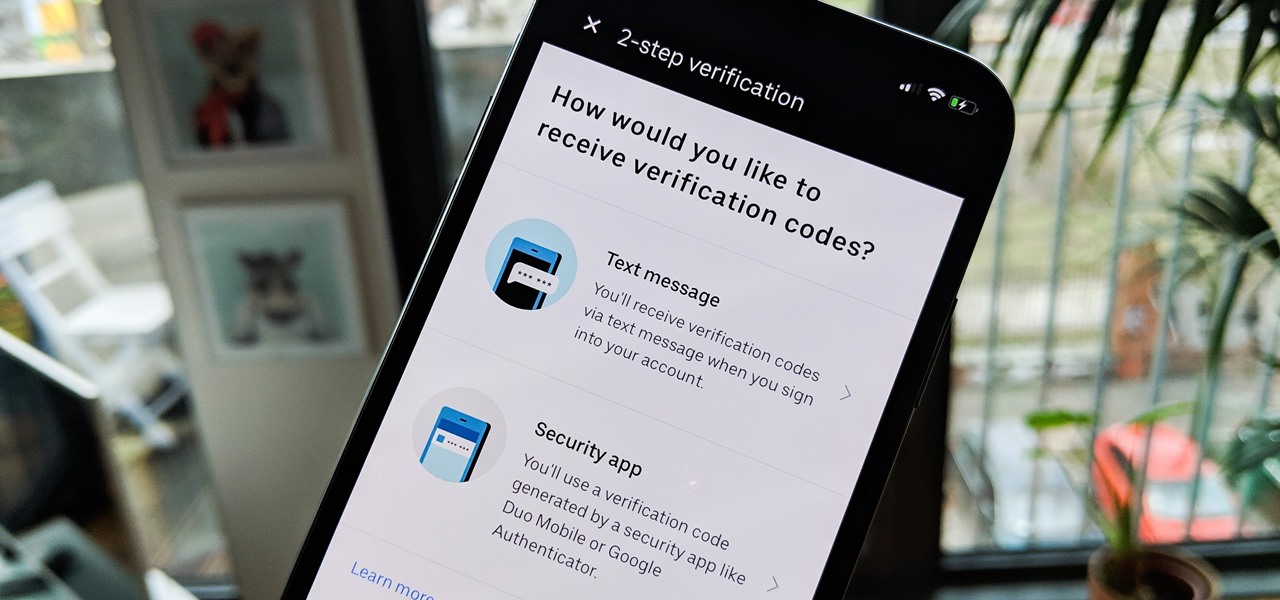
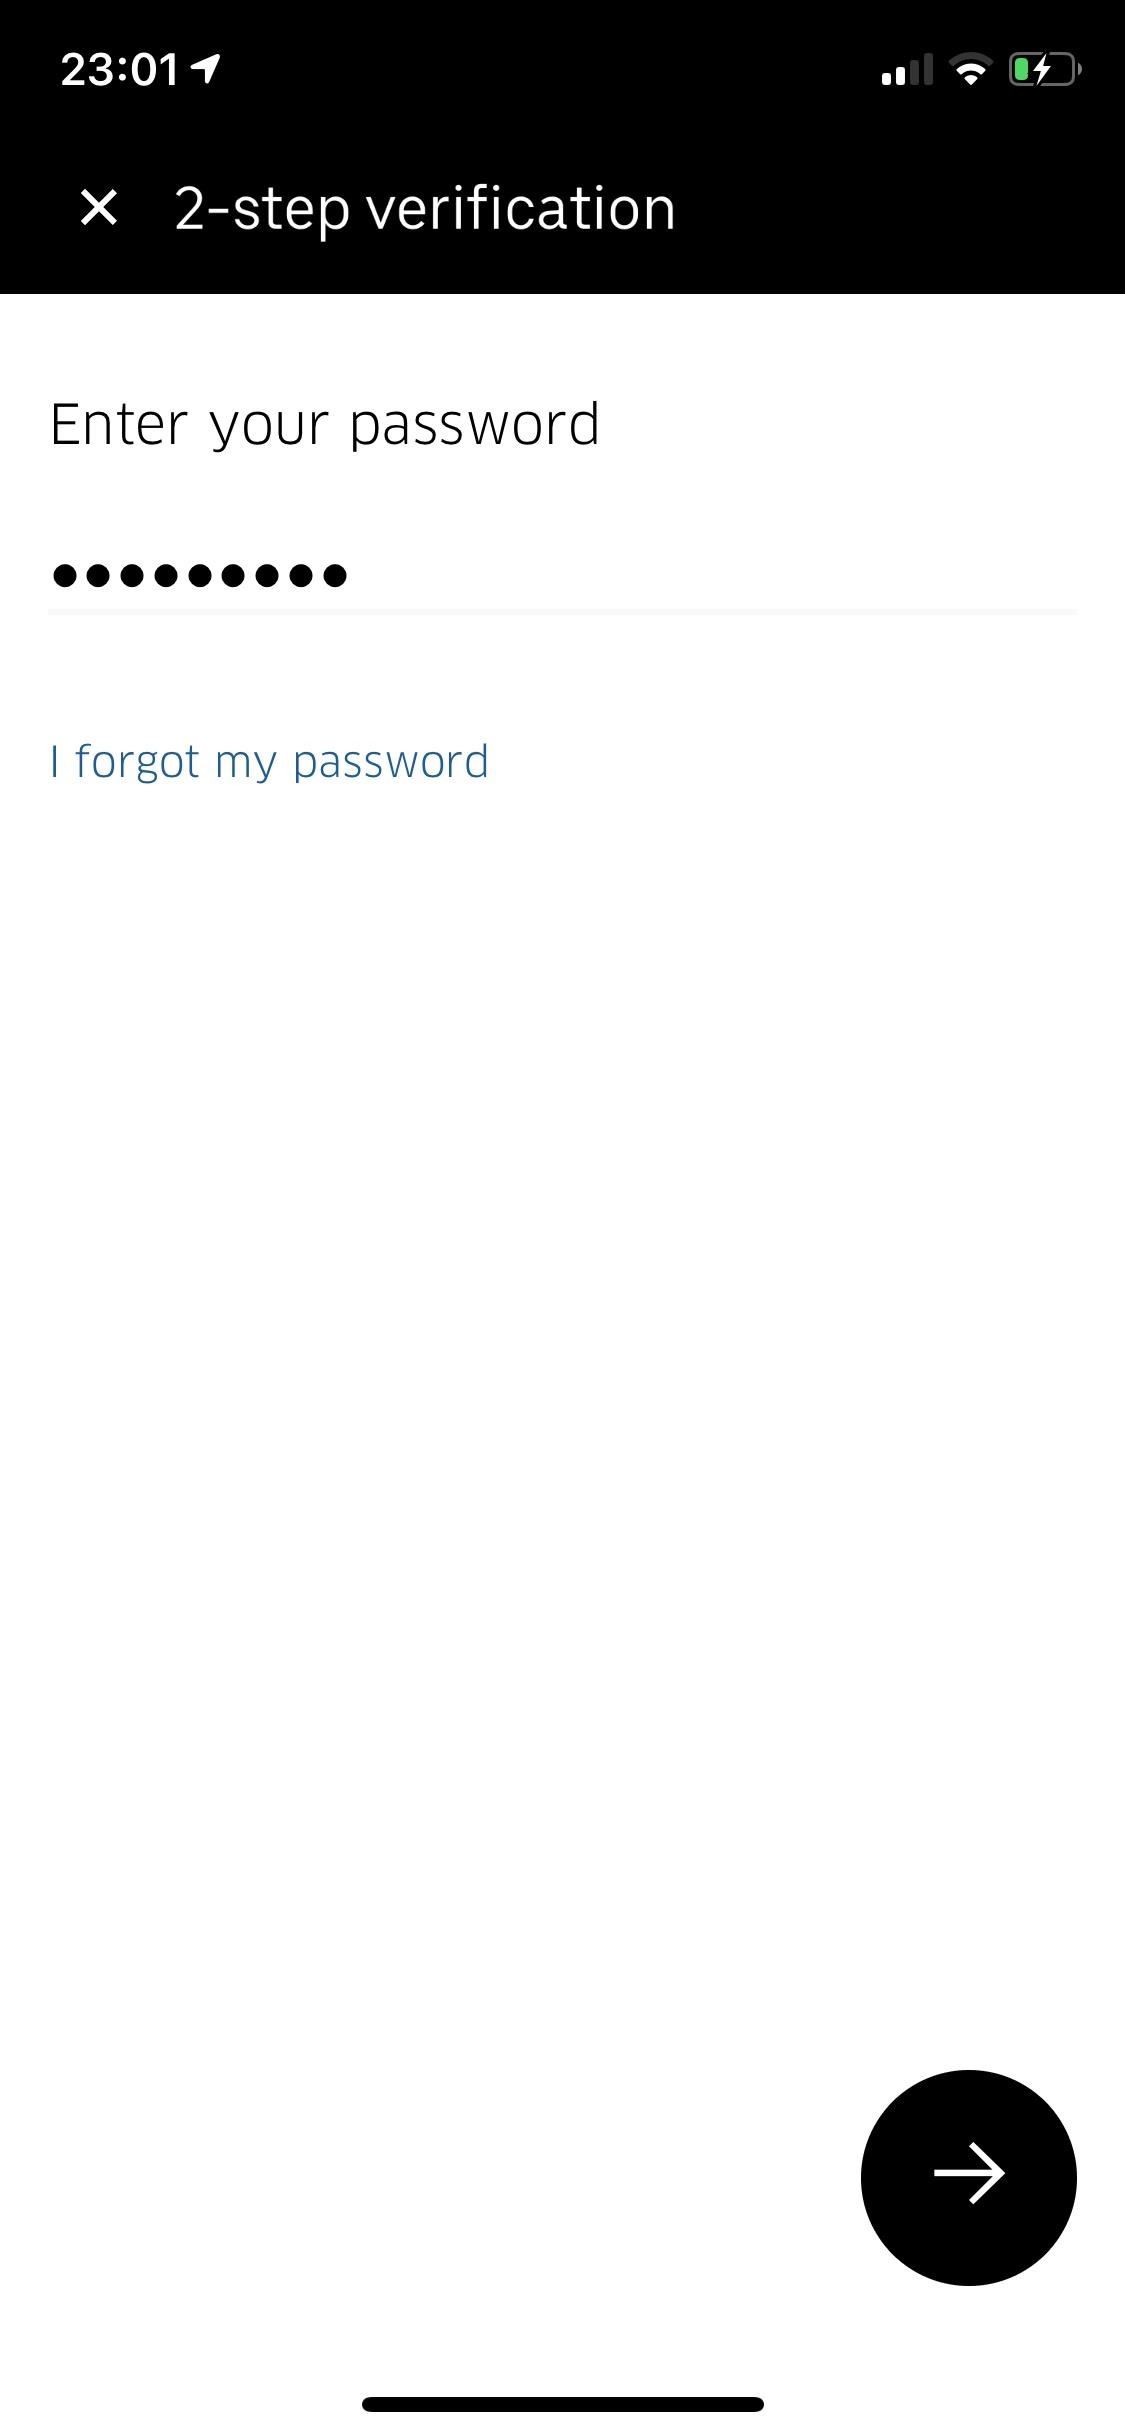
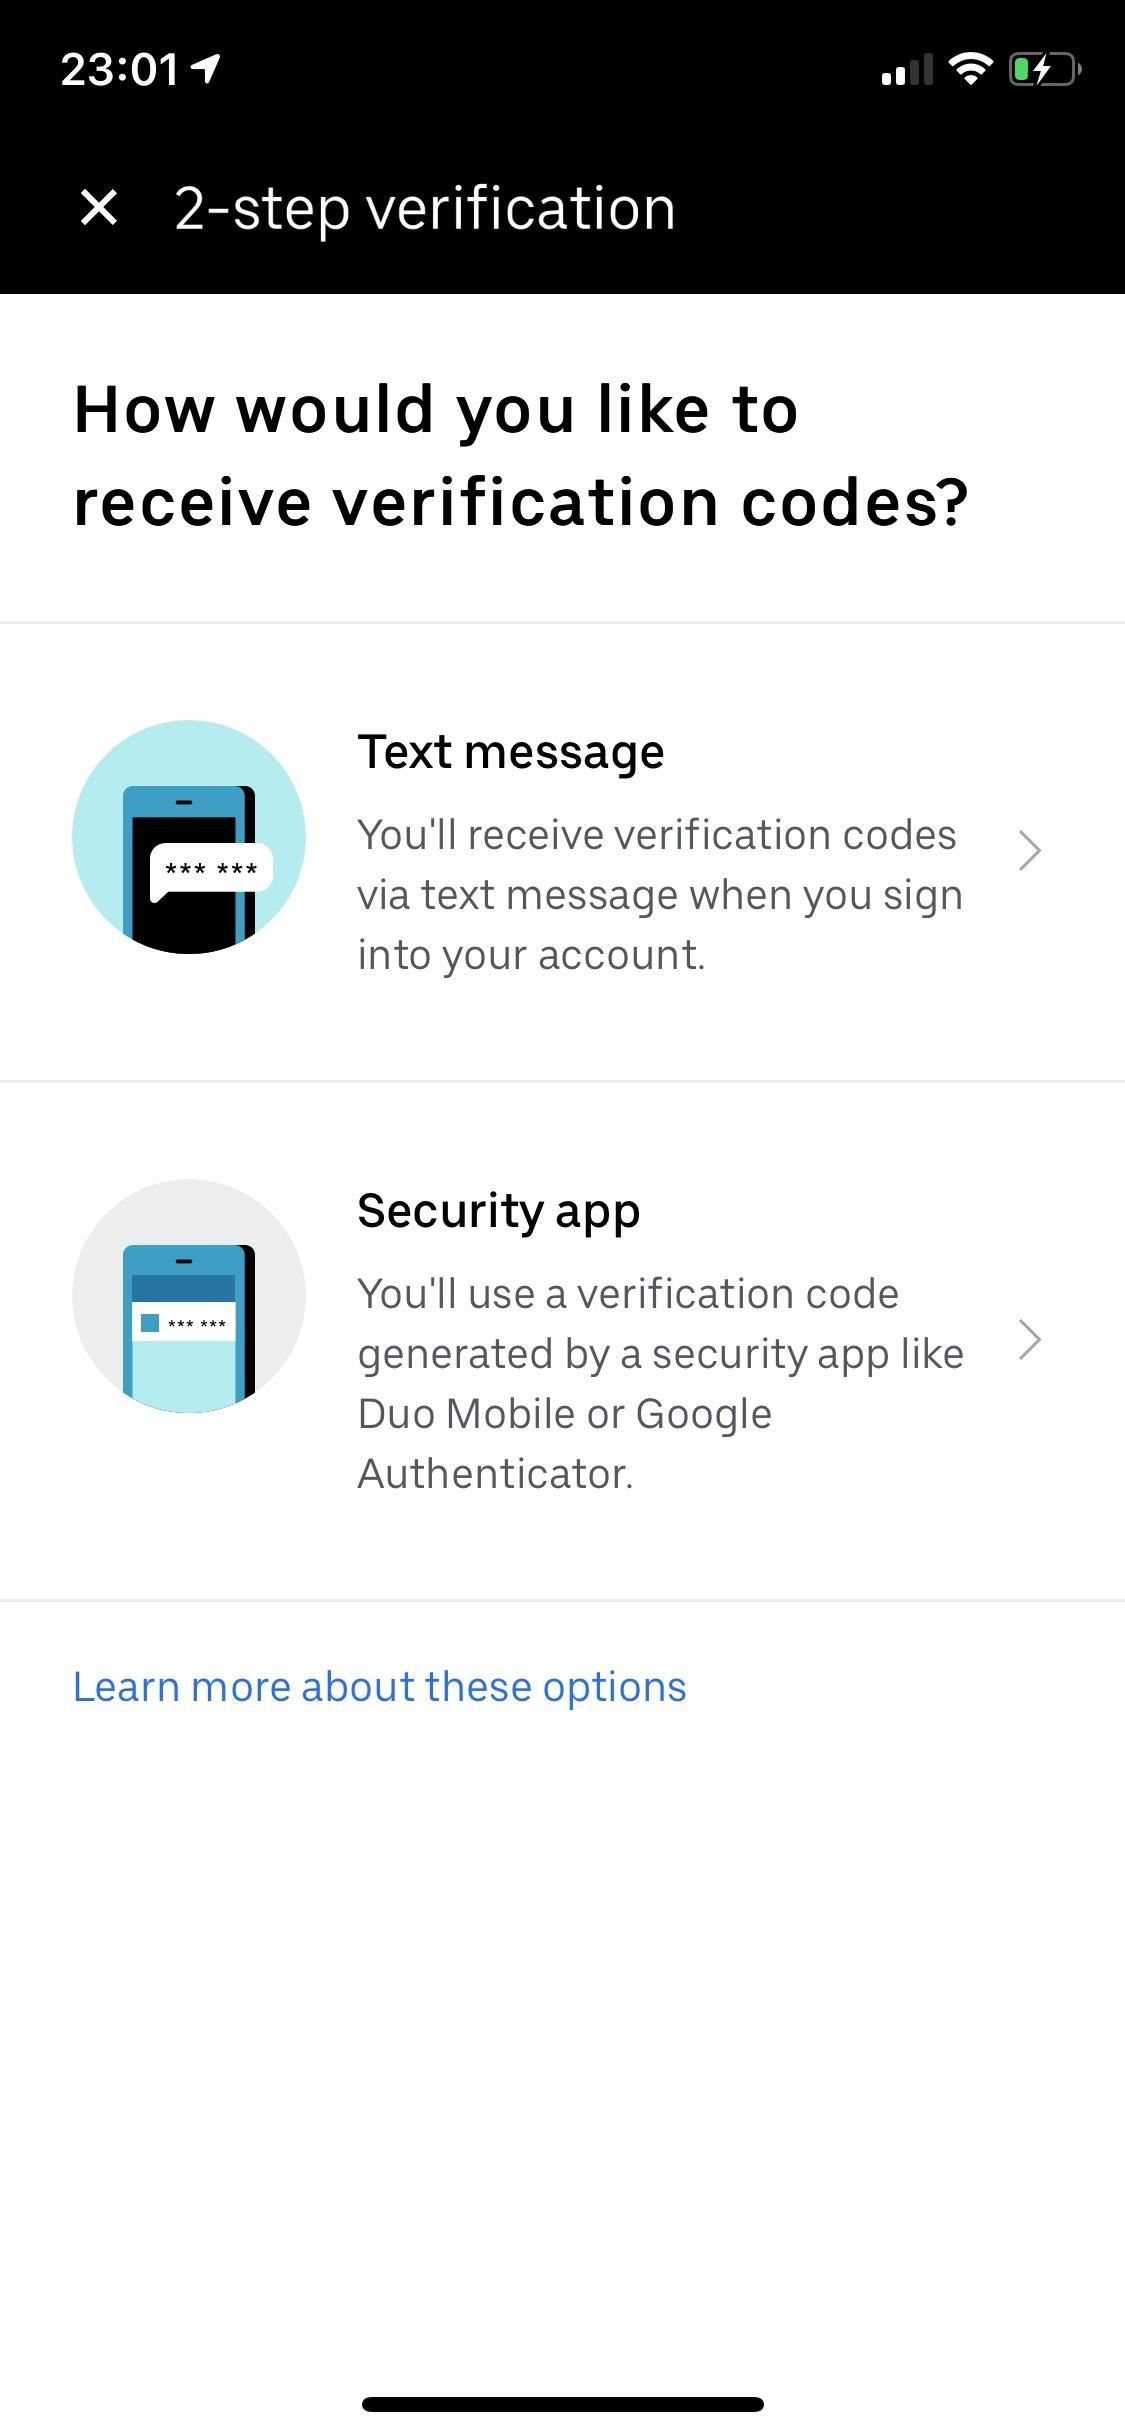
Now it's time to turn on 2SV: tap on "2-step verification," hit "Set up now," and enter your password. On the next page, you'll be asked how you would like to receive your verification codes when you log in to Uber: either "Text message" or "Security app." If you want to go with SMS, go to Step 2. If you'd like to use a security app like Authy, Google Authenticator, or Duo Mobile, skip to Step 3.

Step 2: Use Verification Codes via Text Message
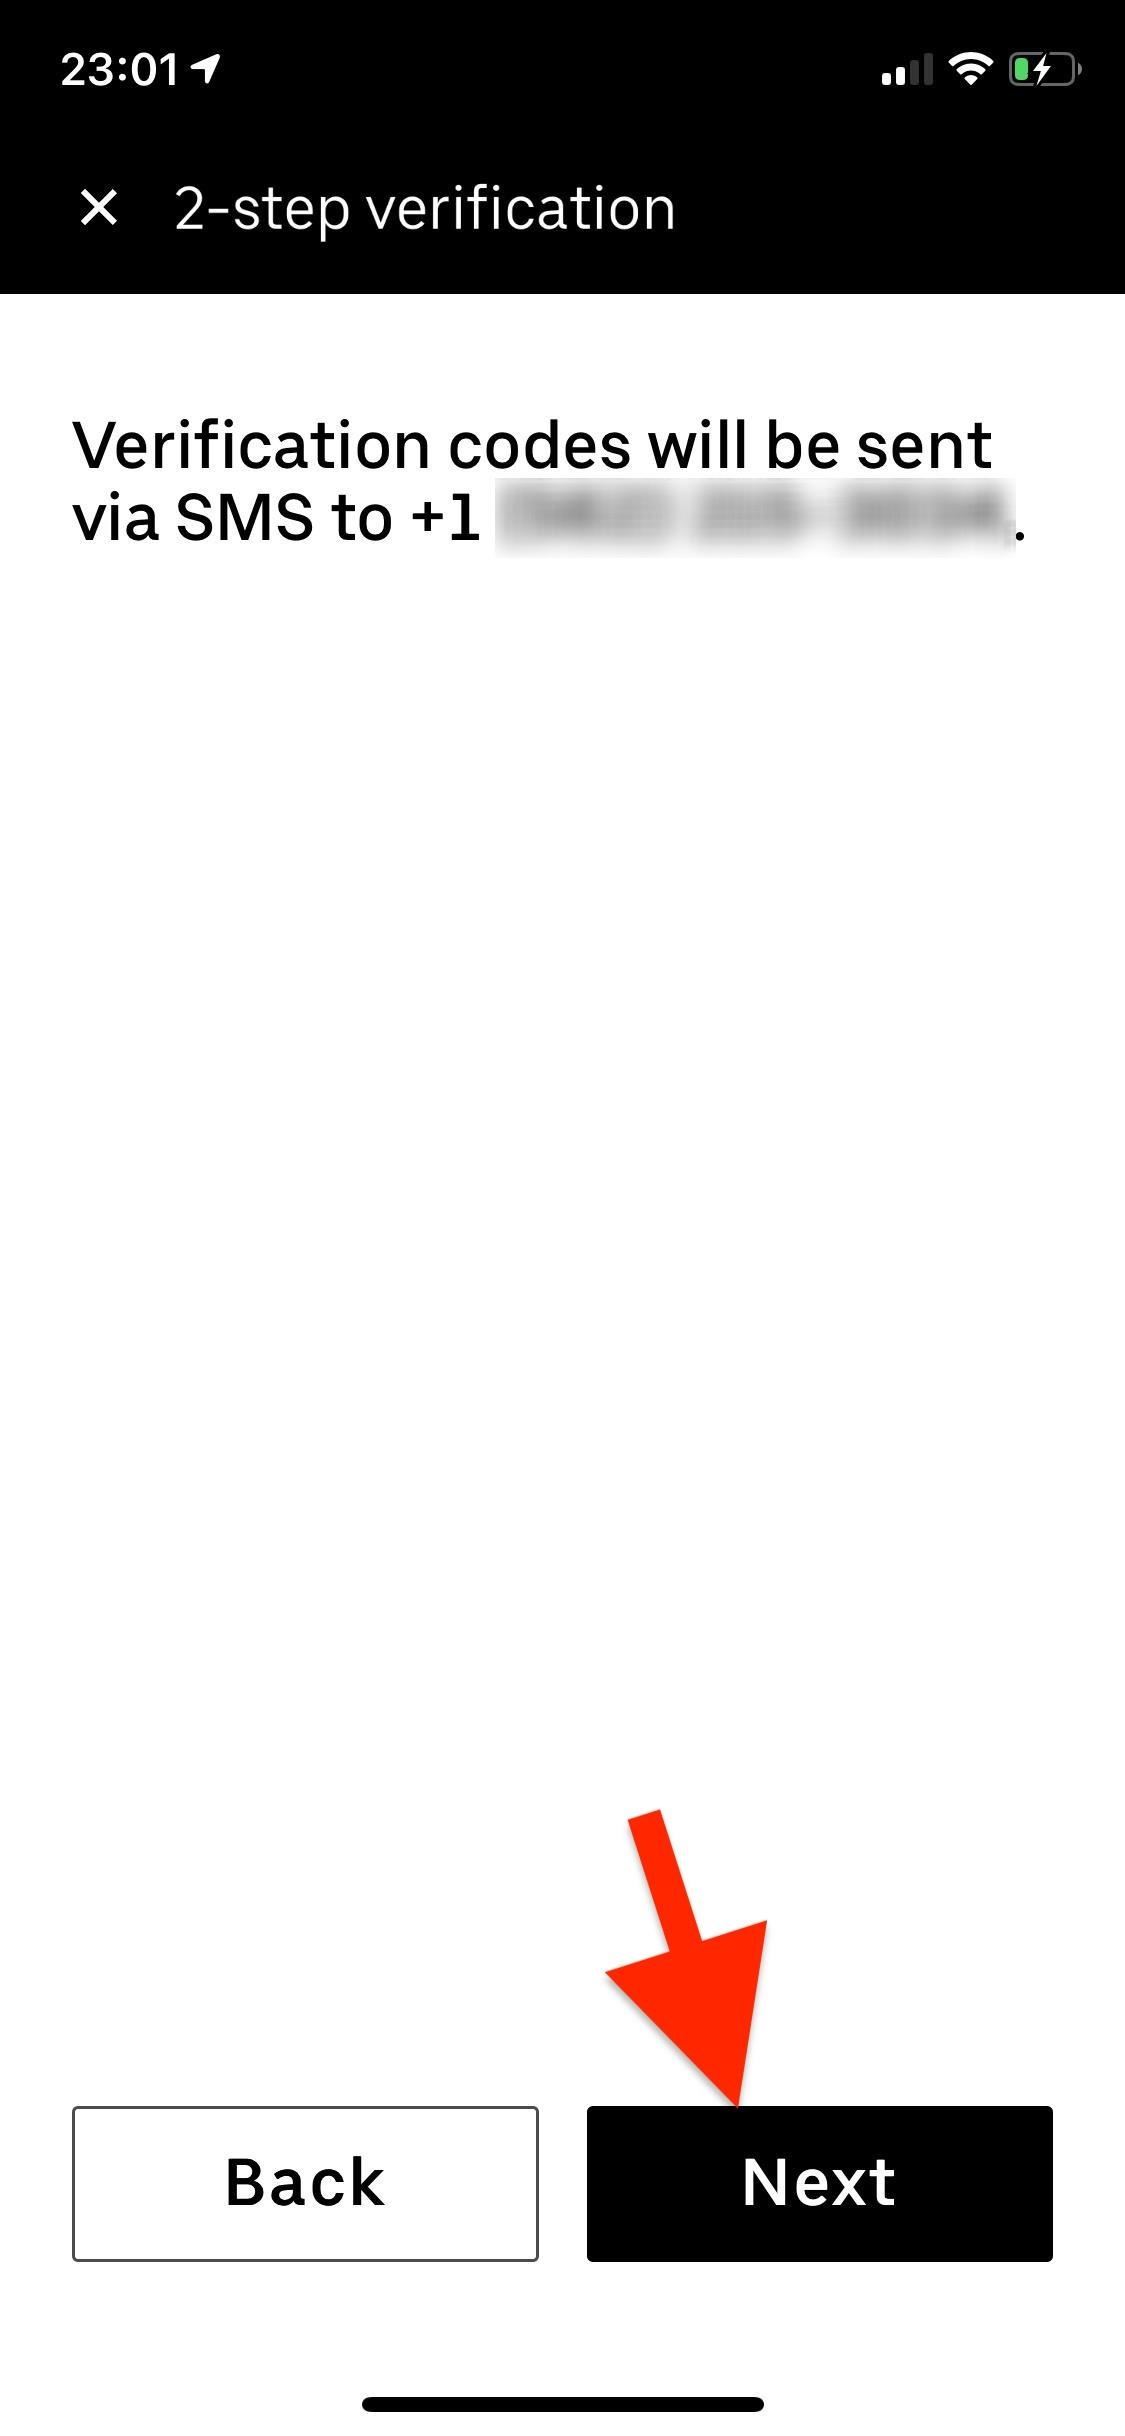
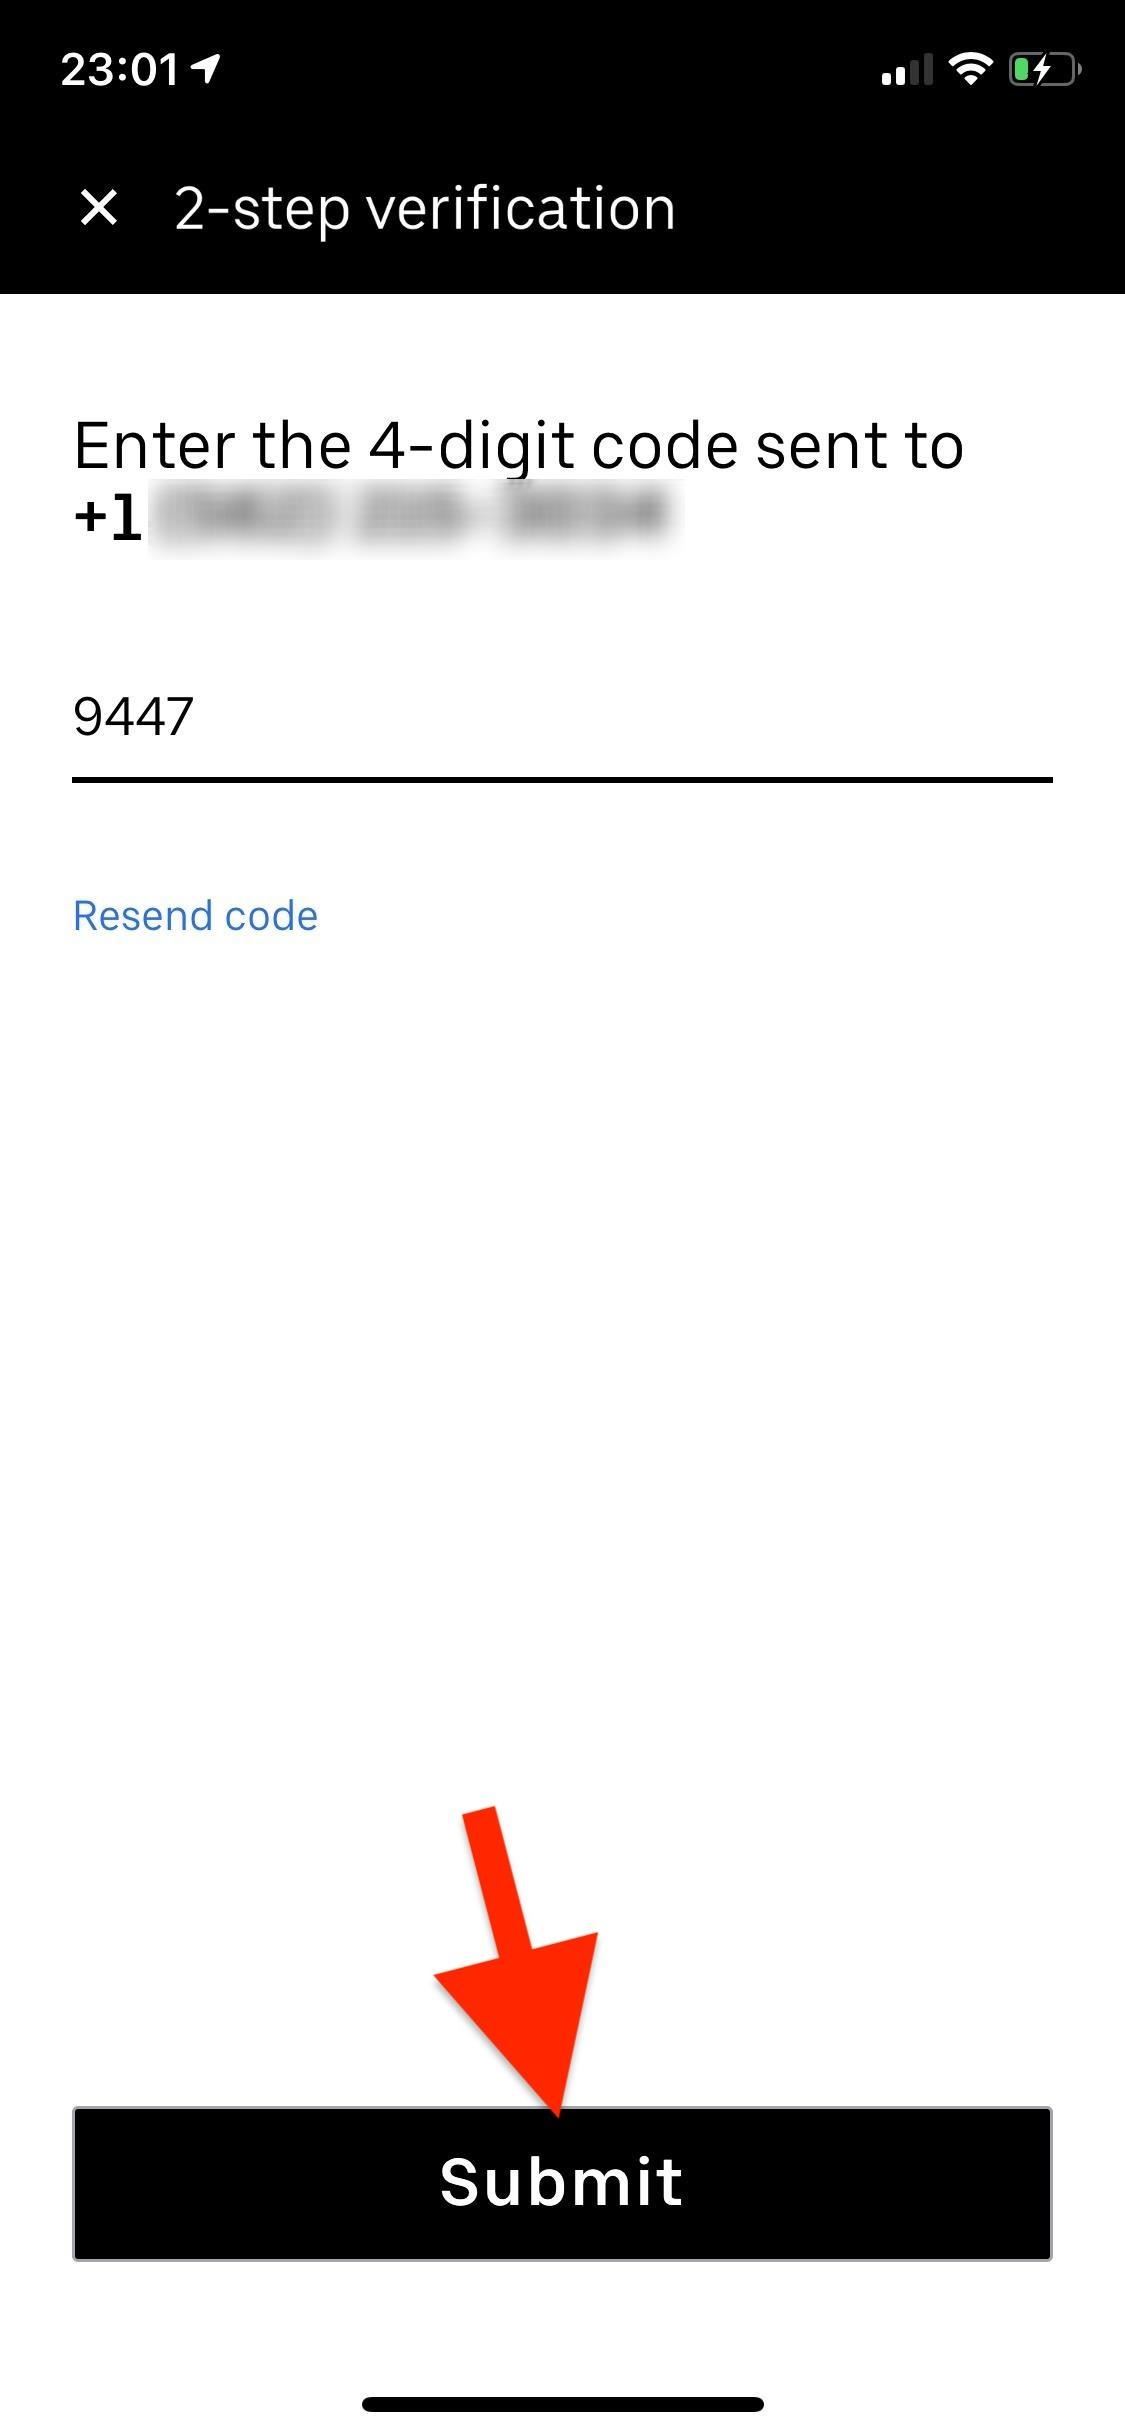
If you selected "Text message," your verification codes will be sent via SMS to your phone number from now on. Hit "Next," and Uber will verify your phone number by sending you a four-digit numerical code to your number. When you get it, enter it into the number field, and hit "Submit."
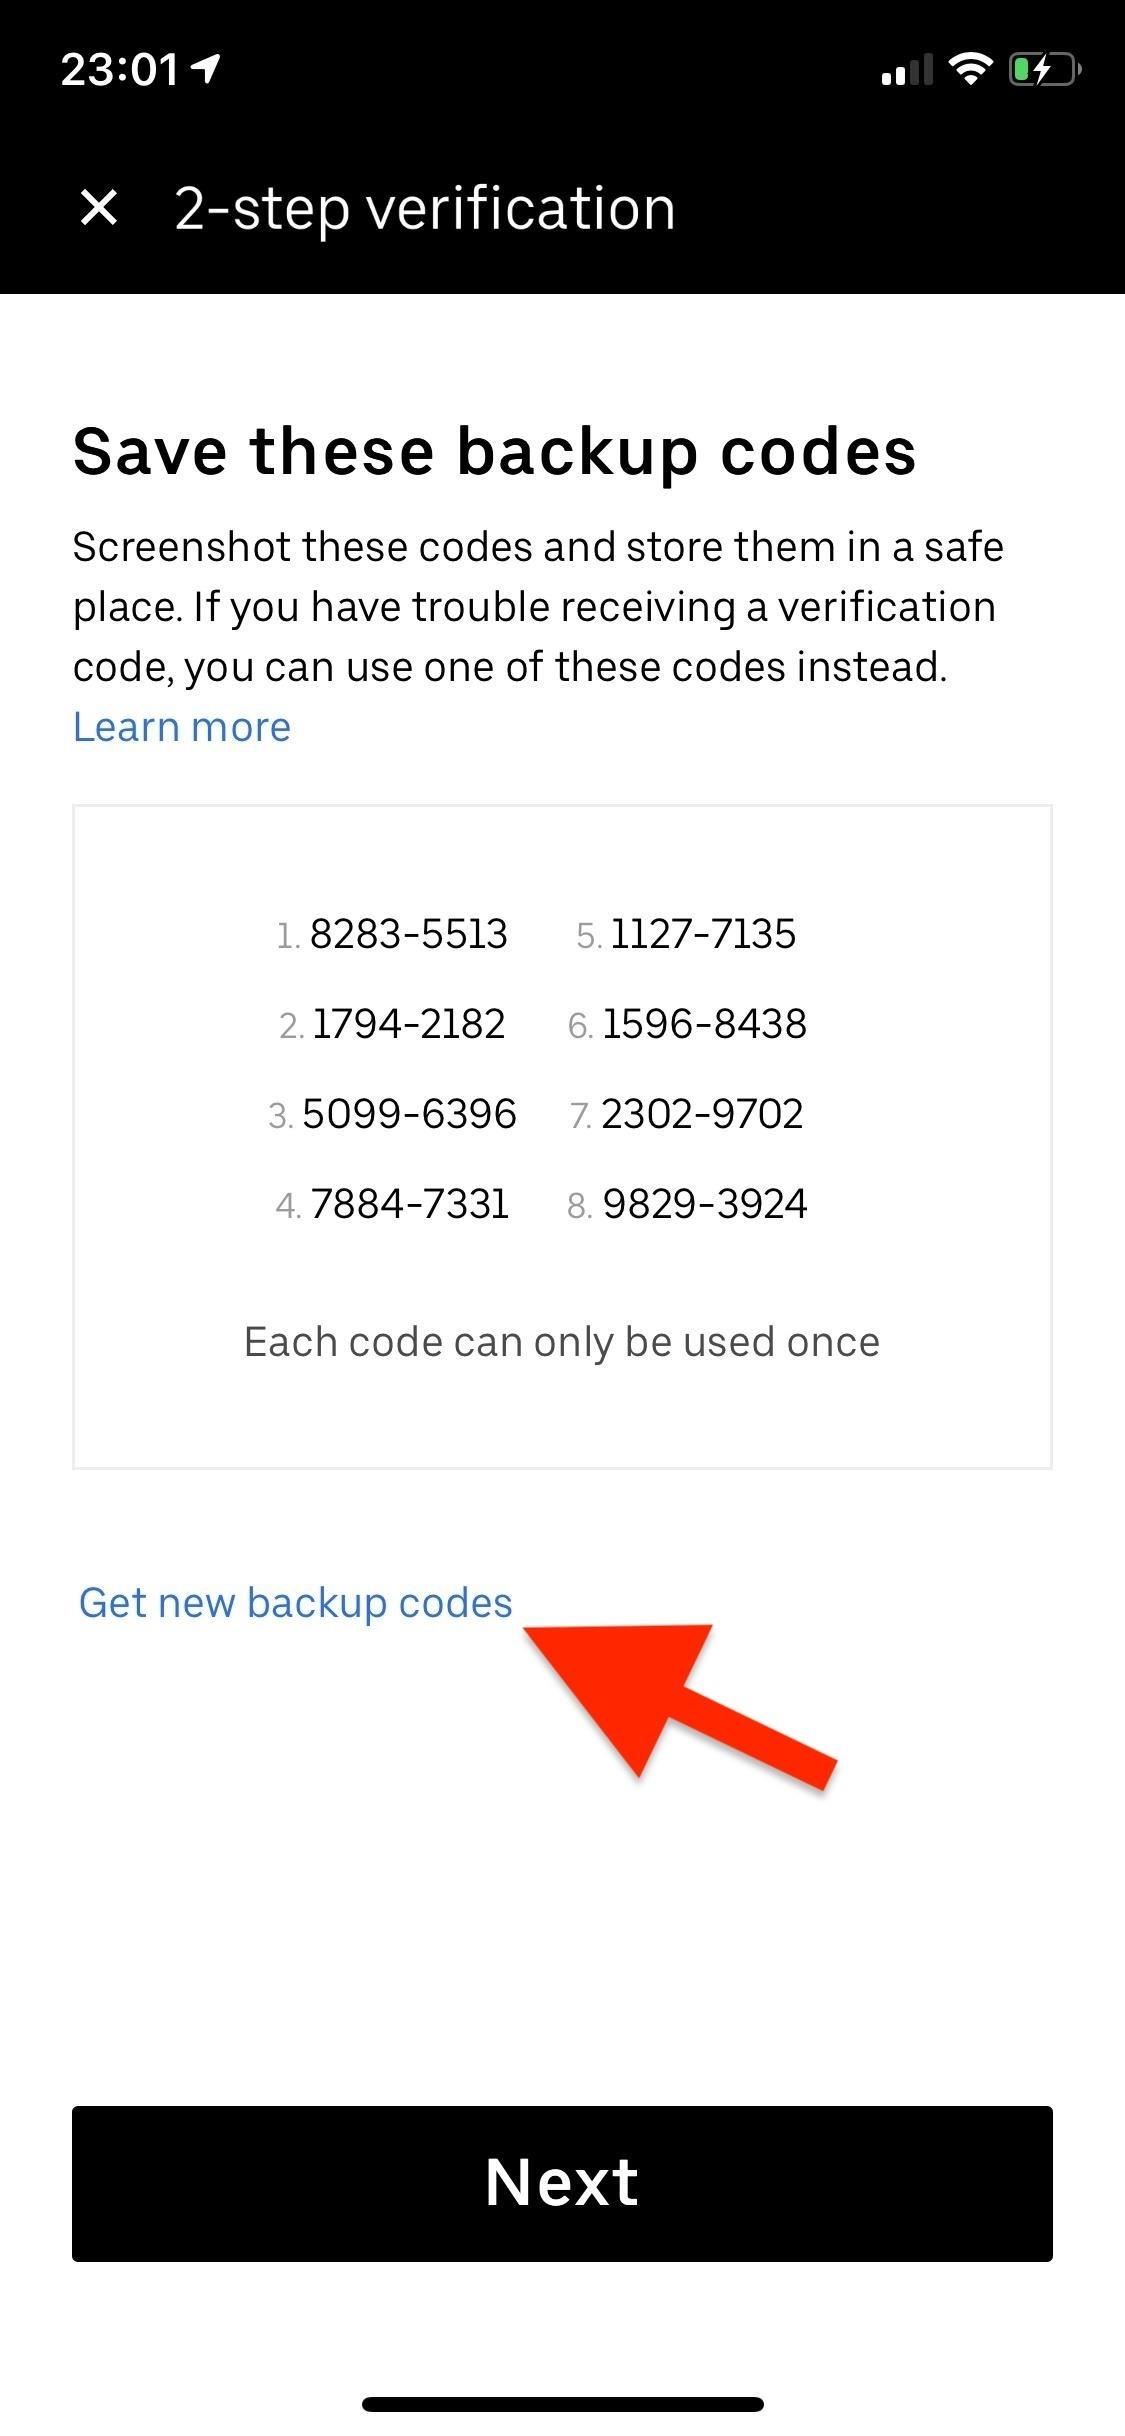
On the next page, you'll see a number of backup codes (eight to be exact) which you can use in lieu of a text message code if your phone is lost or your number isn't working and you're attempting to log in to your Uber account.
Screenshot these codes and keep it somewhere secure but accessible to yourself, such as a photo locker or even email it to yourself. Better yet, copy and paste them to a password manager such as LastPass for safe keeping. You can also request new backup codes since they can only be used once (more on that later).
Step 3: Use Verification Codes via a Security App
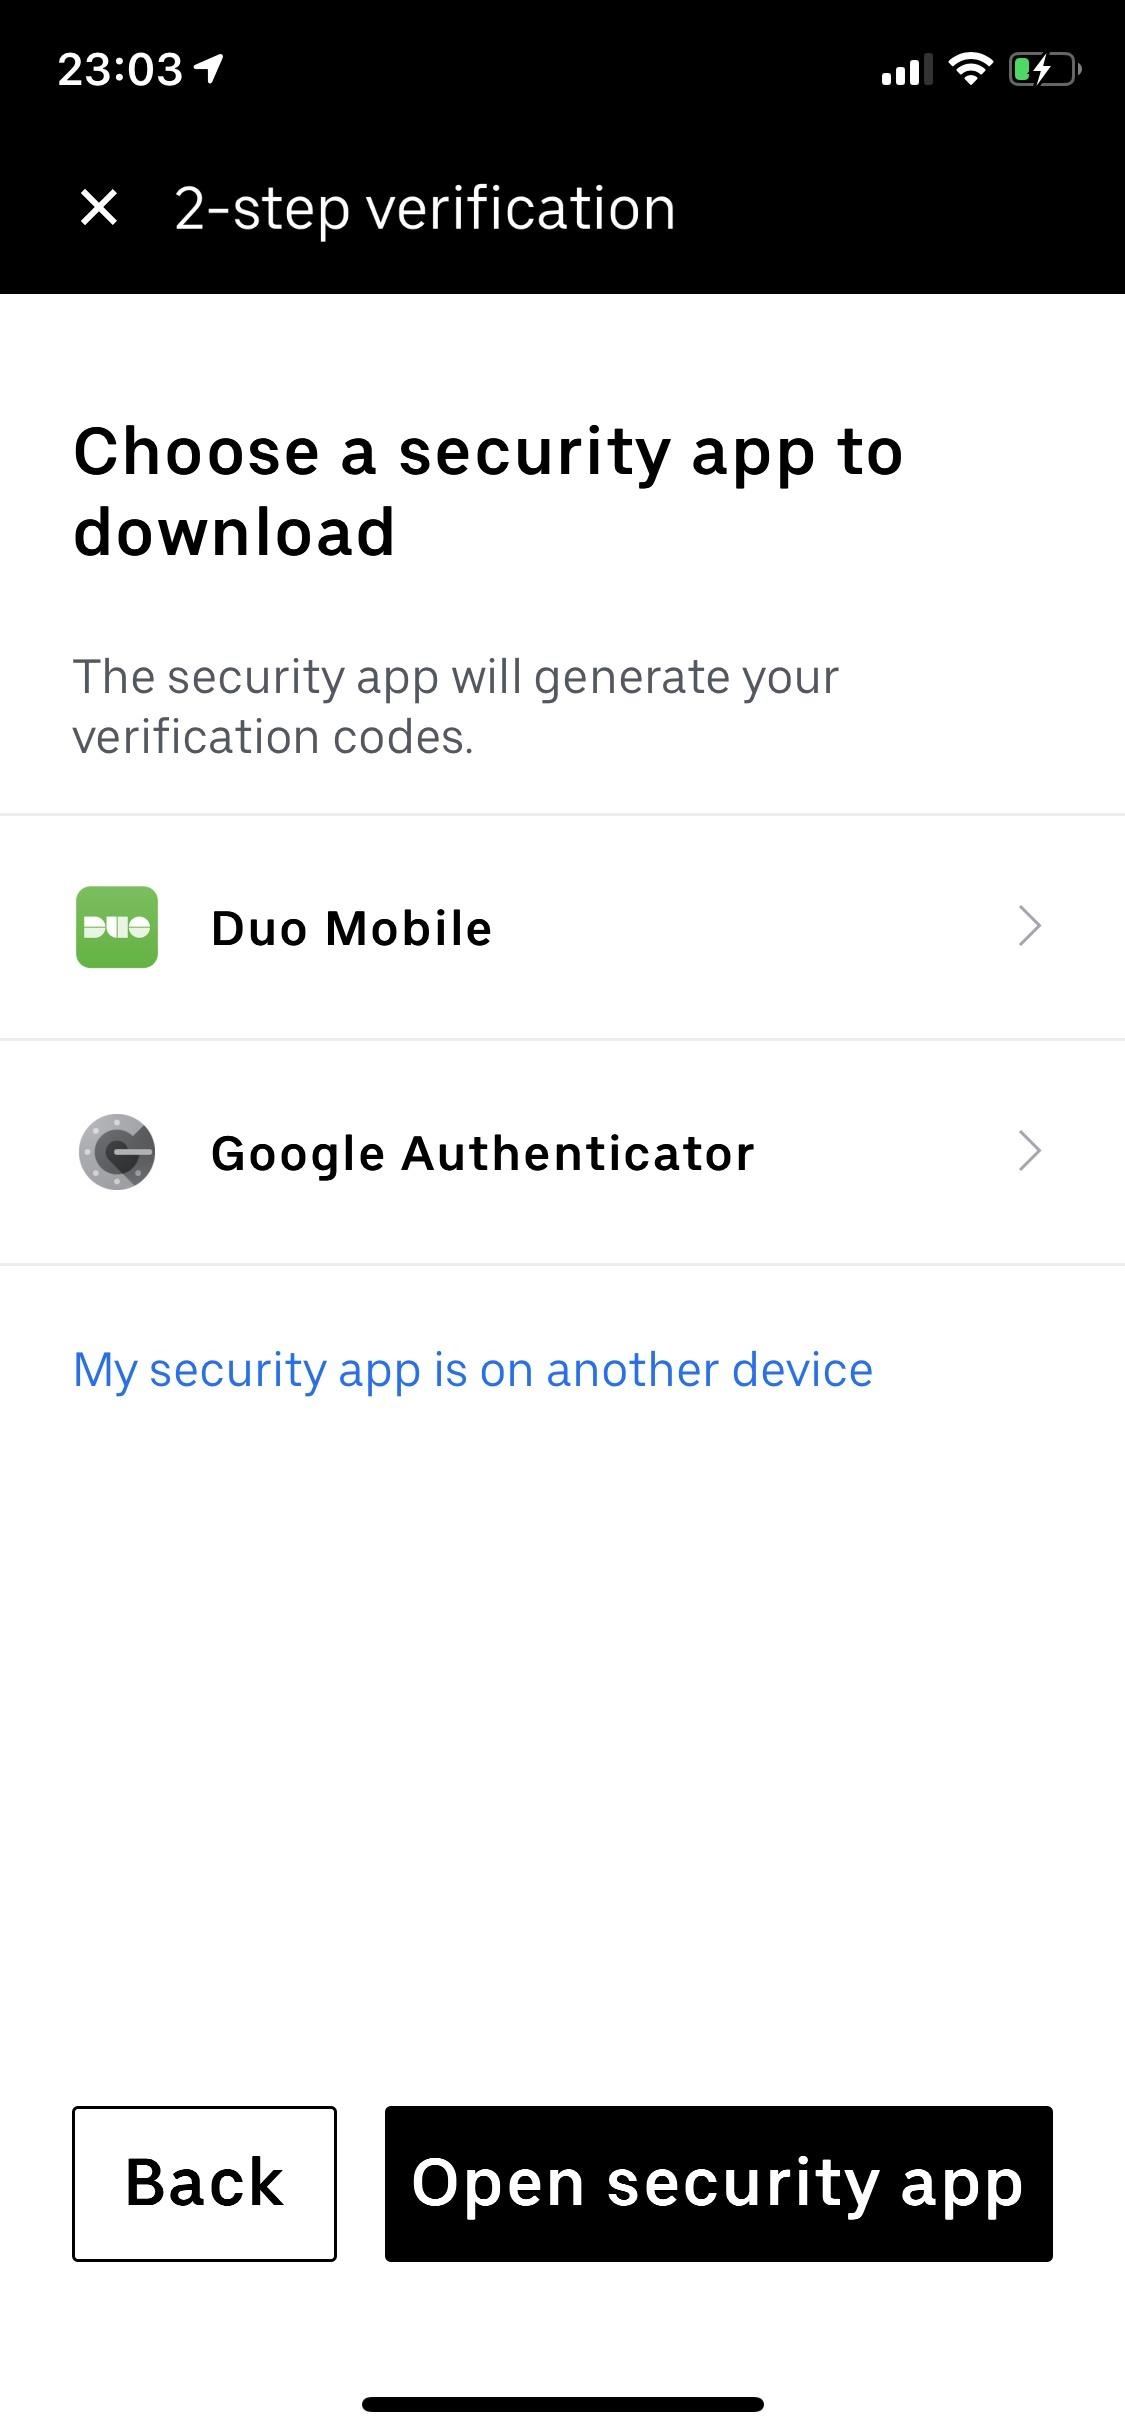
If you decide to use a security app such as Google Authenticator, select it from the list and it will download on to your device if you don't already have it. You'll need to set that app up first before you can continue. If your security application is on another device, tap on "My security app is on another device" instead.
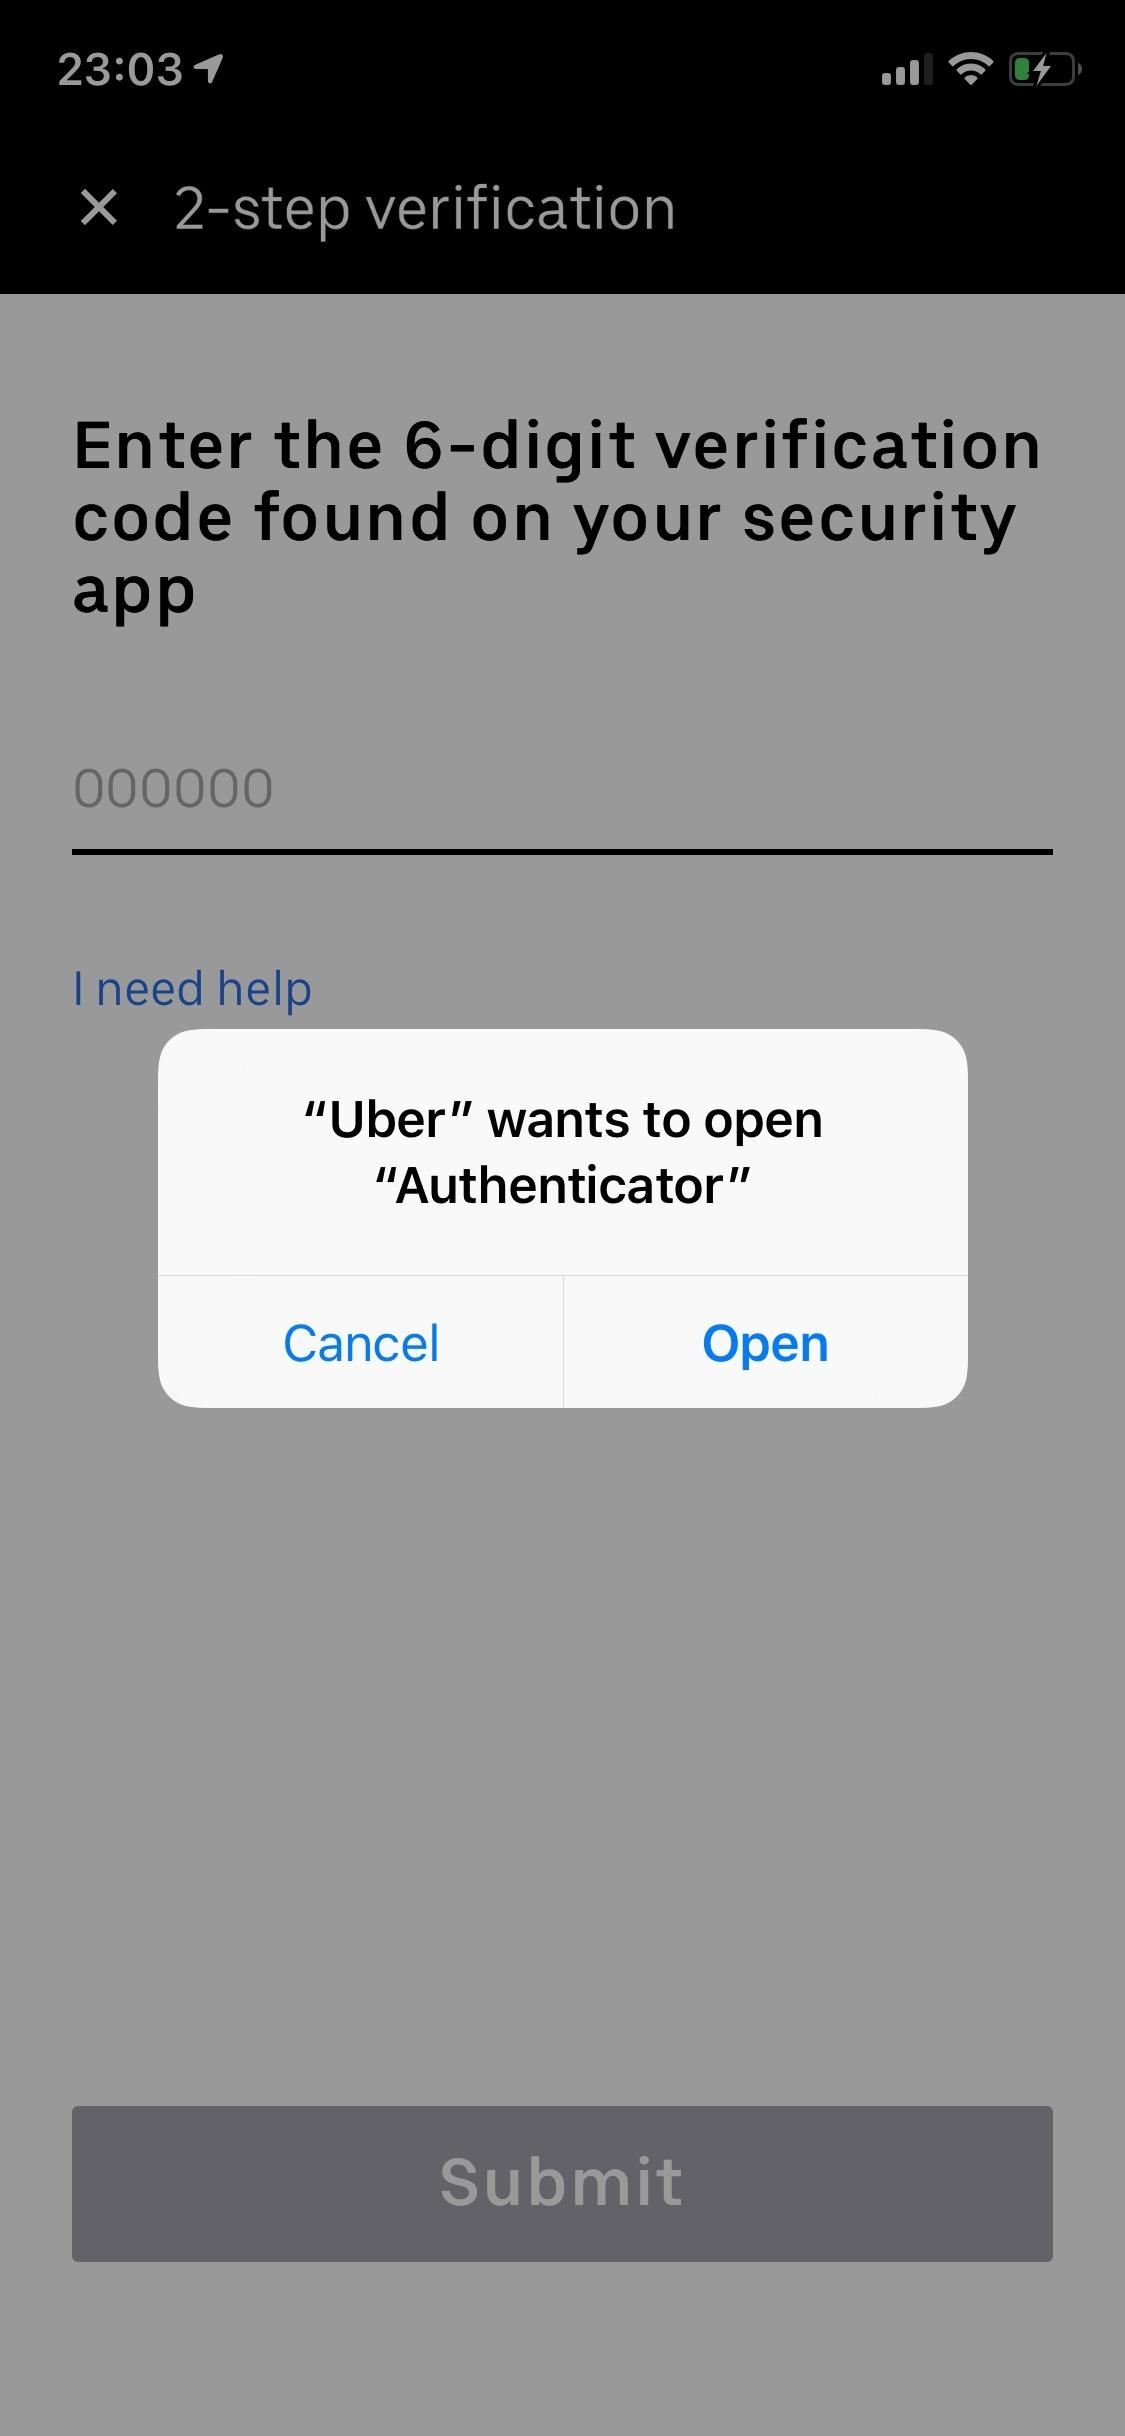
For those of you who already have one of those security apps installed (like Authy) and are using it for two-step verification in other apps, after you select "Security app" it will try to open the app right away. This will also happen after you set up a security app for the first time.
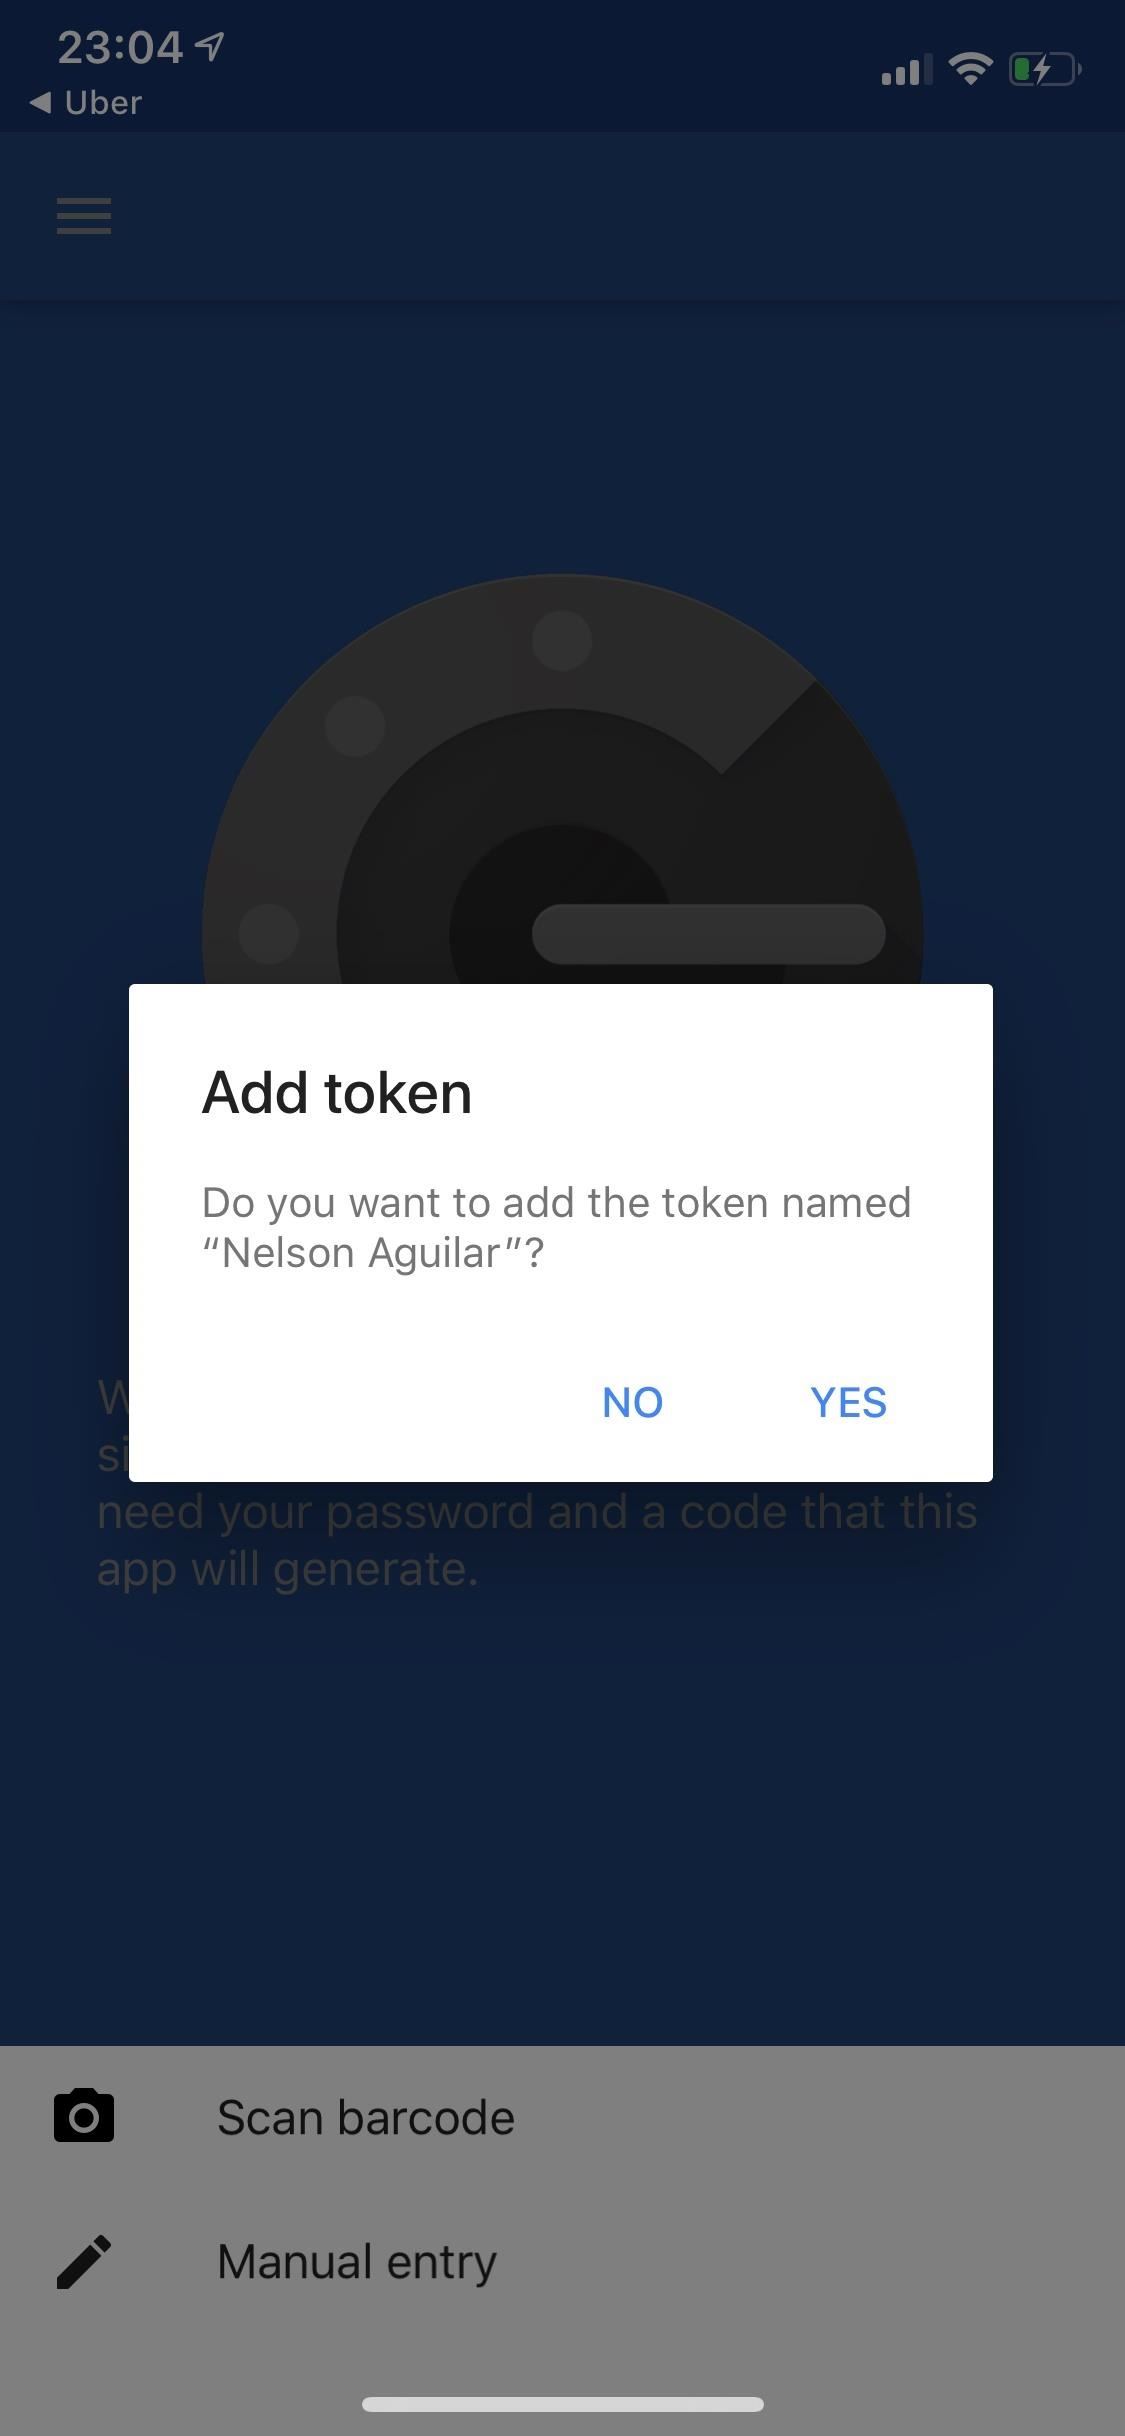
When you tap "Open" on the prompt, you'll likely be asked to add your token for the Uber app. In my example, that's exactly what happens with Google Authenticator. Tap "Yes" to add the token.
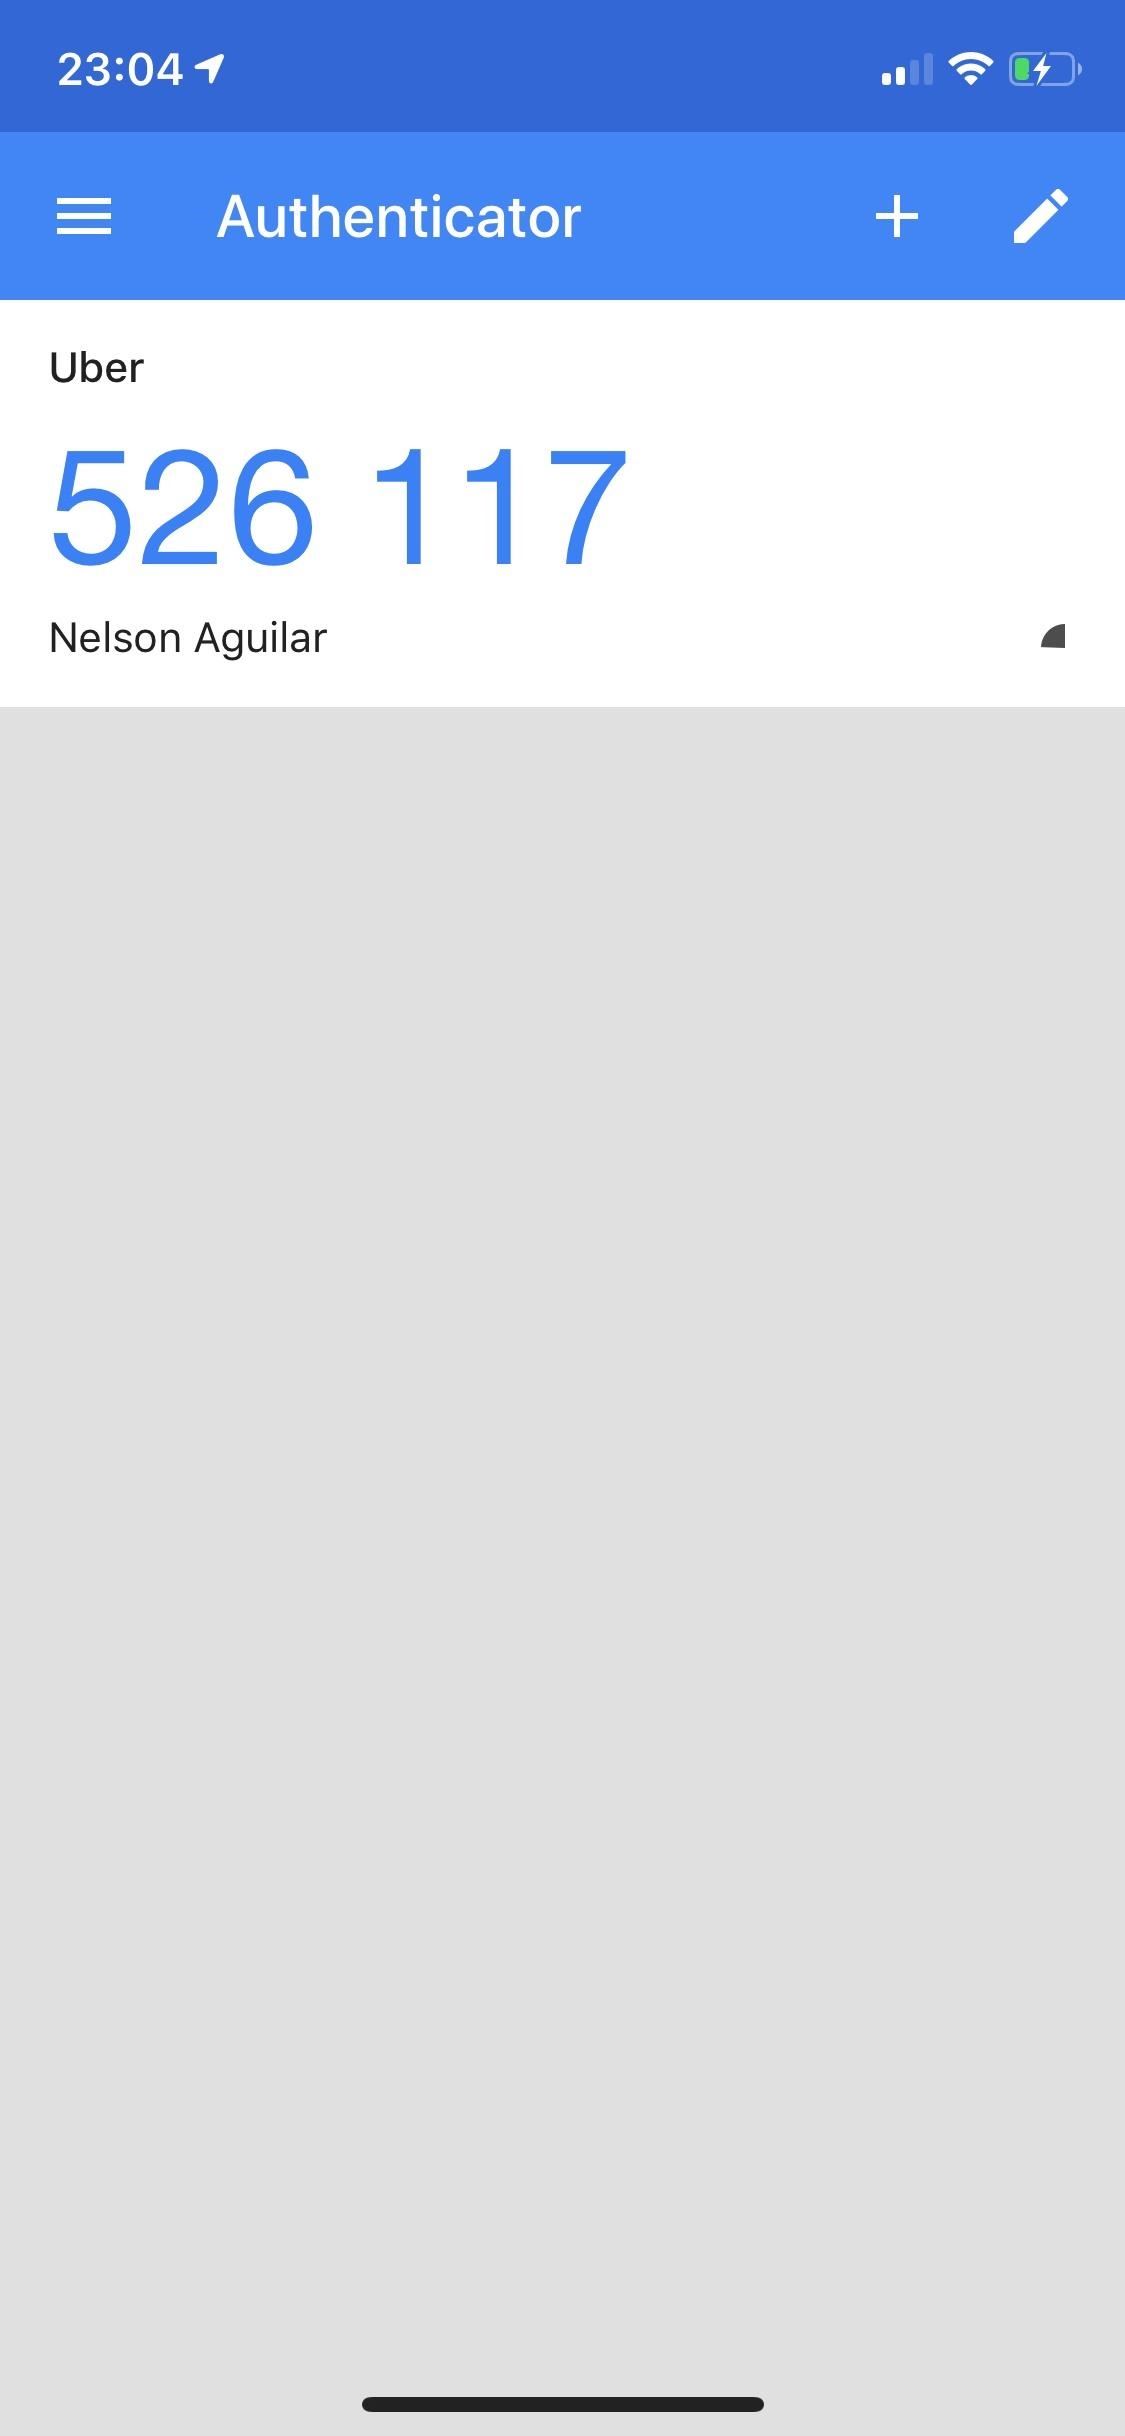
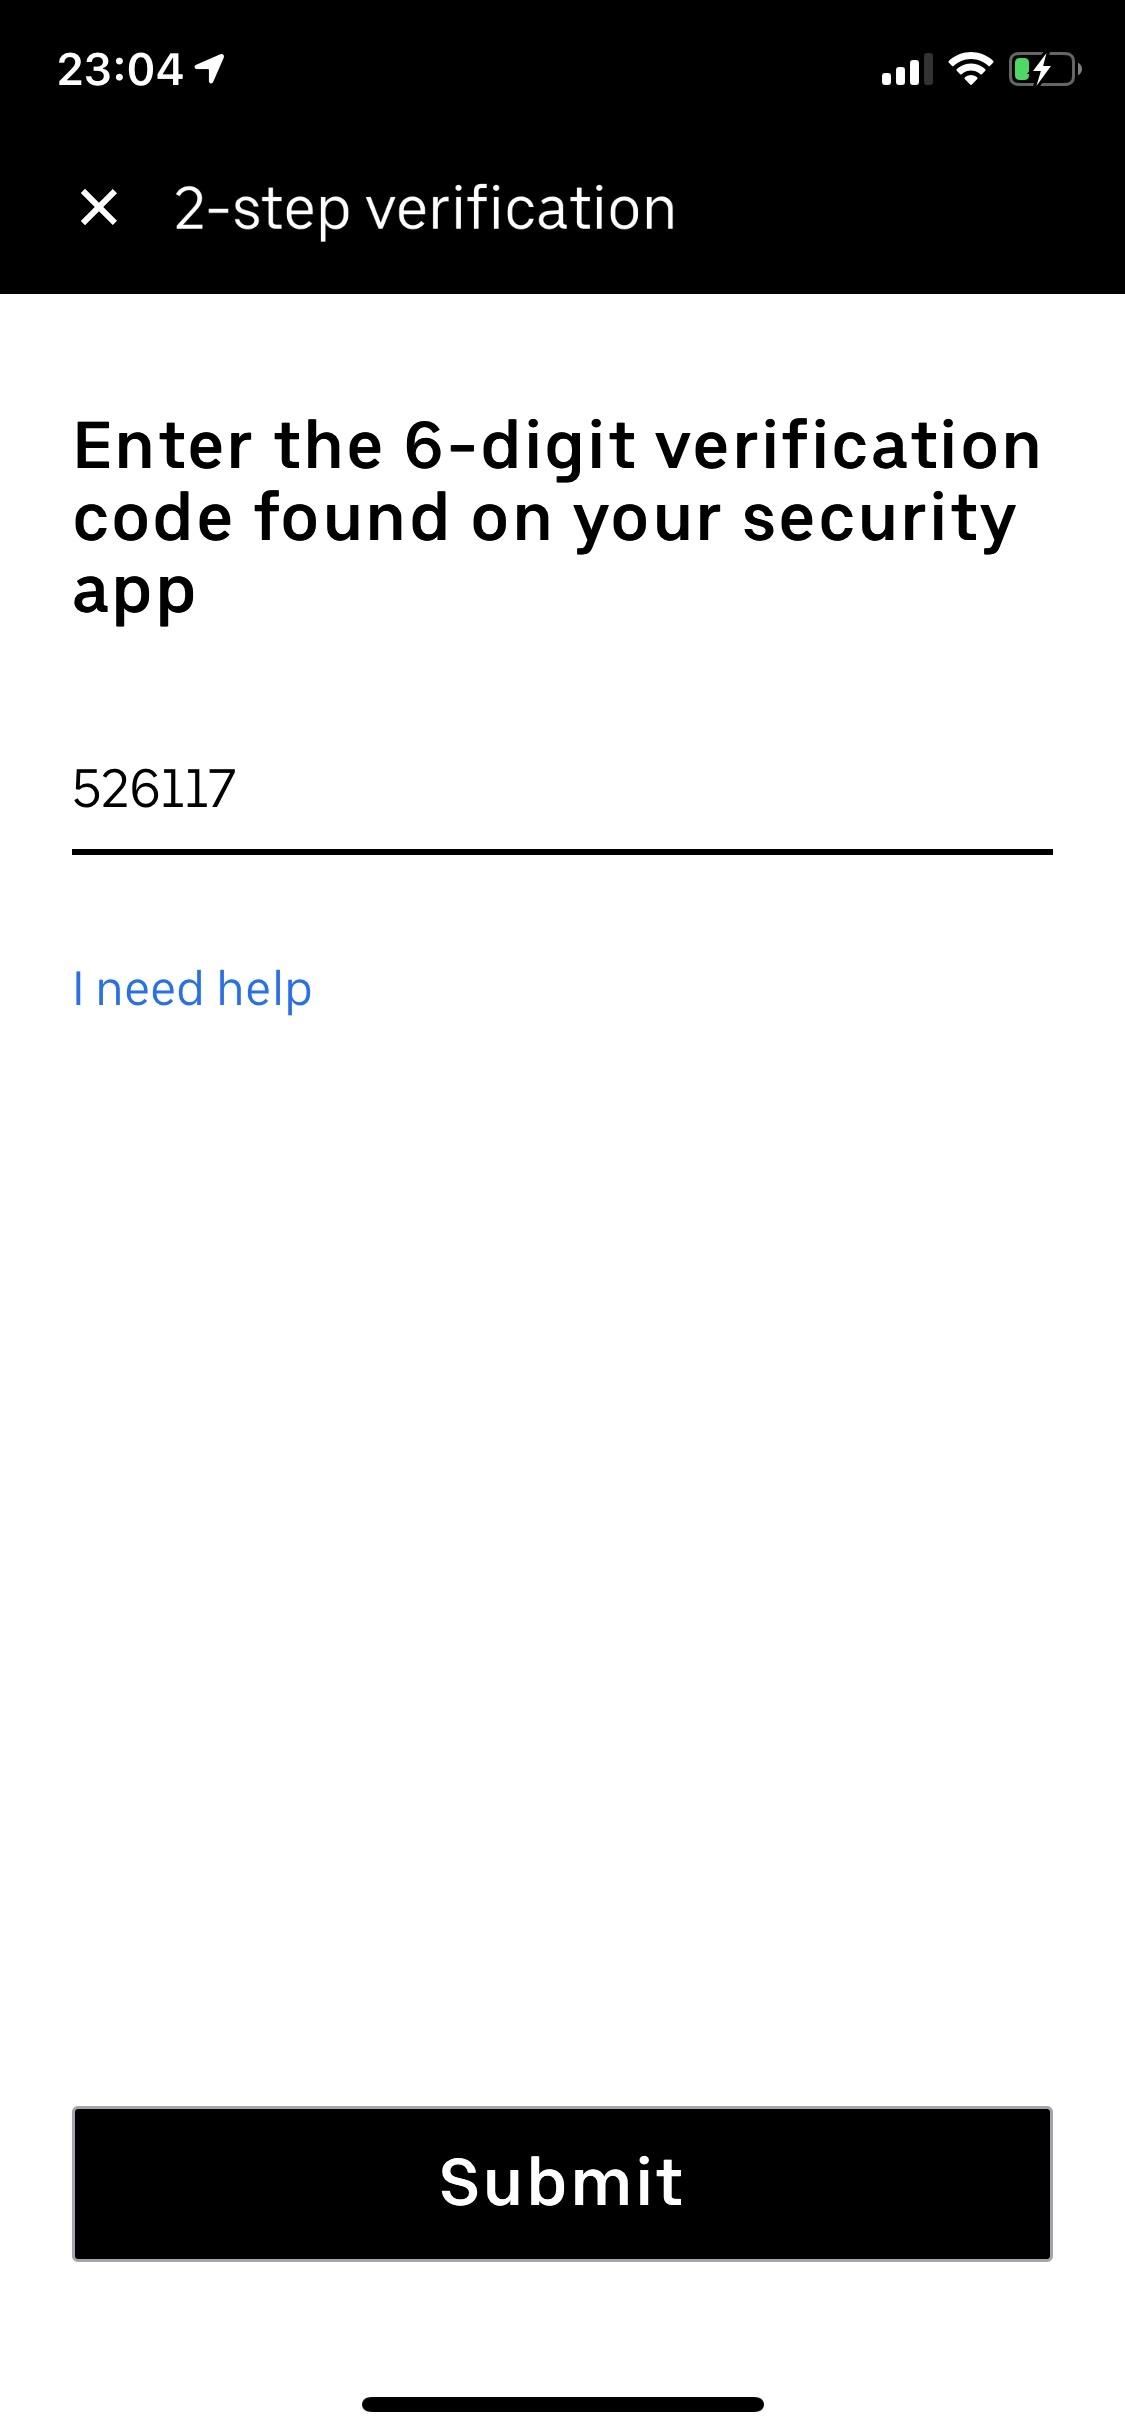
Once you add the token, the six-digit code appears, under the title Uber. Press your finger down on the code to copy it and go back to the Uber application. Enter the code into the number field, and hit "Submit." You'll now need to use your security app to log in to your Uber account. On subsequent login attempts, you will not need to add a token again since there already is one, but the six-digit code will change.
On the next page, you'll see a number of backup codes (eight to be exact) which you can use in lieu of a text message code if your phone is lost or your number isn't working and you're attempting to log in to your Uber account.
Screenshot these codes and keep it somewhere secure but accessible to yourself, such as a photo locker or even email it to yourself. Better yet, copy and paste them to a password manager such as LastPass for safe keeping. You can also request new backup codes since they can only be used once (more on that later).
Step 4: Use Recovery Codes When All Else Fails
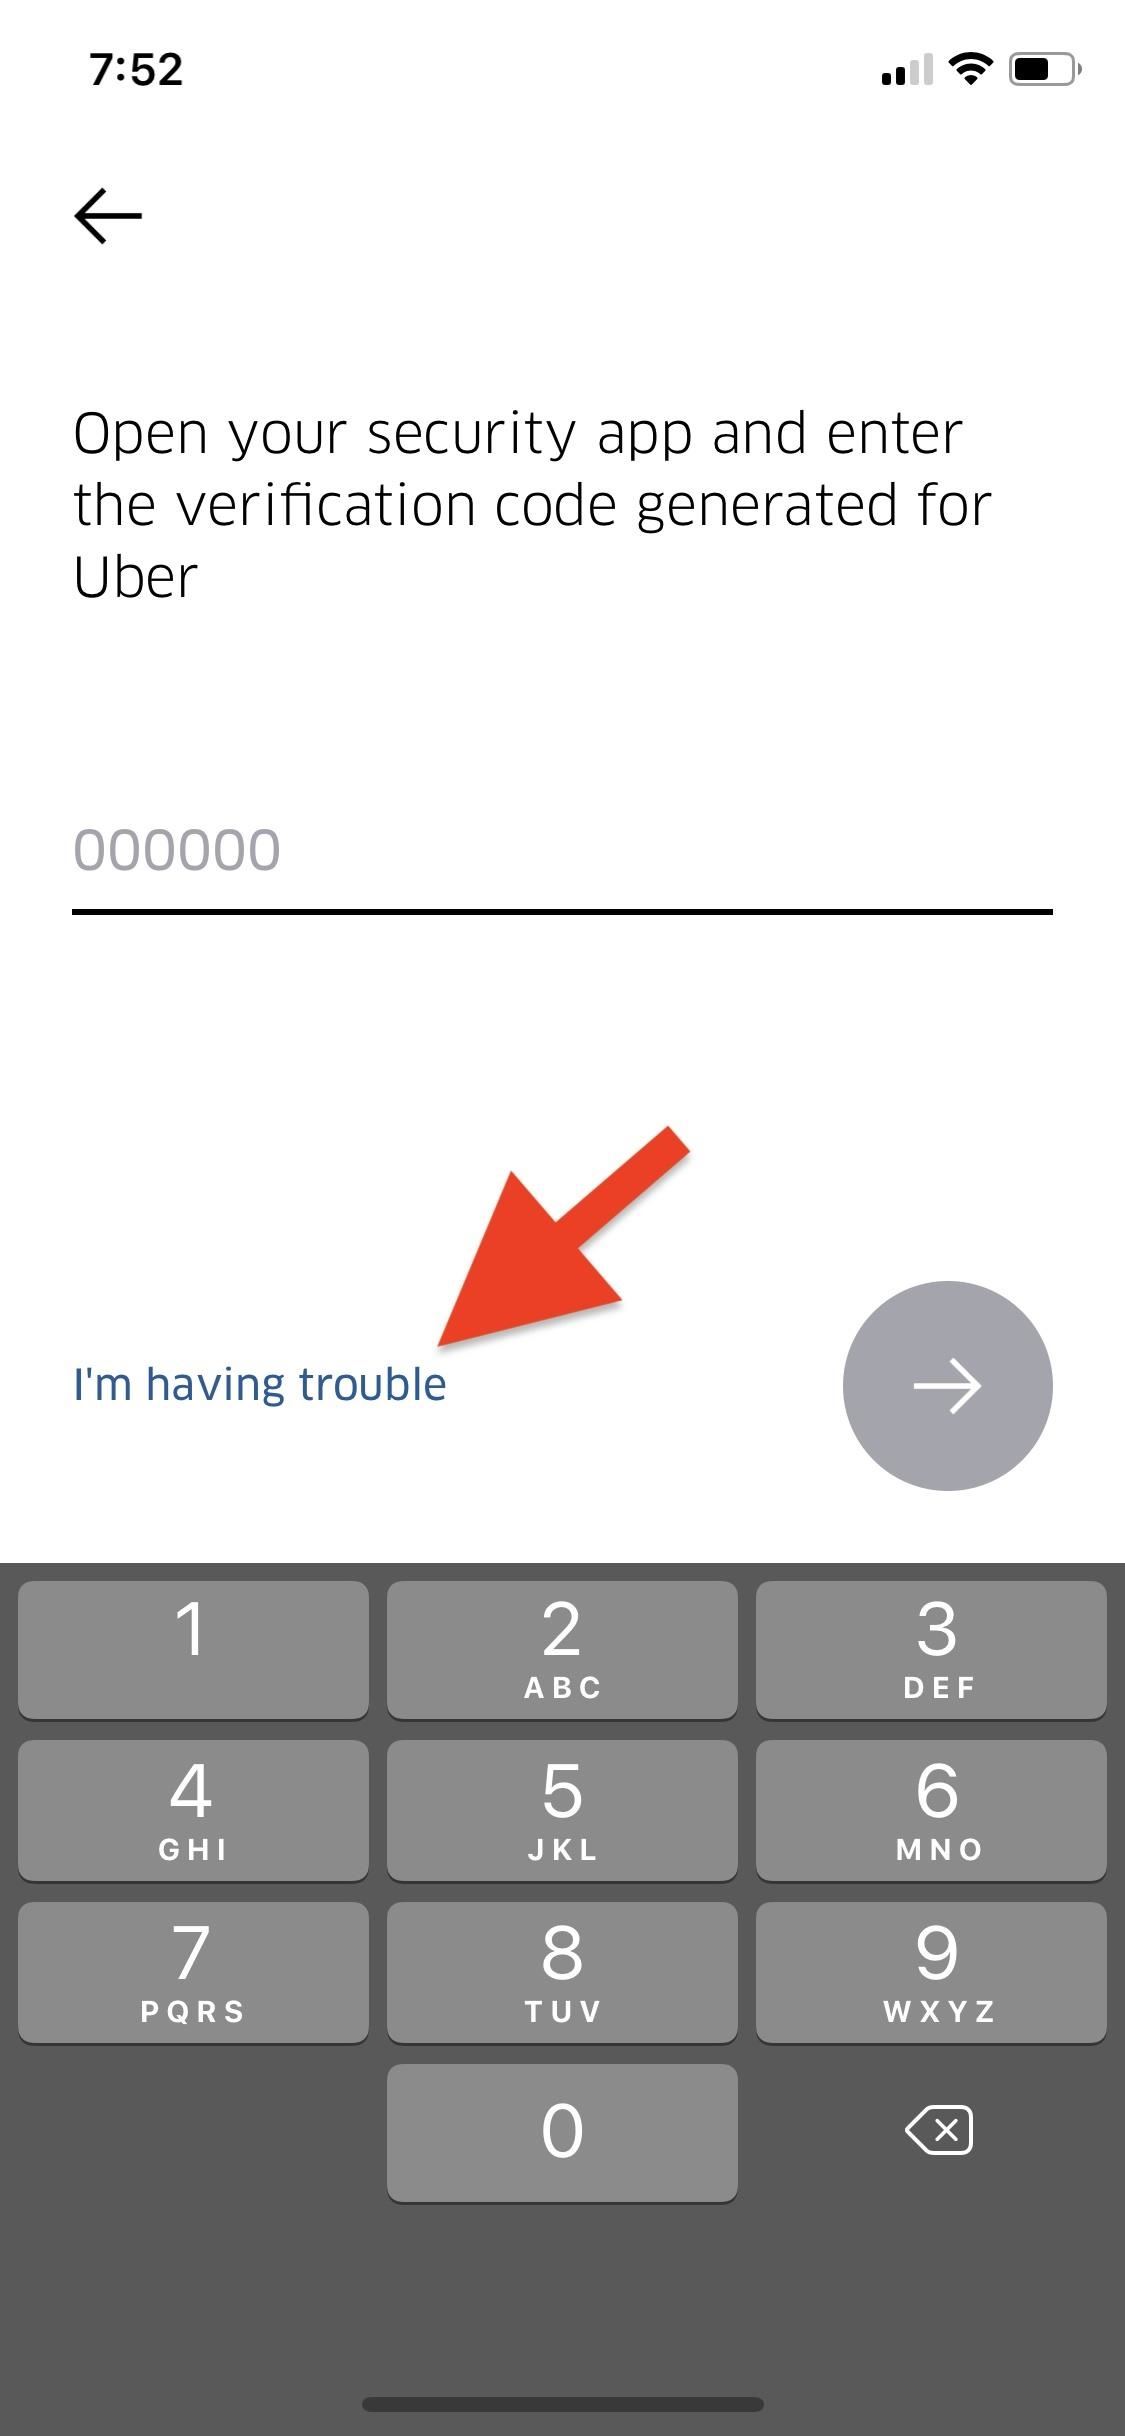
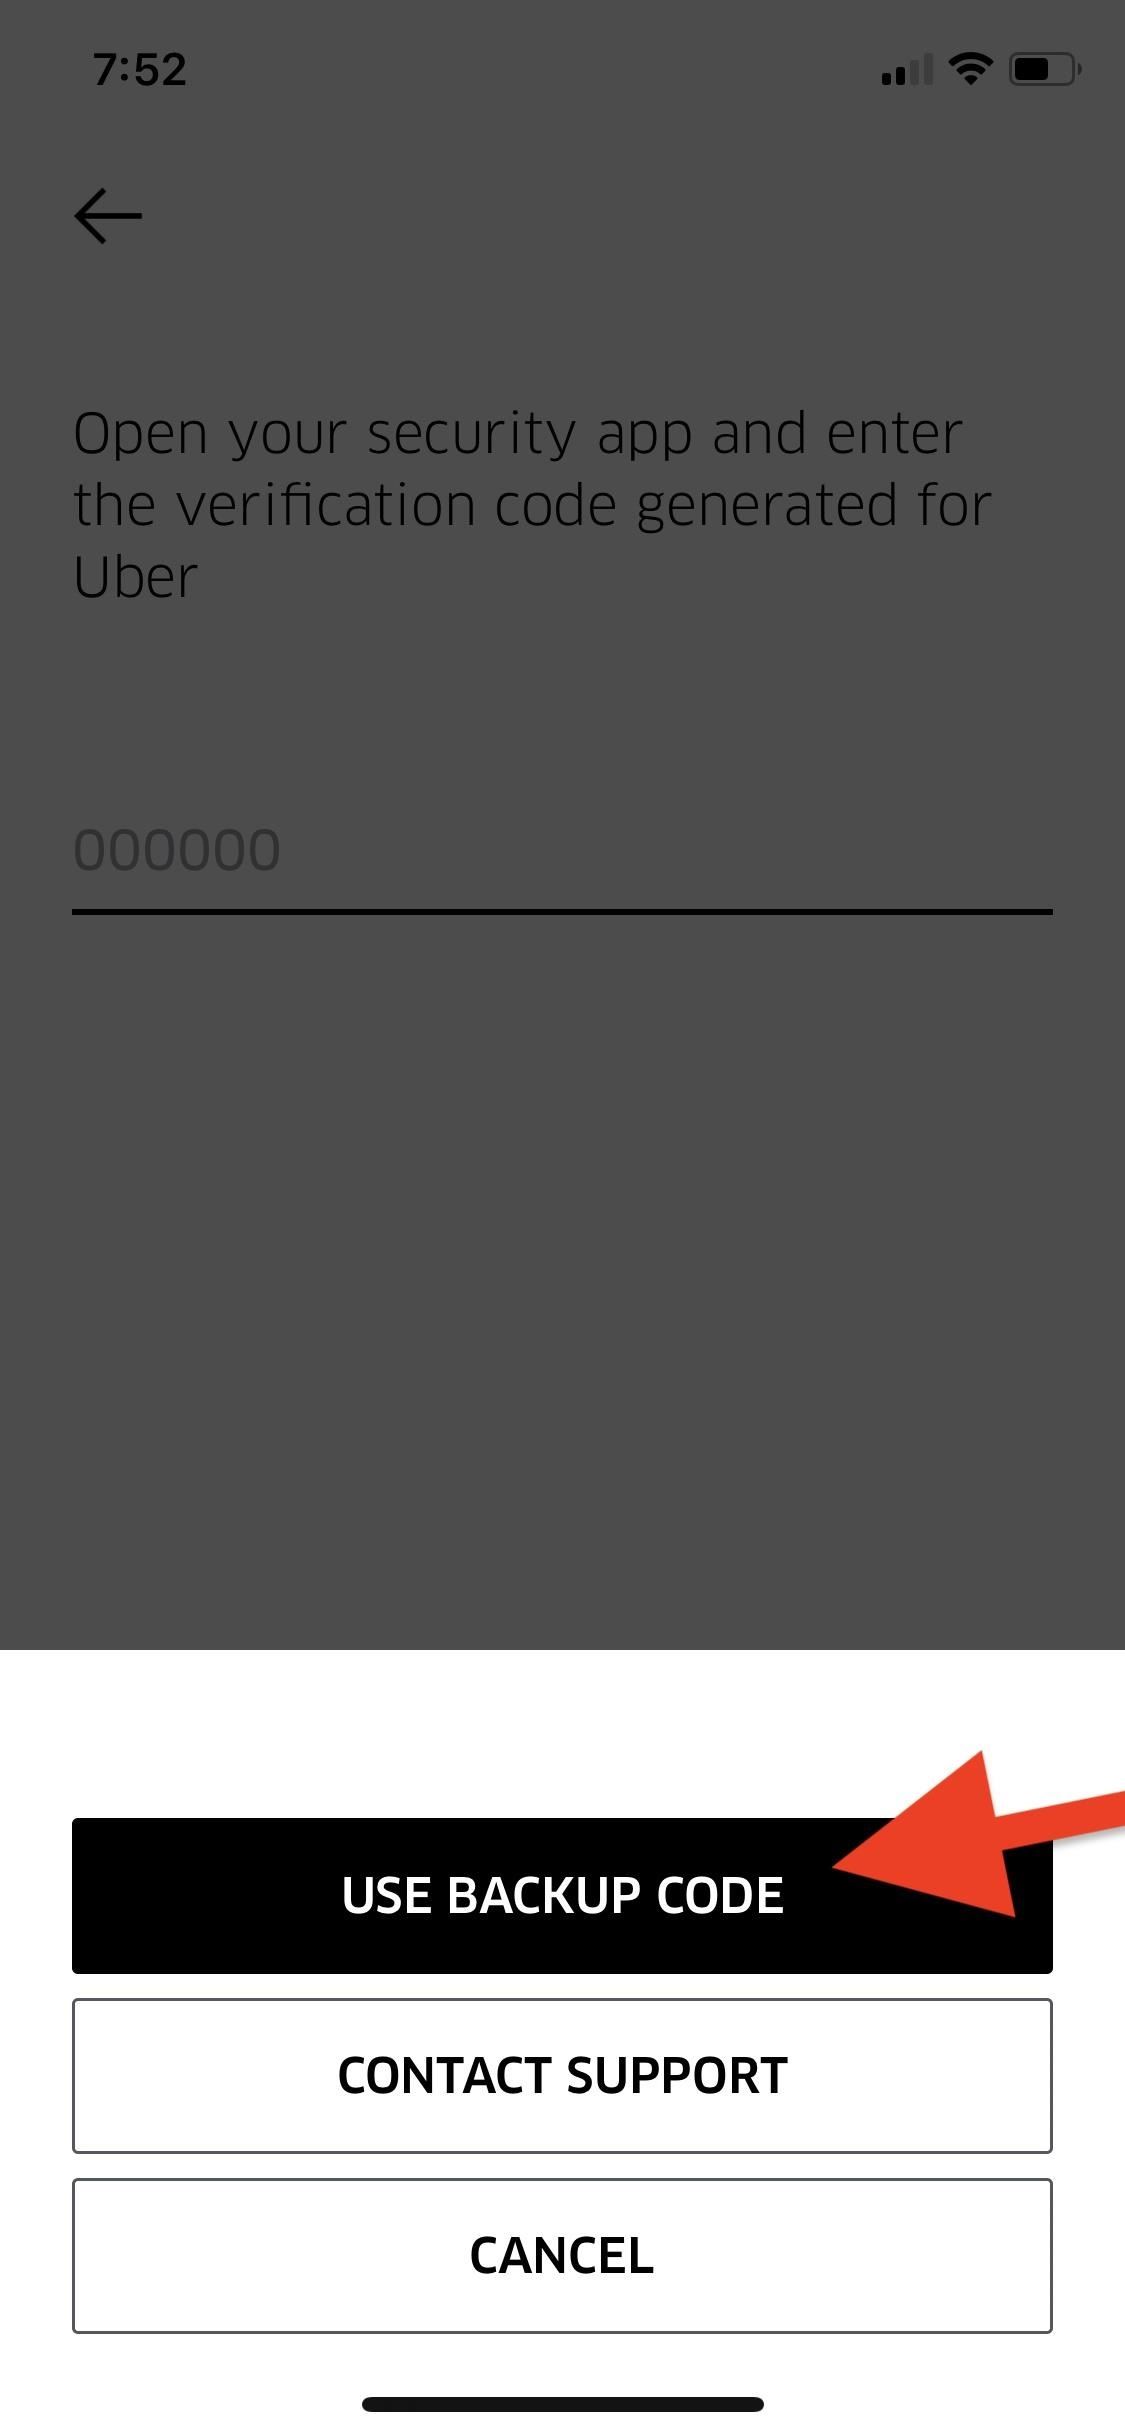
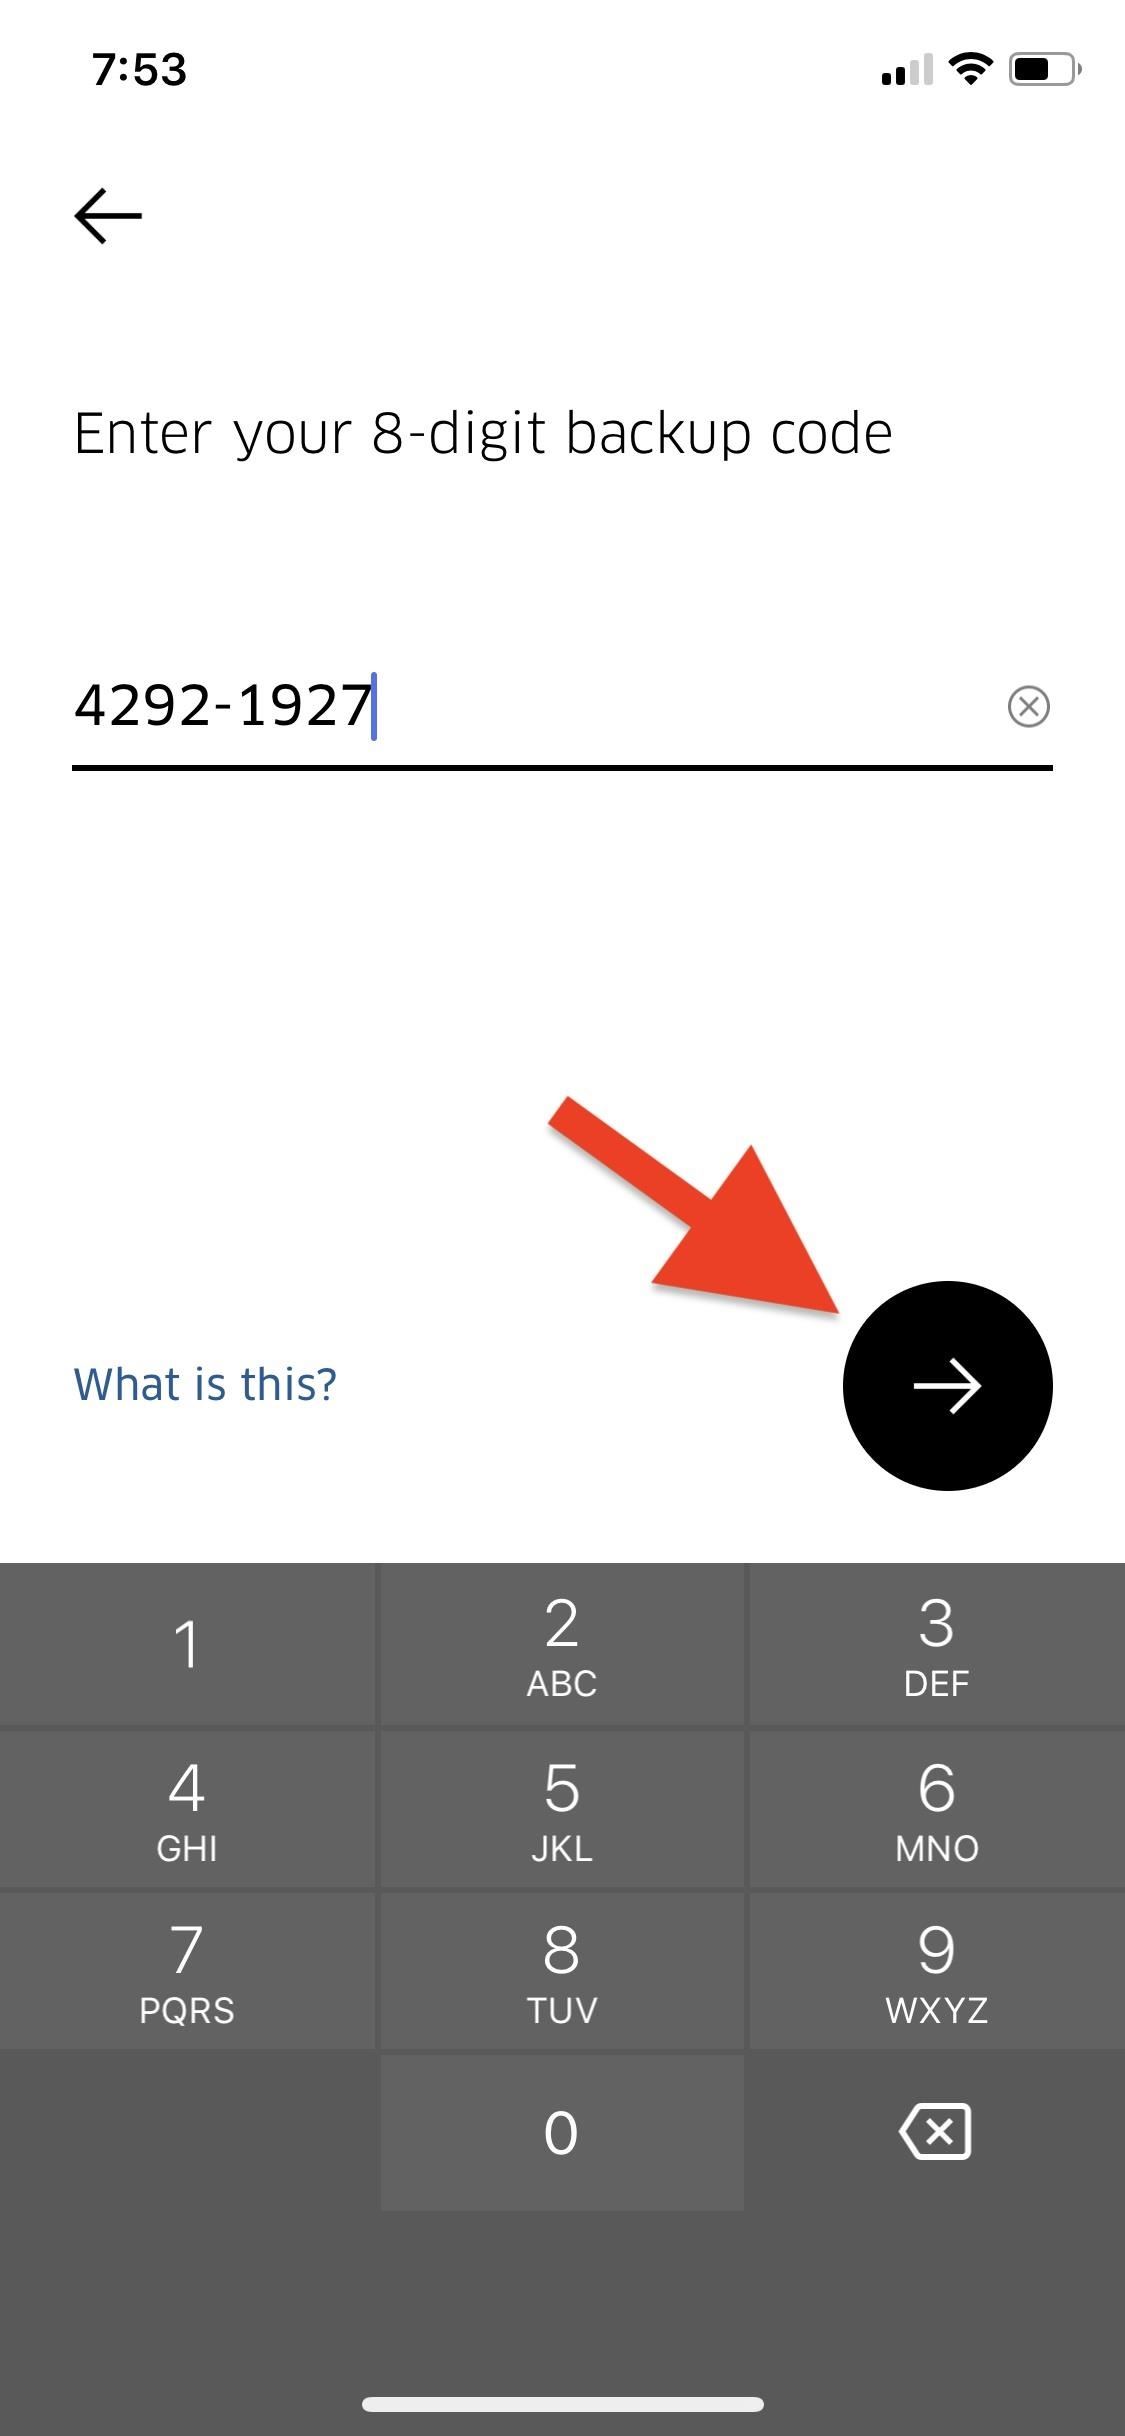
When setting up or using Uber on a new device or when logging back in on your current device, you'll first be asked to enter in the SMS or verification code via the security app. If you don't have access to either or it's not working, you can tap "I'm having trouble," then "Use Backup Code." Enter one backup code you saved earlier, and hit the arrow button to process it. Afterward, you'll be asked to enter your password to finish logging in.
Step 5: Get New Backup Codes
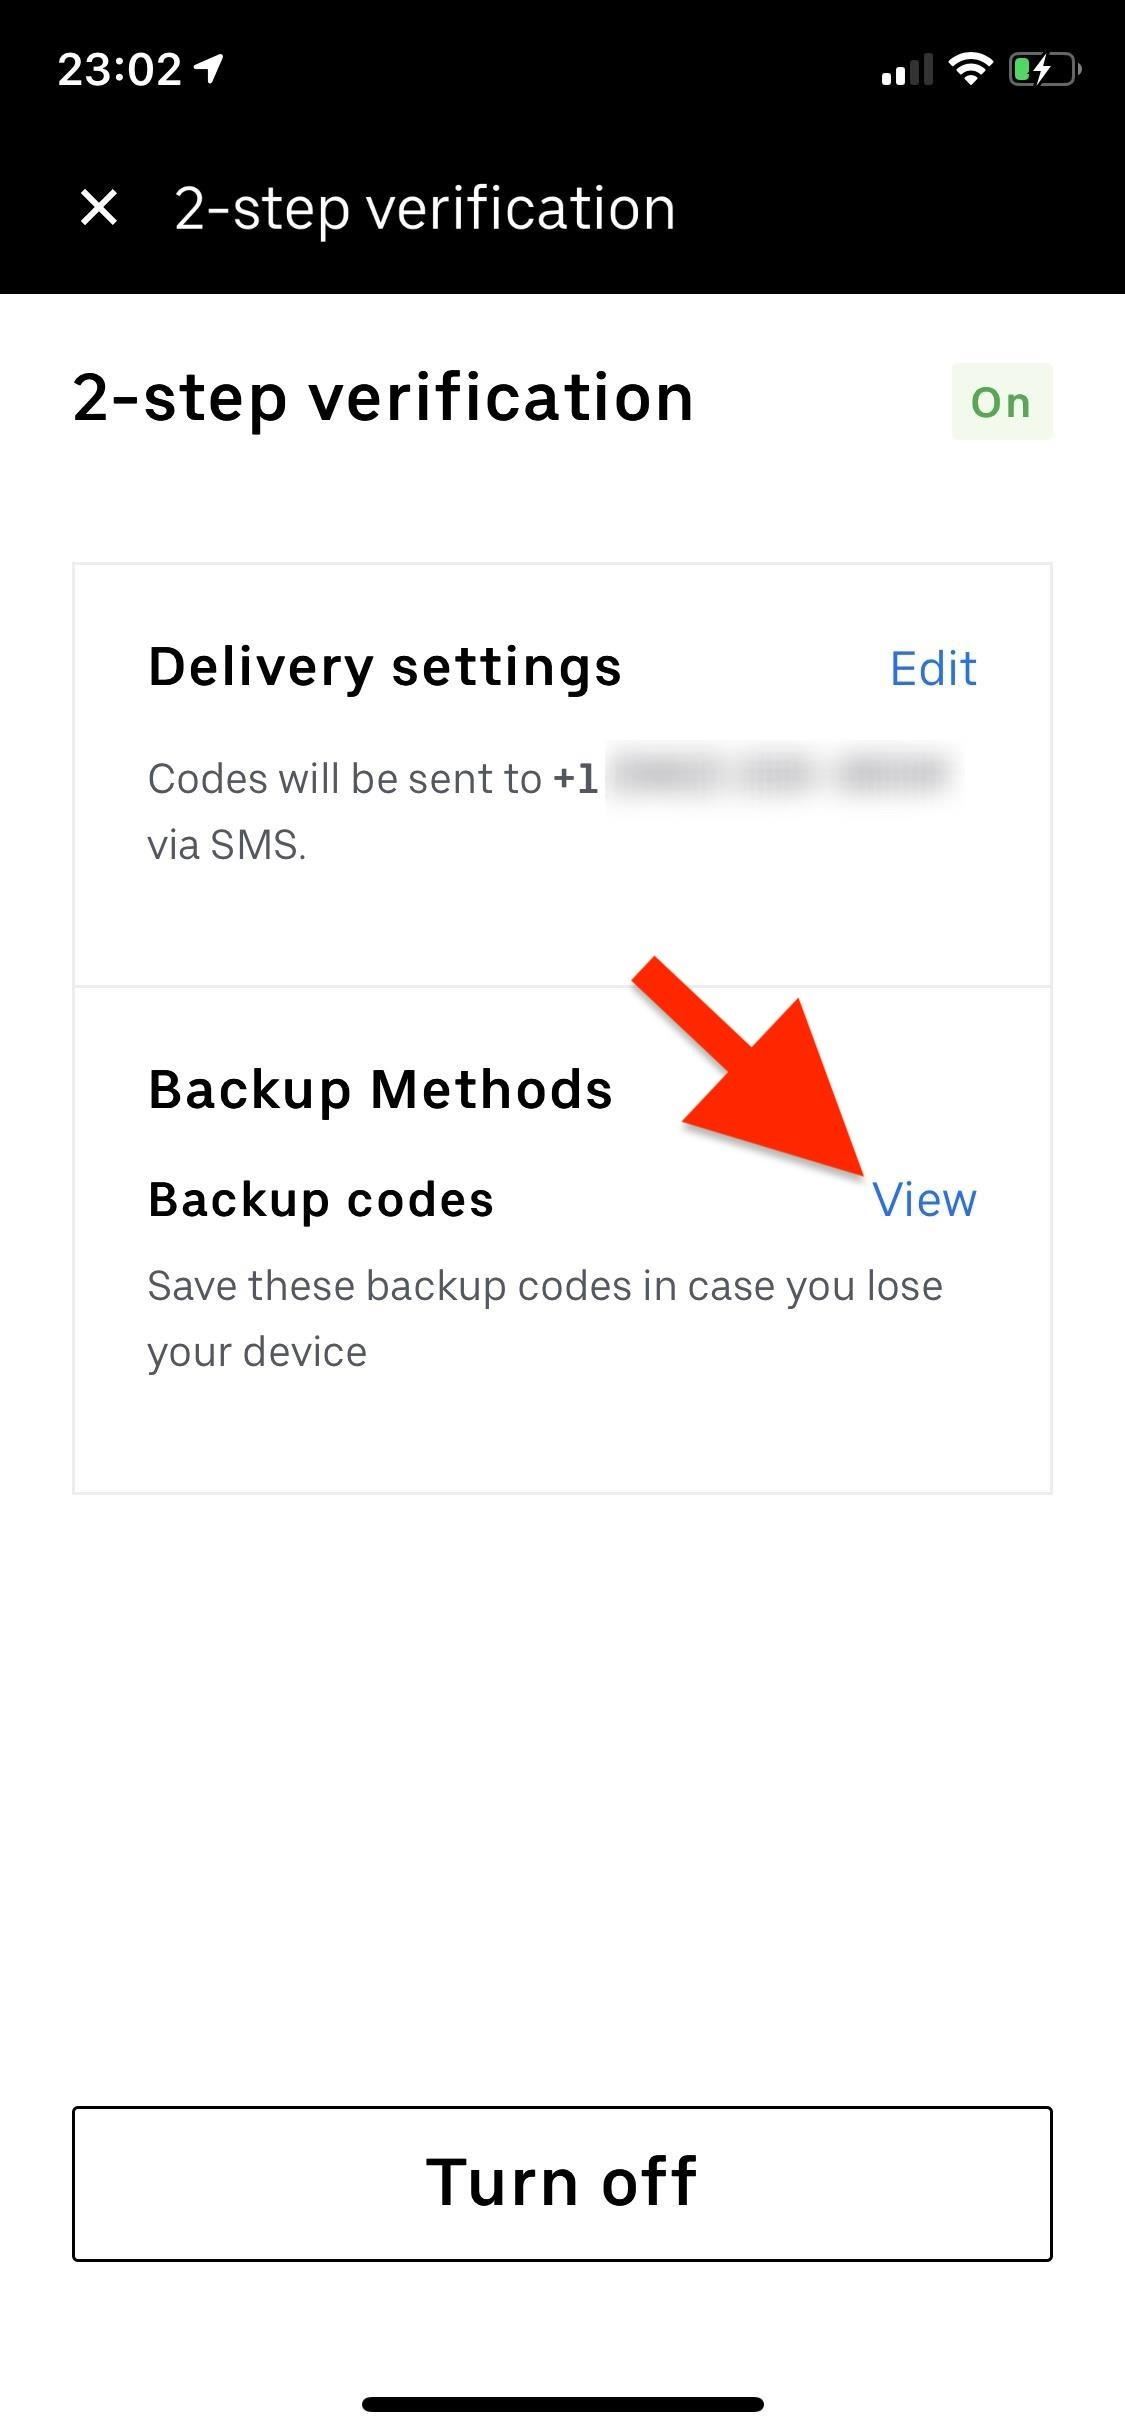
Each of the backup codes (also called recovery codes) you receive can only be used once. For that reason, you can request new ones, which you should do once you're running low on codes. To do this, go into "Settings", tap on "Security," then "2-step verification," and select "View" inside the Backup Codes box. Enter your password when prompted.
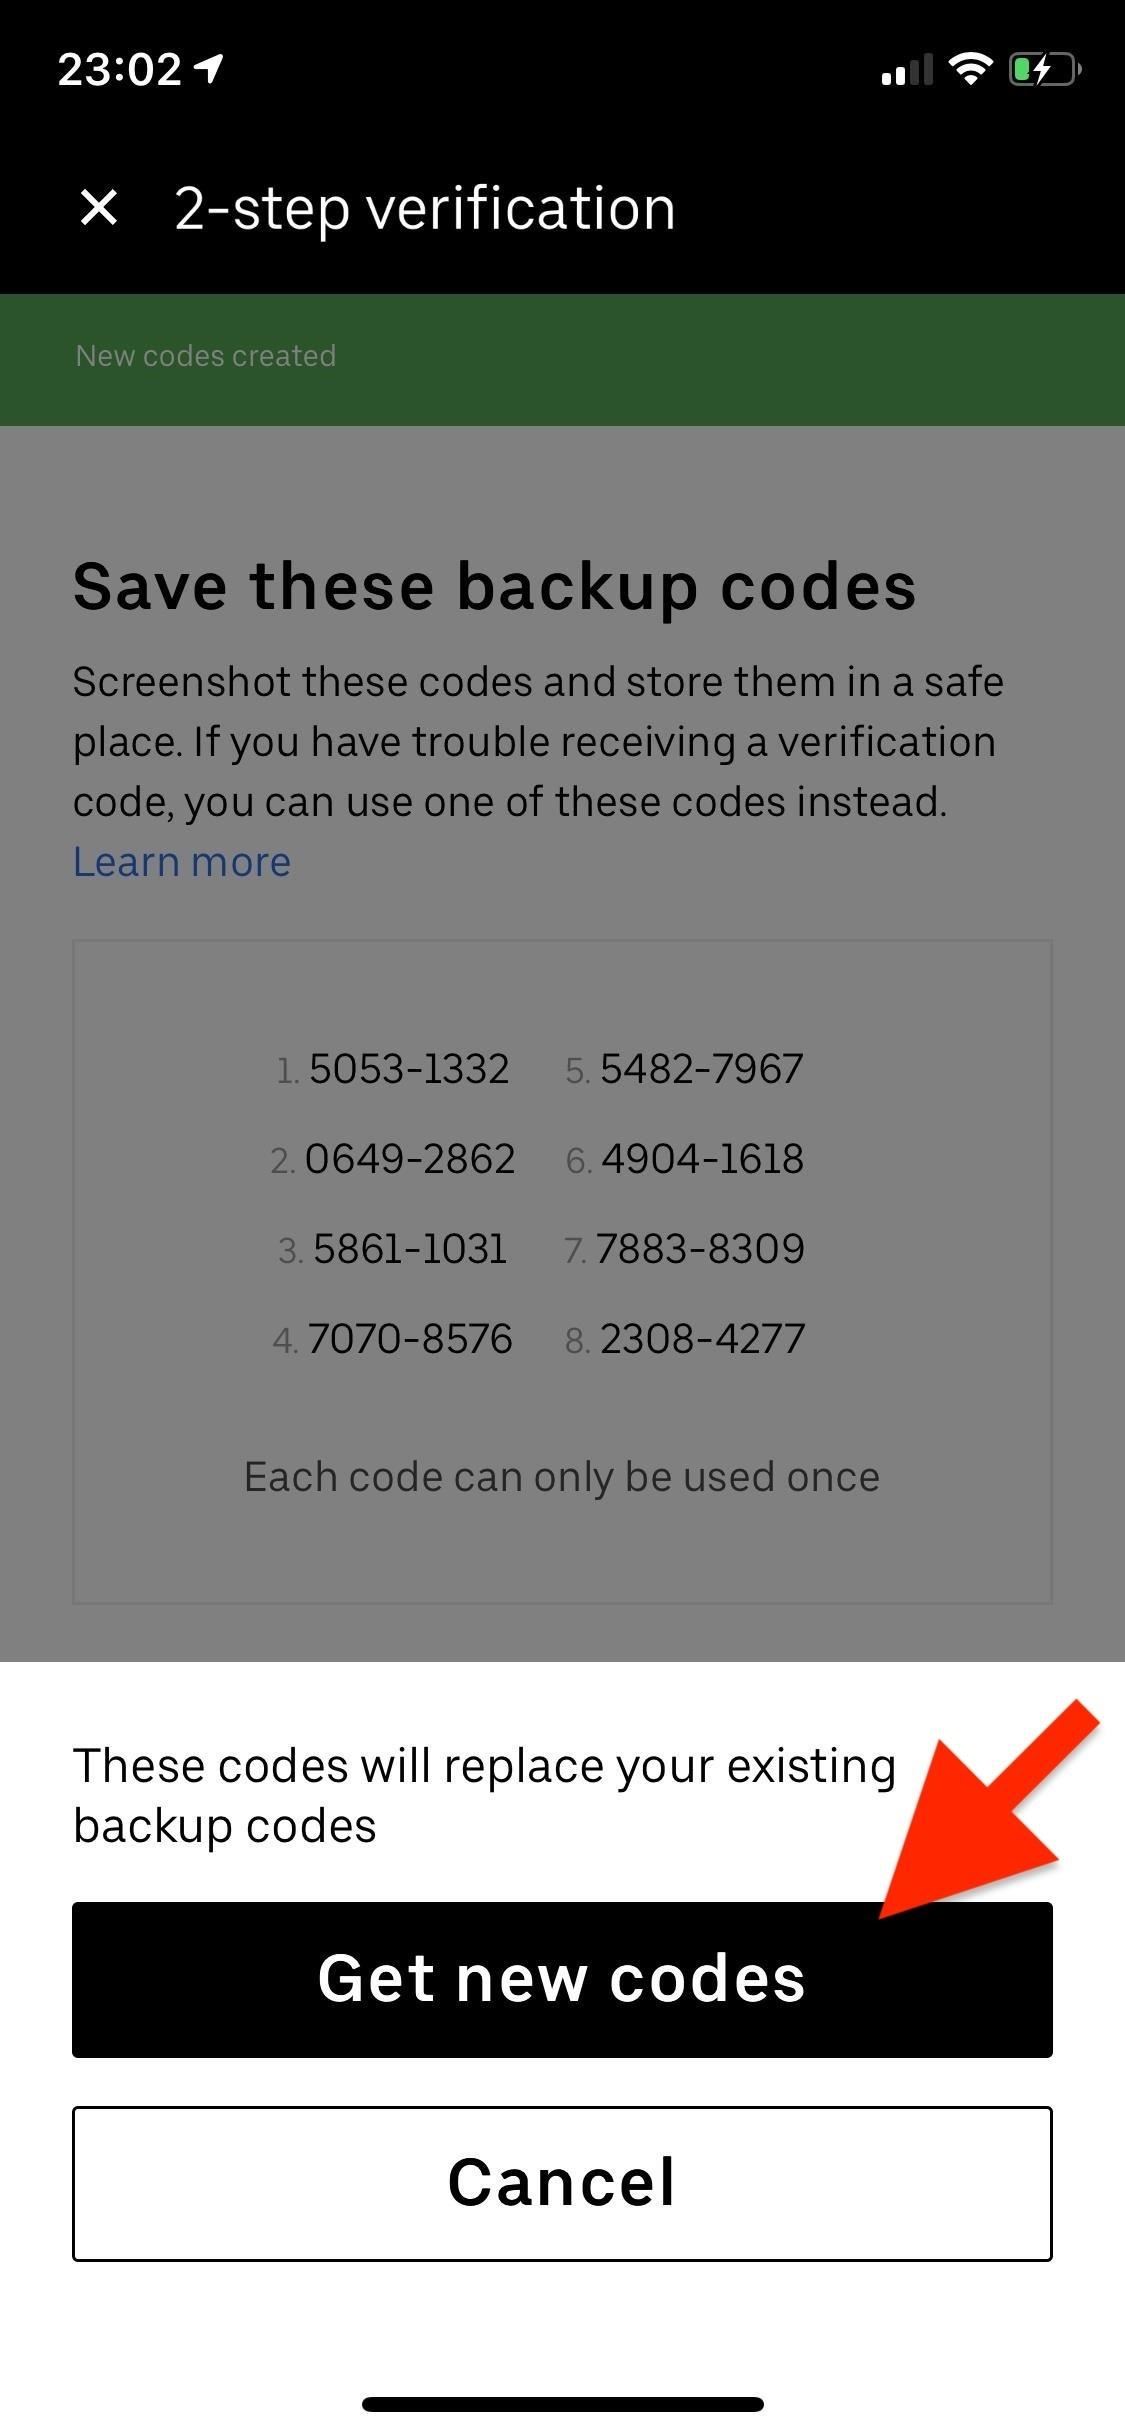
Tap on "Get new backup codes," and then "Get new codes," which will give you eight new backup codes. Your old backup codes will no longer work after you request new ones, so save the new batch and keep them somewhere secure.
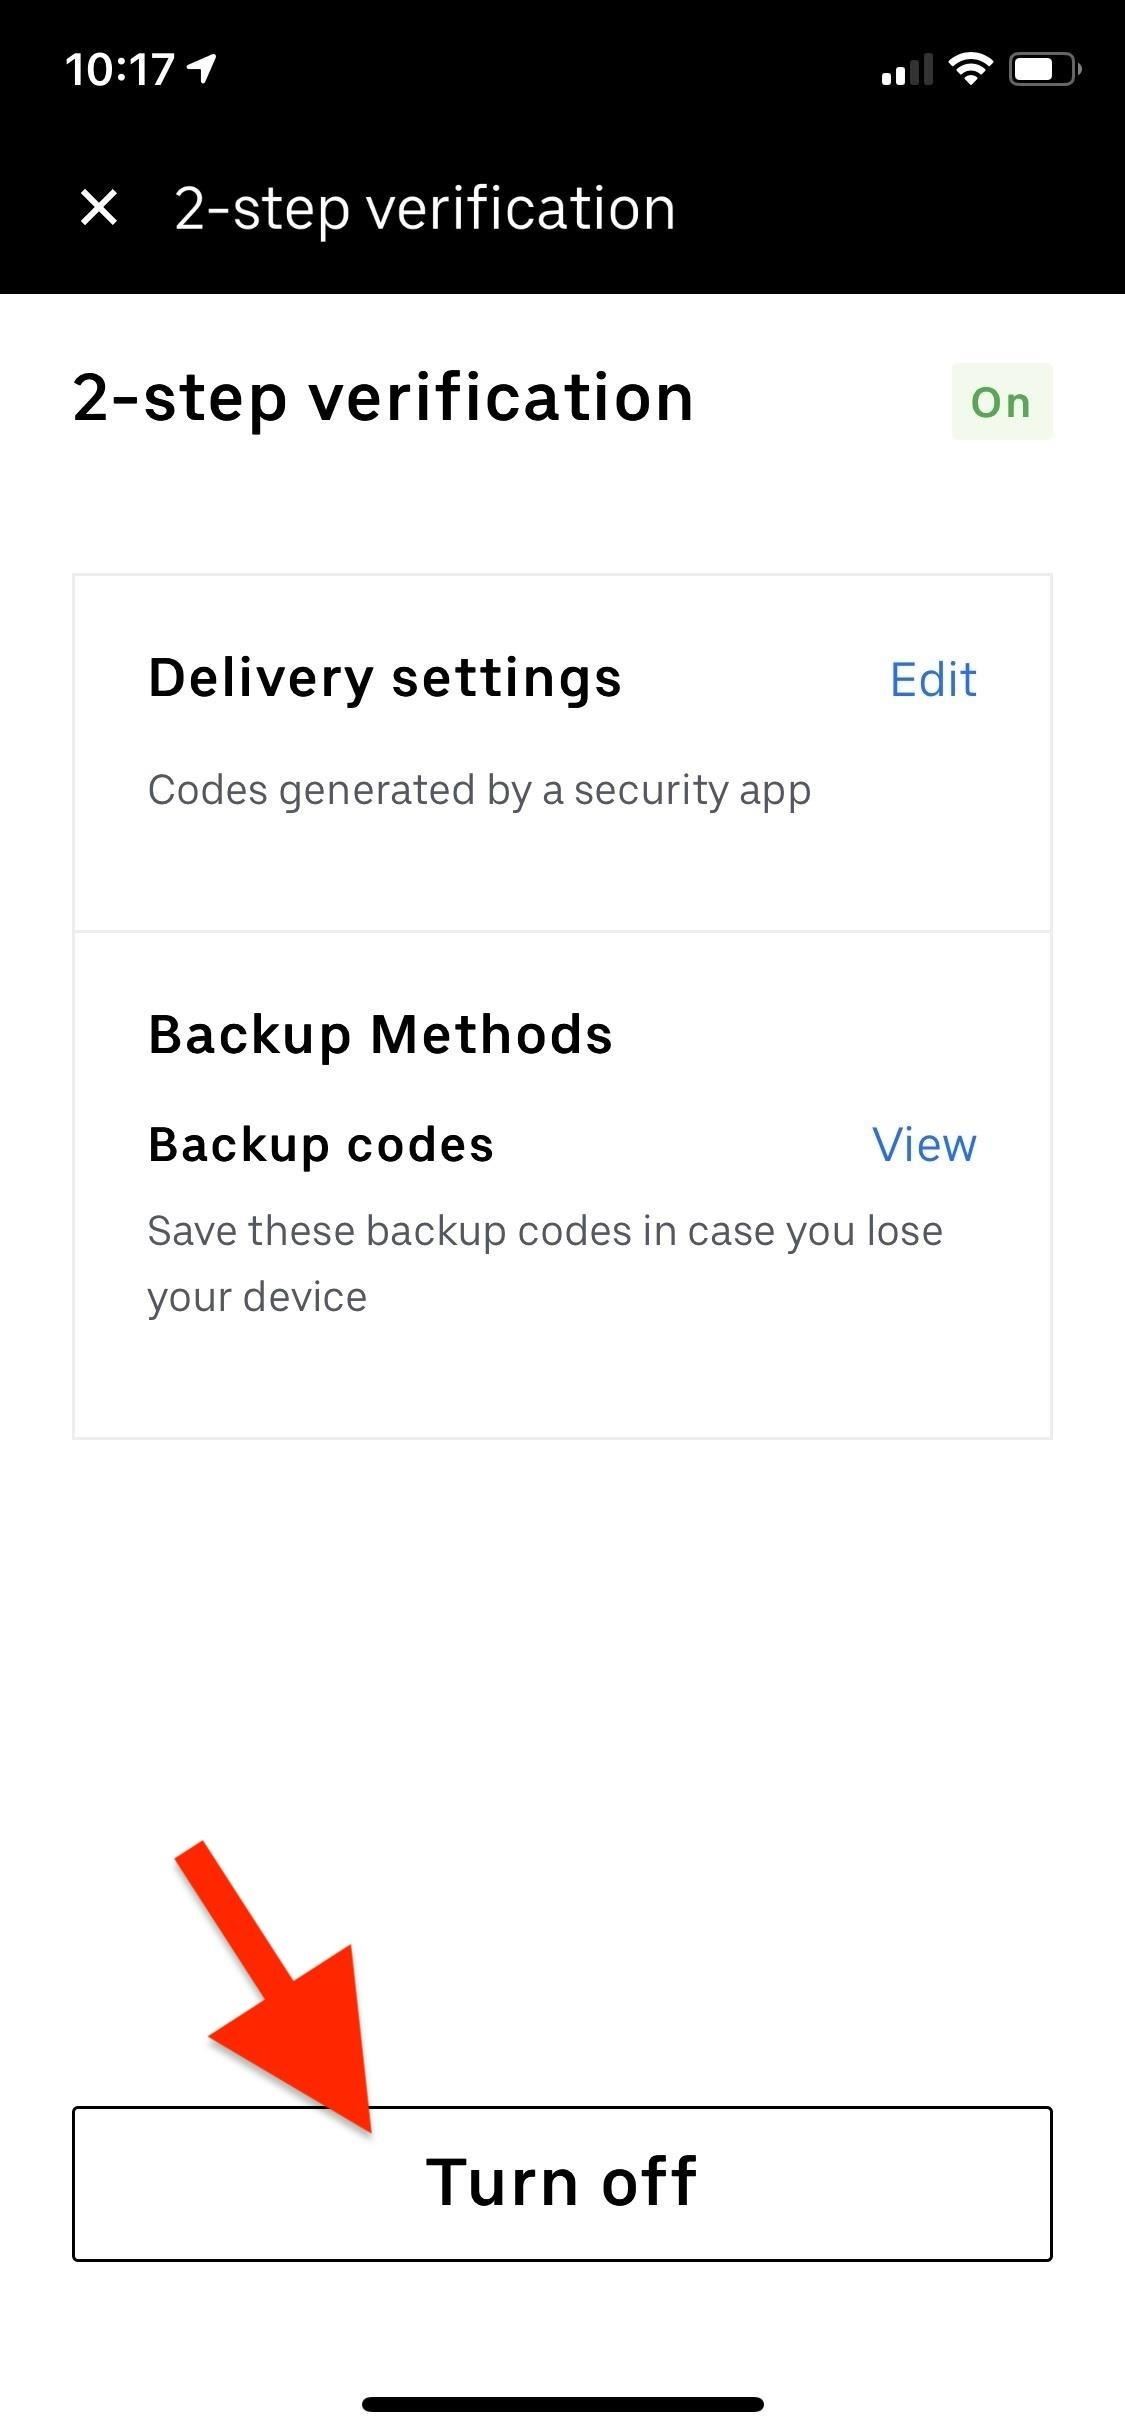
Step 6: Turn 2-Step Verification Off
If you no longer want two-step verification on, you can easily turn it off. Go to "Settings," then "Security," and tap on "2-step verification." Enter your password (if prompted), and tap on the "Turn off" button at the bottom of the screen. Enter your password again, then either enter the four-digit verification code via SMS or the six-digit verification via security app, and 2SV will be turned off.
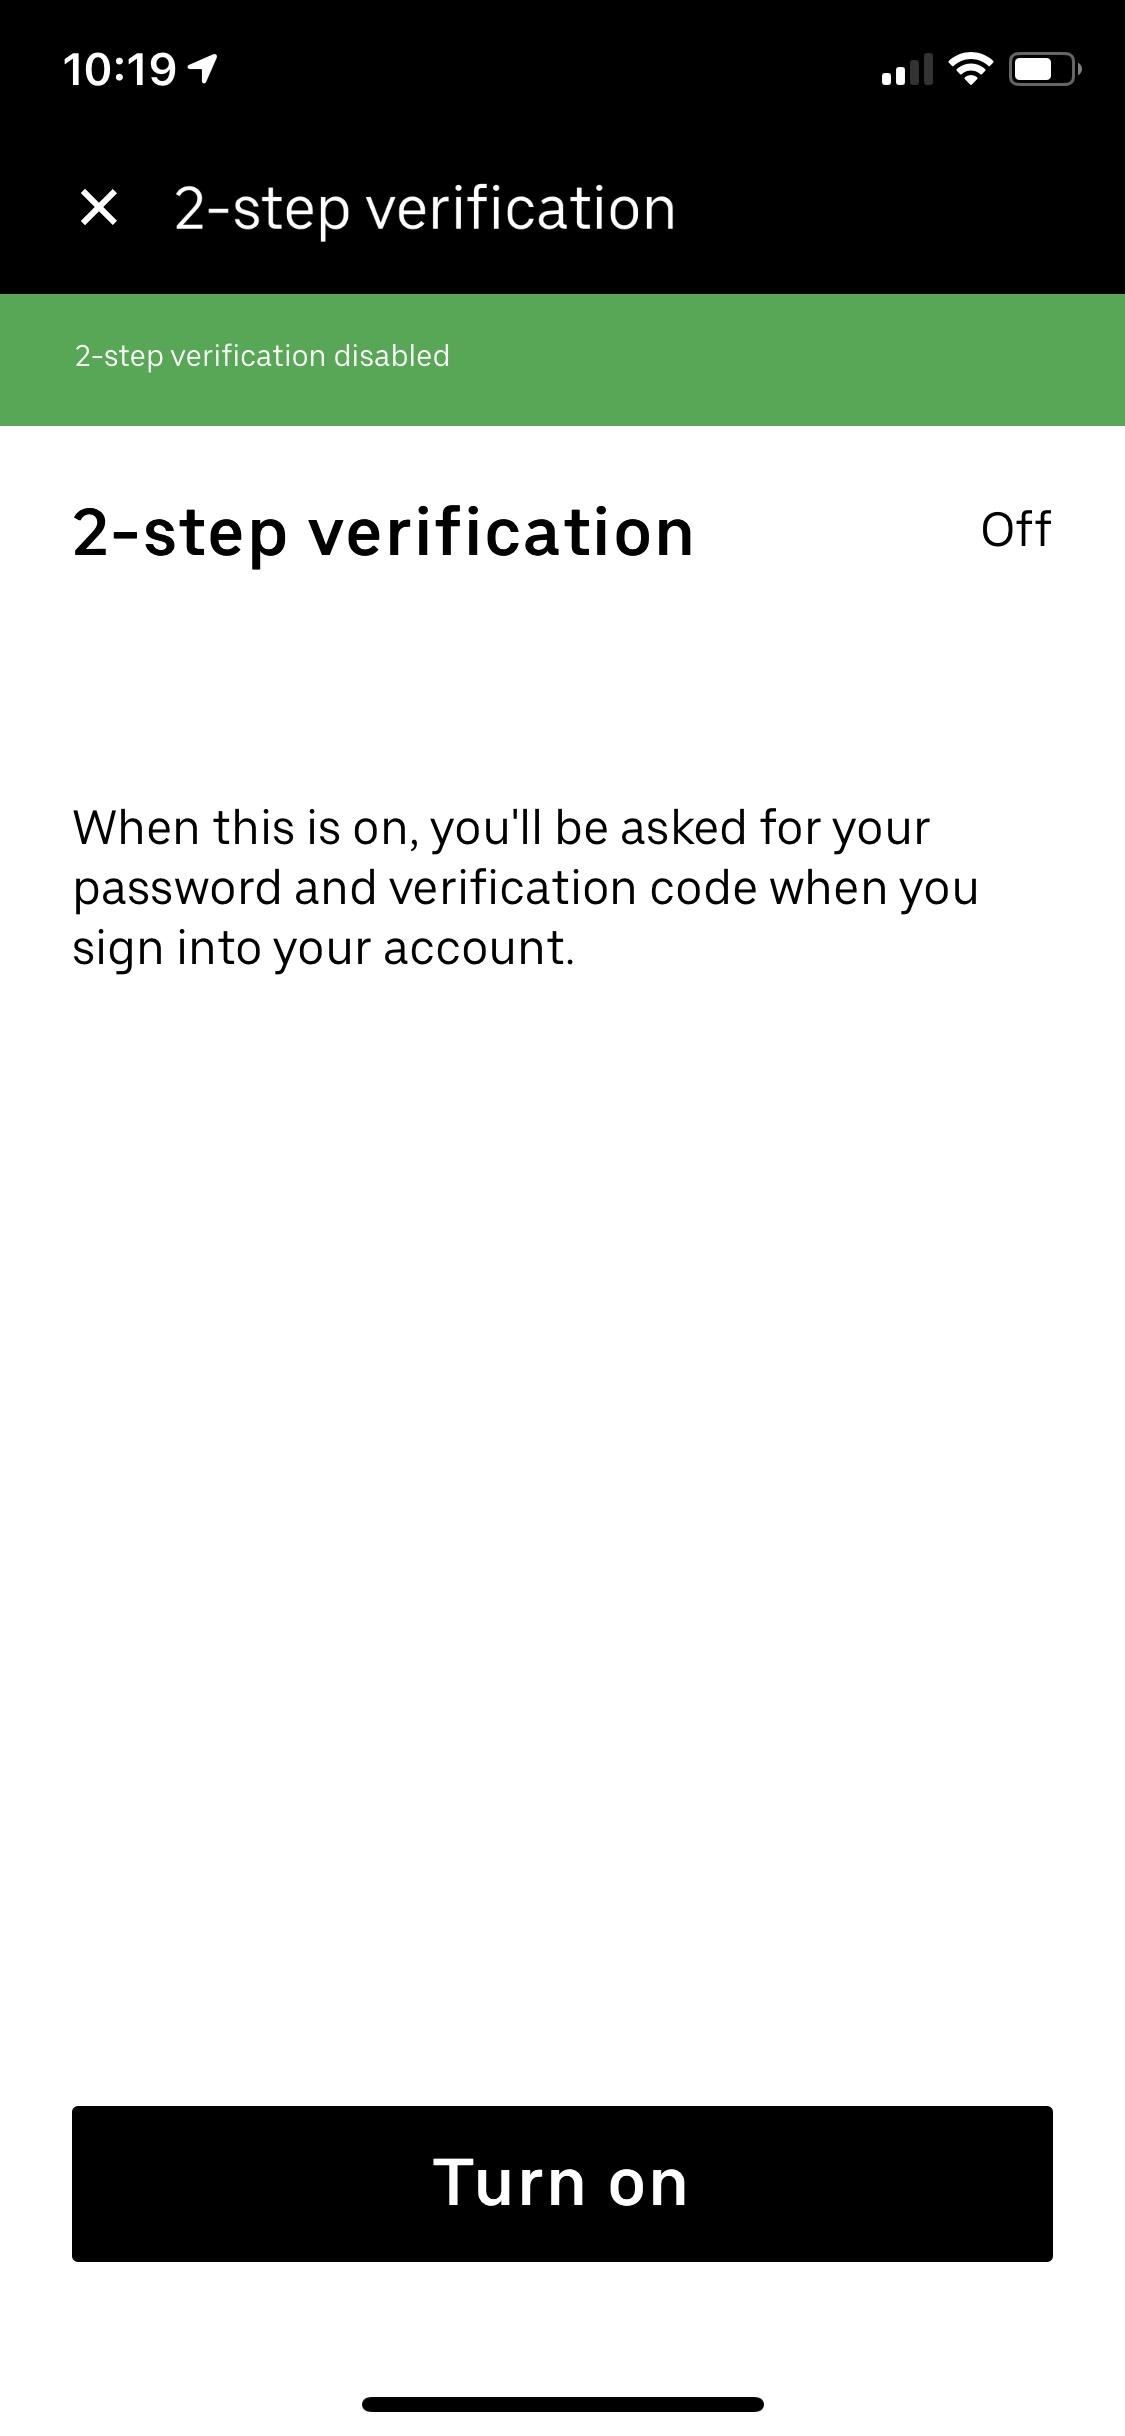
Using 2SV for your Uber account on your iPhone or Android phone will help prevent fraudulent logins, in case you ever do accidentally give up your account information to a hacker. The extra layer of security is all it takes to thwart most attacks. Even if Uber suspects unusual activity on your account, 2SV will require additional steps before you can log in. So it's not advised to turn it off.
This article was produced during Gadget Hacks' special coverage on traveling with your smartphone. Check out the whole Travel series.
Just updated your iPhone? You'll find new emoji, enhanced security, podcast transcripts, Apple Cash virtual numbers, and other useful features. There are even new additions hidden within Safari. Find out what's new and changed on your iPhone with the iOS 17.4 update.


Be the First to Comment
Share Your Thoughts